Horizon on the upper third; shoreline on the lower third. Perfect!
I'm doing quite a bit of landscape photography at the moment; it was my photographic resolution for 2012, and seeing as I'm travelling right now, felt like a sensible choice. This of course means that you'll be subjected to a hefty quotient of landscape articles for the foreseeable future. I'm sorry if that doesn't float your boat, but I'll do my best to keep them entertaining and informative.
So there I was, at the top of Rangitoto, a volcanic island just off of Auckland, snapping away at some landscapes, when it occurred to me: it's a cardinal rule of photography that horizons shouldn't run through the middle of photos, you should apply the rule of thirds. If you want more emphasis on the area above the skyline, you place the horizon on the lower of the two imaginary lines dividing your frame into thirds. Should you prefer that more attention to rest on the foreground, place the horizon on the upper third dividing line. That we know.
What, though, should you do when there's more than one dividing line in an image? For example, if you've a series of islands in your frame. Or a shore line and a skyline right in front of you. Yes, the horizon is the horizon, but these strong lines can also have a nasty impact on your photos if you manage to get one of them smack-bang in the middle of your frame, too.
If you've two dividing lines running through your image, ideally one would go closer to the upper third and the other towards the lower third, with both avoiding the middle. That should keep things dynamic, and prevent your image from looking flat and dull. The first image up there does just that: the shoreline is on the lower third, the horizon is on the upper third. Bingo! But, geography isn't always that accommodating towards geometry - and let's face it, it's why photographing landscapes can be so inspiring - so sometimes you will need to get a bit creative with your cropping.

Take the examples with the solitary yacht. The first one (above) has the skyline is running mostly along on the upper third, but the shoreline is perilously close to the centre. By cropping a bit from the lower half, I've been able to place the shoreline on the lower third, giving it an overall better feel.
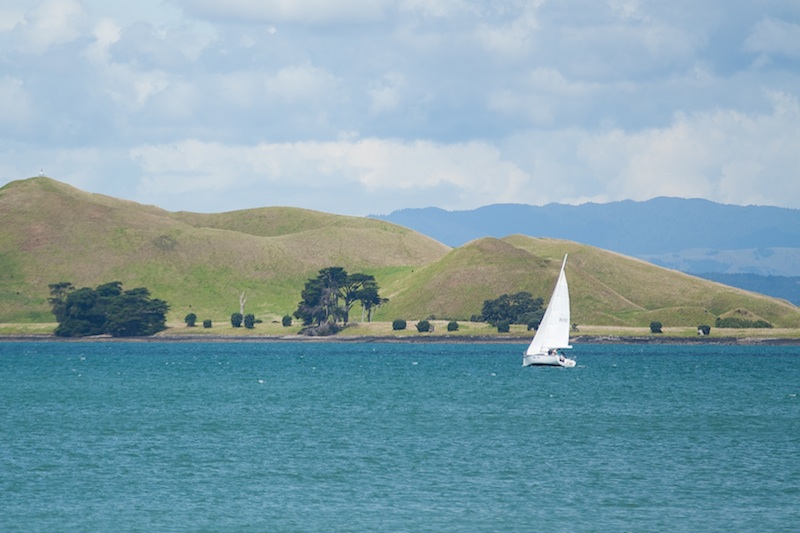
That shoreline is so strong in this image that it needs to be properly accommodated to prevent the photo from looking oh-so-obviously split in half.
In fact the blue of the sea is so strong in this picture that if you wanted to, you could even push it a little further down the image, which pushes the actual horizon closer to the centre of the frame. Of course, that might not float your boat at all!

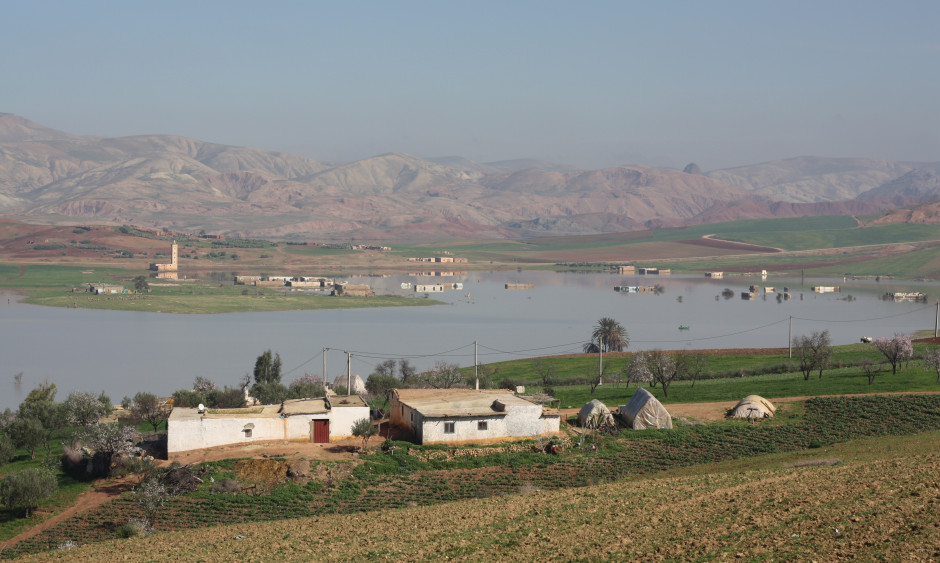
If you've an image where you have three or more strong dividing lines running through it, the chances are that one of them will end up running straight across the centre of the frame, with others above and below it. Provided that the central line isn't overwhelmingly strong and obviously bisects the scene, there should be sufficient movement across the entire photograph to keep it fluid and interesting. You can see that in the photo of the flooding I took in Morocco (down below). The floodplain runs through the centre of the image (look carefully and you can see the reflections), but the skyline and the shoreline are both strong enough to stop it from coming over as boring. In other words: don't worry too much.
Finally, don't forget that if you're using a non-destructive editing package, there is nothing to stop you from playing around with the composition of your image until it looks right. Apart from making that picture look pretty, it'll also ensure that the next time you encounter a similar situation, you'll have a better idea of what works and you'll have to do less fiddling in your editing suite.
Oh, actually, this is finally: make sure your horizons are straight.