
In the interests of consumer empowerment, we here at Small Aperture have played around with free editing software and been pretty impressed; we’ve suffered some fairly terrible options at the lower end of paid-for software and picked up on some gems, too. But there are some options out there that cost a wee bit more, as well. So we thought that we’d put the biggest name in photo editing software through its paces and see how it does.
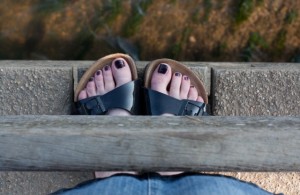
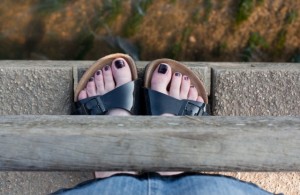
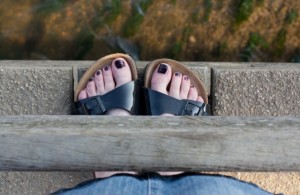
Yes, we’re talking about Adobe Lightroom 3. It costs £232.65. (Or $299) That’s a lot of pennies. (23,265, to be precise.) Is it honestly worth it? We decided to find out in the best way we could think of: we let loose a complete Lightroom novice and an absolute Lightroom junkie on it, with this picture that I took on my Canon 450D one afternoon at the seaside.

Yes, those are my footsies.
The only requirement was to make the picture look better. (And to tell us what they thought of the process.)
Did they manage it?
First impressions
The junkie opened up Lightroom 3 (being all accustomed to Lightroom 2) and went: ‘Cool!’. The novice opened it up and turned white. Lightroom 3 is beautifully laid out, with collapsible panels on all sides, including the five modules that act as the centre of operations across the top of the screen, but as a programme that doesn’t just edit images, but organises and stores them, and prepares them for printing and web uploading (hell, it probably runs the International Space Station, too), there’s a whole heap going on. If you’re not sure what to expect, it’s pretty overwhelming.
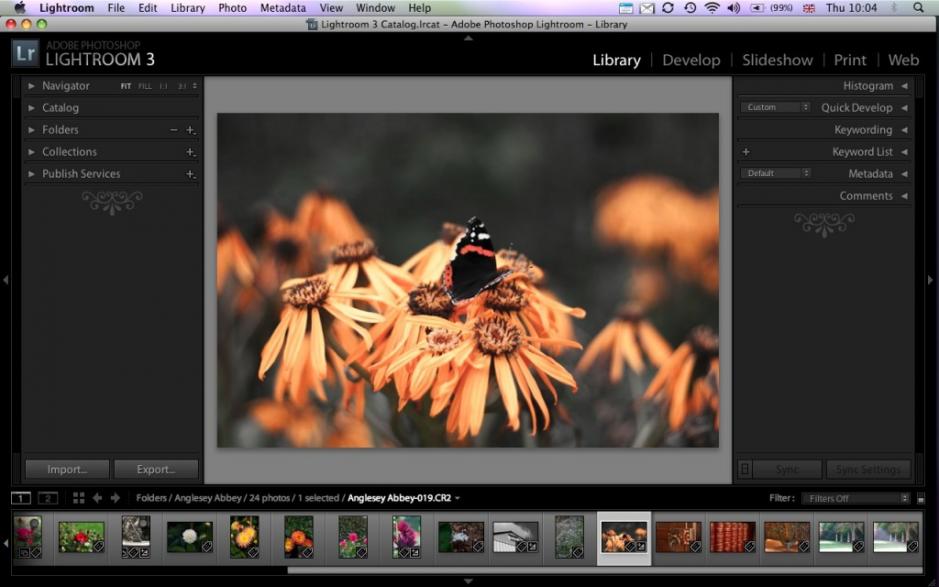
Beautifully laid out, but with so much going on, it could be overwhelming
Nerves calmed, with tea, our Intrepid Duo ploughed on.
Setting off
Importing images is straight forward. You plonk yourself in the library module, you tell it if you’re importing directly from your memory card or transfering from a hard drive, you select your images, you press ‘import’. Kaboom! There they are.

So many ways to order your photos
Next, being this swanky image organisation oojimaflip, you get to organise your images according to some gazillion different options. When you’ve found a method that you like, you can save it as a preset. Lightroom likes to let you save things that you do regularly as presets. That’s fairly handy for demon picture editors. Or you can play up to the image of the disorganised artistic type and never use the same system twice.
Whatever, this next bit is one of Lightroom’s key functions: when an image is imported, it keeps the original RAW file perfectly safe. It will let you do all manner of hideous things to your images by sending them lurid shades of red and green and adding ghastly vignettes before you can crawl back to it as a primary school kiddie would her or his teacher and ask feebly: ‘Please Miss, can I have another one?’ Awesome!
Picture successfully imported and saved, our Intrepid Duo slunk onwards to the develop module to, ehm, develop the photo.
Develop
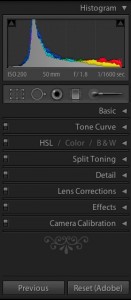
More tools than canapes at a palace tea party
When you switch between modules, the layout of the screen doesn’t change: you still have four collapsible panels around the edges and a large version of your image in the centre of the screen. Top panel are still your modules and bottom panel shows a film strip of the images in the folder you’re working on. What changes is the content of the left and right hand panels.
In the develop module, your right hand panel contains more tools than canapes at a Buckingham Palace garden party and the left hand panel shows a small version of the image and a history of the changes that you’ve made to that particular image.
You’ve also fancy buttons that allow you to compare images side-by-side, on top of each other, and cut in half and moojed together (yes, ‘moojed together’ is a technical term). You can compare two completely different images, or the same image at different stages of editing. It’s just what you need to create the perfect Batman villain.
So now you want to know what our Intrepid Duo did, I suppose, don’t you? I’m getting there. I promise. (But they didn’t create any Batman villains.)
Cropping and rotating
Obviously I’d had one beer too many at lunchtime that day and my angles were all out of kilter. Straightening things up after the event, however, was as easy as pie. (Why is pie regarded as easy? I have no idea.) It was also easy to remove the information-free grey zone in the bottom left corner.
Much better.
Exposure and tweaking
Now I took this photo at about 4pm on a clear day in high summer. The sun was bright, we were near water, but I was doing a good job of shading myself. Still, the exposure needed a bit of help. Boy does Lightroom offer that in spades.
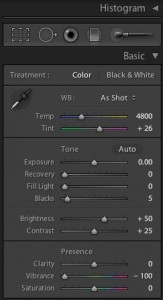
These are the basic developing tools
There’s a histogram. There’s a panel of basic functions to tinker with temperature and tint, to meddle with exposure, brightness, and contrast, and to muck about with clarity. If you want to fiddle with highlights and shadows independently of each other, there’s a tone curve. Then you can play with the hue, saturation, and luminance of eight different colours in the image.
There’s even a groovy widget which adjusts the specific colours prevalent in a given area of the photo. You might not have thought that the purples were overly dominant there, but Lightroom lets you know.
When you’re making your adjustments you can either use the slider to slide between different values, or if you’re a control freak you can type a specific value in the box next to the sliding scale. Whatever adjustment you make, the response is almost instant in the image. Marvellous.
So. What was done to these here foots of mine? For a start, my skin tone belies my Mediterranean heritage and my toes looked almost frostbitten. No problem, warm the light a touch. As I was making an excellent shadow for myself, the picture was a touch dark. Bring on the brightness, Lightroom.
That had an odd effect on the greens, yellows, and oranges, though. It was, however, superbly easy to correct that, using the hue, saturation, and luminance buttons.
That was about it.
Straighter, brighter, warmer, and with no odd greens, oranges, or yellows
The verdict on exposure and tweaking? There is so much that you can do with one image, where to start? Well, at the top. Work down. Don’t like something? Go back a stage. This is what Lightroom does so well. It’s completely non-destructive and in a panel on the left it tracks every move you make. (You can sing, hum, or whistle The Police now, if you want.) Yes, you can go wrong, but there’s nothing you can’t undo.
Retouching and sharpening
The grains of sand between my toes could easily have been brushed away, but I was at the seaside, so why would we want to do that? And if the picture were sharpened any, those grains of sand would’ve looked like daggers. Not so pretty. But entirely possible. I suppose that the Intrepid Duo could’ve added some drops of blood then, but it might’ve distracted from the overall look. But that doesn’t change how responsive the the tools are, and how many different options you have for brush size and how you might want to use it.
Black and white conversion
The Intrepid Duo was able to flip back to straightened, cropped image to begin their black and white shenanigans, which started with the touch of the black and white button.
Then they began to adjust the black and white mix of the colours that made up the image. Again, there’s a groovy widget that allows you select a specific area and amend the dominant colour within it. In this case, the purple was taken out of my toes, again to stop them looking frost-bitten, and the blue was taken out of my sandal straps to increase the contrast.

Unlike the colour version, the orange and green tones didn’t need to be adjusted. Of course, the Intrepid Duo found this out by fiddling with the sliders for themselves. And when they finally decided to let it be, all they had to do was slip down the history panel and select the version of the image before they’d begun messing with orange and green.
The oranges remain unadulterated.

The verdict on black and white conversion? Lord that was easy.
Toys and stuff
Lightroom 3 comes with 50, yes really 50, presets that allow you to add vignettes and grain and mess with the tones, and make your pictures look 100 years old or as if they come from the future. But even better? The range of functions that it affords you, and being able to save your own specific processes as presets, means that making your own toys is just a matter of trial and error. Whether you want to introduce an air of sepia-toned mystery or pop-art it up, anything is possible. Or you can go read Photocritic’s guide to creating toy camera presets. Oh, and take a look at my pretty butterfly.

This is what happens when you play with vibrance and saturation
Now what?
As you’ve been working on your RAW images, all that remains is to export your final version into whichever folder you want it, or email it directly to your Mum, or upload it straight to Flickr. By the this stage, our Lightroom novice’s face was an incredible mixture of relief and pride, whilst the junkie wanted to start all over again. Yeah, I should’ve taken a photo.
The verdict?
As our novice put it: ‘Honestly, it seems as if there’s nothing that Lightroom 3 can’t do.’ That’s probably an accurate summary. We haven’t even looked at its lens correction capabilities, its split toning function, its red eye removal button, or its groovy graduated filter. And then there’re the slideshow, print, and web modules. I figured that you didn’t want to read something as long as War and Peace, so I’ll just mention that they exist.
The bottom line – is it worth £232.65? If you’re serious about taking pictures, yes. You can fiddle about with its functions until your heart is content and then revert to the original image, or any point along the way, and begin again. You can learn the exact capabilities of each and every element with absolute impunity. You can do as much or as little as you want.
Both the junkie and the novice agreed, however, that if you take pictures occasionally and don’t do that much editing, no, it’s not worth it. There are cheaper, or free, editing packages out there which will do precisely what you want them to, and not overwhelm you in the process.
Lightroom 3 isn’t for everyone, but for those who are its target users, oh it is magnificent.
This article produced in conjunction with morning coffee, lunch courtesy of Innocent, afternoon tea, and home-made carrot cake.