journey

Creating a photography portfolio

You are into taking photos, obviously – so what do you do with them? Many of you probably make online galleries, or you create prints to hang on your walls – or perhaps you even sell prints to others. Eventually, as photography progresses from a mild interest via passionate hobby and into the realms of what could be seen as a professional career, you are going to have to create a portfolio of your images, to show to prospective clients.

Heck, even if you have no clients, you will still want to make a portfolio. Imagine how great it’ll be to show the grandkids! 

So, you are a photographer, and you want to make a portfolio. I have had to do this a few times, and I have fucked up a few times, so I learned all of this the harshest way possible. Ah well – on with the show

Image selection

Galleries

Into the Mist (Territorial Army III) 
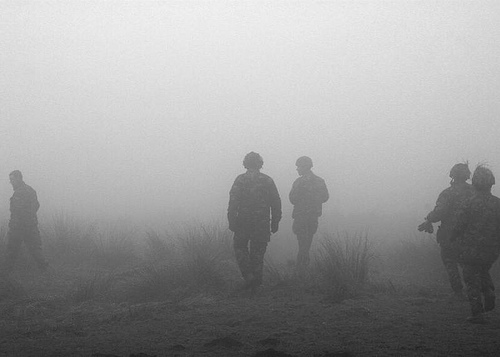
Into the Mist (Territorial Army III) by Photocritic.org, on Flickr

If you want to show your pictures in a gallery, you will need to make a selection of images around a theme of some sort. If you just run around and snap pictures, you will have to scrutinize them, to find out what they really are about. If there is no connection whatsoever between them, you might want to consider not making a portfolio, and rather concentrate on taking more pictures.

Why is a theme important? Well, although single pictures can be interesting, galleries tend to be interested in offering its visitors with a journey. Pick an emotion, and explore it visually, or perhaps a situation or a place. As long as there is some kind of “red thread” tying your images into a whole, you’ll be all right.

Make sure that the images are in a logical order – either cronological, or through mood development. Be prepared that you will probably have to talk the person you are presenting your portfolio to through all the pictures, so if you have some kind of story prepared, all the better. If you decide to mix colour prints and black and white prints, you’d better have a very good explanation as to why.

A good selection of images is 10-20. If you have several themes, make different portfolios, and present them separately.

Image libraries

This type of portfolio is the photographic equivalent of a “Best Of…” album.

Image libraries are the other extreme – here, it is okay to have a large batch of single, non-interconnected images, as this is not what the target audience is looking for. What they are looking for, however, is genericicity and perfection. The more generic the image is, the bigger the chance somebody will use it, as it is adaptable for many different situations.

If your image has a flaw, ditch it. If your image is only slightly out of focus, ditch it. If your image has brand names or visible logos in it, chances are it is worthless in connection with image libraries. If you do not have model releases for the people in your images, get rid of the pictures.

In short: Make sure you only show your very best images. It is better to pitch 3 perfect pictures than 15 good ones, but that don’t stand out from the mass. You should aim for 7-15 great pictures, however.

Commercial photography

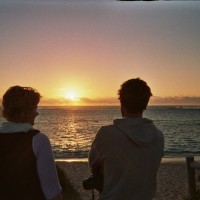
Strongly emotive photos can help your portfolio shine

If you are making a commercial portfolio, be prepared to make it focussed. You might need to change your portfolio around depending on who you are pitching it to. If you are pitching fashion work, make sure you have 5-6 pictures from each series you have done, to show that you can consistently take good pictures. If you are doing product photography, make sure that you do the same: Same product from various angles etc.

If you try to pitch your general skills as a photographer, make sure that you make several portfolios. One for portraiture, one for nature, one for product photography, etc. That way, the person reviewing your portfolio can mentally prepare for something else. Also, it allows you to show only the portfolios that are relevant for the job you are doing.

If you have gotten pictures in print (especially viable if you are planning to do freelance news photography), include both prints and newspaper clippings – side by side on adjecent pages is good.

Portfolio Presentation

This is what people ask about most: How do you present your portfolio?

For School Use Only 
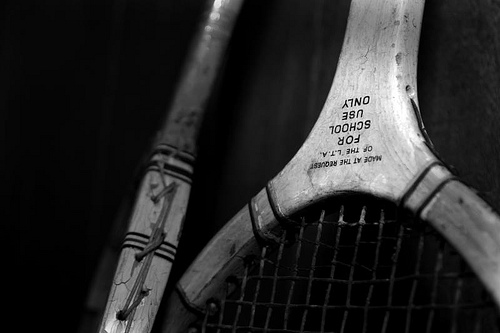
For School Use Only by Photocritic.org, on Flickr

First of all, make sure that your prints are of the best quality possible. This means that they should be of a decent size (approximate A4 / letter size is an ideal tradeoff between presentability and portability)

As for the actual presentation of the portfolio, the answer is difficult to offer. Although a nice leather folder with high-quality plastic inlays to keep your images in offers a good initial impact, it may not be ideal, as the plastic may introduce sheen and / or reflections on the images, making them difficult to see.

In the past, I have seen portfolios that are presented as pictures mounted on cardboard, even loose pictures in a rolodex-style folder. You could consider getting a mini- easel that you can place the images on individually. That allows you and the reviewer to take a few steps away from the images – an especially good bonus if that is how the images are meant to be seen.

Creativity is a big bonus – if you manage to come up with a good way to present your portfolio effectively, it probably means you are doing the right thing. Don’t fall for the temptation to show your images on a computer screen or data projector, however, unless this is how they are meant to be presented. If you only have slides, there is no way around showing it on a slide projector, but if there is any way you won’t have to bring and / or arrange a projector, it is better.

Oh, and it is all in the attitude. Go in there, be sure of yourself, talk, talk, talk, and don’t for a second let up that you had even slightly considered the possibility of them not liking your images. You’d be amazed what difference it makes.

Good luck!

We're going on a roadtrip - grab your camera and drive-lapse

I'm meant to be driving to Edinburgh tomorrow—good health permitting—and if my car weren't due to be crammed to the gunwales with my brother's belongings, I might've considered turning it into a drive-lapse. Or a time-lapse of the journey. It would be possible to do this using a common-or-garden time-lapse technique, but if I were to find myself stuck in a traffic jam (heaven forfend), we'd have shot after shot of my car stationary on the A1, which isn't so thrilling. The clever people at Triggertrap have developed a way around this problem, however: distancelapse mode. Rather than triggering your camera to take a photo at timed intervals, it exploits your smartphone's GPS to take a photo at specific distance intervals. How very nifty!

Safety first

Shooting a drive-lapse will necessitate mounting your camera and triggering device securely in your car, with a decent view of where you're going. While this might seem simple, whatever means you choose to mount your camera in your vehicle, you must do it safely. Laws will vary from country to country, but the primary consideration is that your kit mustn't obscure the driver's vision and neither must it be a distraction. Do be sure of the regulations before you go anywhere.

Selecting a mounting option

You have a few options to mount your camera in your car. A superclamp attached to the passenger seat's headrest stalks is ideal: it won't obscure the driver's vision and the camera has a great view. Alternatively, you could opt for a suction cup on the windscreen or a tripod wedged in the backseat. Remember: it's about being safe.

Aperture priority mode or Manual?

Choosing your preferred shooting mode for a drive-lapse can be a bit of a conundrum. If you're likely to encounter changes in the weather conditions or light throughout the duration of your journey, manual mode will leave some shots over-exposed and other under-exposed. Aperture priority mode can solve the exposure issue, but leave you with a flicker problem. You're going to have to weigh up which mode will suit your journey, and therefore your final video, best.

Time and space considerations

If you're going on an especially long journey, you'll need to make provision for this, in terms of your personal needs and your kit's. Your memory card will require sufficient space and you might need an external charger for your phone, too.

Drive time!

With all of these considerations, ehm, considered, it's time to do this!

Mount your camera

As we've already discussed, your camera needs to be mounted legally and securely. You don't want it wobbling about if you encounter potholes or sleeping policemen.

This was a Manfrotto clamp, for the record

Camera, meet Triggertrap

Hook up your camera to the Triggertrap dongle and the dongle to your smartphone. Secure your smartphone, too, as you don't want that moving about.

You could do this as an ordinary time-lapse, but if you get caught in traffic, it could prove a bit dull

Set your camera

Your camera needs to be in manual focus mode in order for Triggertrap to function, so if it isn't already, switch it to manual focus and adjust to get the image sharp. You also need to choose between aperture priority and manual exposure modes, and set your exposure accordingly.

Let Distancelapse take the strain

Open up the Triggertrap app and select the Distancelapse mode. If you're driving on the motorway, 300 metres is a good interval. Hit the big red button, allow the GPS to settle, and then off you go!

300 metres should do the job

Putting together your video

When you've completed your journey and have all your images, it's time to compile them into a video. We'll save that for another article, but this one should get you started. Then you get to relive the journey, in shortened form.


Much of this, including all the images, is based on the fantastic How to shoot a road trip timelapse tutorial found on Triggertrap's How-To microsite, and it's reproduced with permission. Triggertrap How-To is full of great content for making the most of your camera. You should take a look.

Book Crossing meets photography - the Disposable Memory Project

Autosave-File vom d-lab2/3 der AgfaPhoto GmbH

I’ve found my favourite photography project of the week, almost certainly of the month, and given that we’re almost in November, probably of the year, too.

Take a bundle of disposable cameras, leave them places across the globe, ask people to snap a picture or two before passing on the camera, and see – quite literally when (or if) the film is developed – where the camera travelled. It’s the Disposable Memory Project.

Matthew Knight dreamed up the idea back in 2008, when he was standing in a dry cleaners somewhere in the scary metropolis that’s London and spotted a cheap single use camera for sale. (Don’t tell me that you’ve not had an astonishing idea in a most incongruous place.) If he set one free with a message on it, a unique URL to enable its progress to be tracked, and a return address so that the film can be developed and uploaded to the project’s website, what would happen? It was a slow art project that fused analogue and digital and rather piqued his fancy. (And now mine, too, for that matter.)

A few years on, over 350 cameras have been released into the wild and 30 have made it home to date. They’ve visited 70 different countries, including the South Pole, Everest’s Base Camp, and the Gambia, and travelled over 440,000 miles, which is to the moon and back. Speaking of the moon, they’re hoping to get a camera into space at some point in the near future, so if anyone can help them out there, let them know!

The Disposable Memory Project has 1600 members, all of whom have been brought together by a randomly distributed camera and the marvel that’s the Intergoogles. If you’d like to send your own camera off on its journey, buy a disposable camera, and then head over to the Disposable Memory Project website for the instructions to generate a unique URL and a camera-leaving kit.

How long do they anticipate the project continuing? For as long as they can fund it, and disposable cameras remain available for purchase. I hope that’s a while yet. It’s a damn cool project and I’m off to leave a camera somewhere.

You can see more of the project’s pictures on the website, and you can follow their cameras’ adventures on Twitter as @FoundACam, too!