


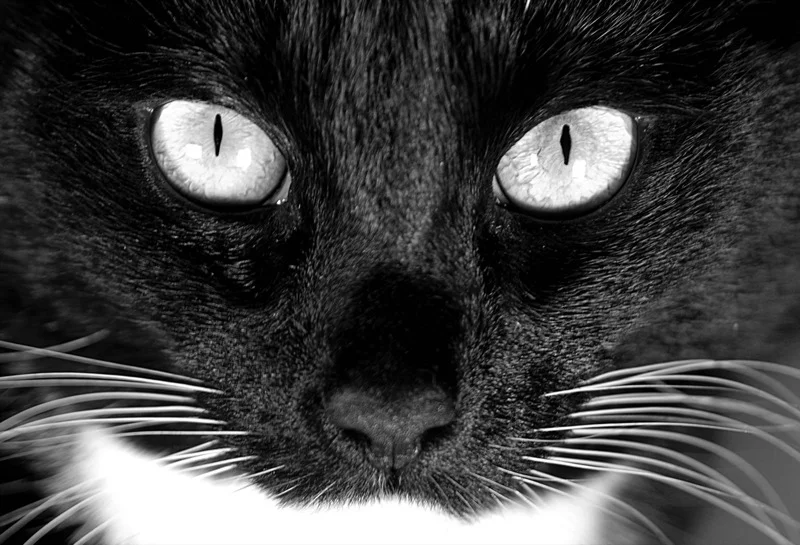
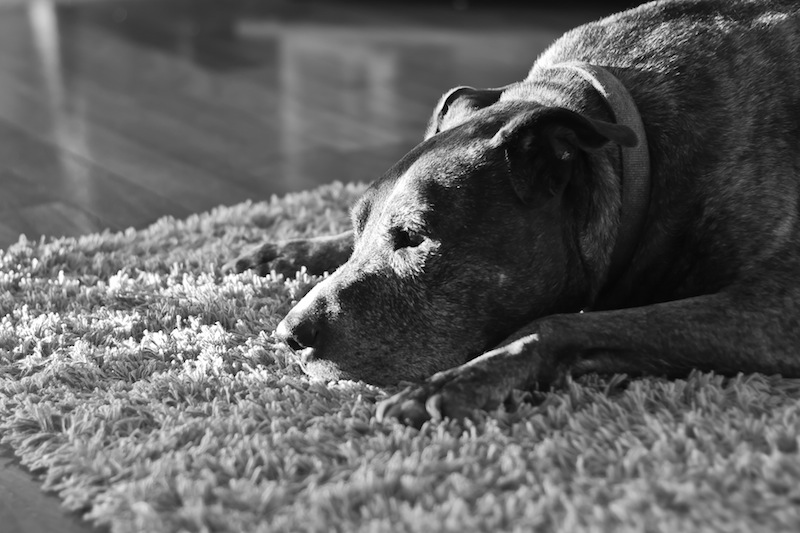
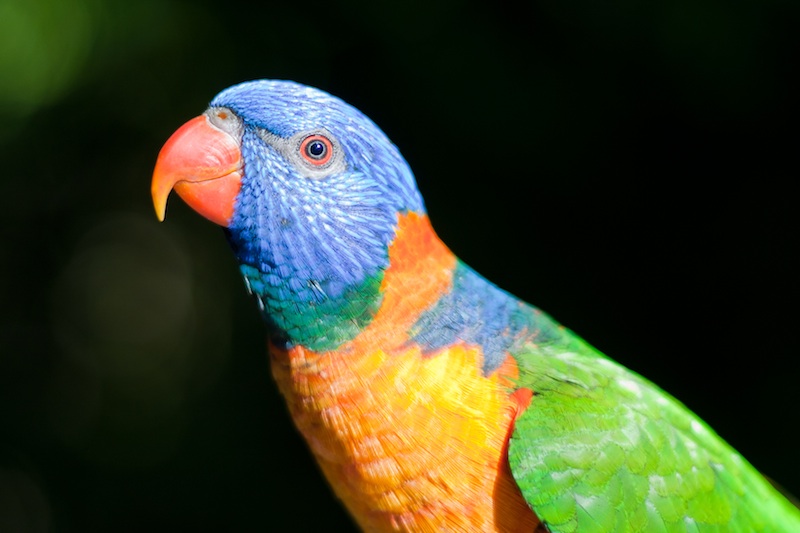
Photographs of black animals can turn out as black blobs with eyes or fluffy grey clouds. Neither does them justice, but with a bit of forethought, you can have perfect portraits instead.

When you hear the term 'high-res' thrown about with such abandon when it comes to images for web use, have you ever stopped to think just how big or how high quality and image meant for the web needs to be?
There's an assumption that high-contrast images are more dynamic, more compelling, more inviting. Have a go at some low-contrast photography. You might surprise yourself with the results.
Balance doesn't mean symmetry; it means an internal consistency and tension within your photos. And it's a vital element of composition.
Great photos might be down to a little bit of luck, but most of that 'luck' you make yourself. Don't believe us? Read on...
Question: How deep can you really take the GoPro camera underwater (the box says 60m)? The way this works, is that any piece of equipment is 'rated' to a particular pressure. In the case of the GoPro Hero 3 underwater case, it will be rated to 7 atmospheres, which works out to 60 metres in freshwater and around 58 metres in salt water.
This is similar to bridges: They'll have a sign saying "Maximum 3 tons" or similar. This doesn't mean that if you are driving a truck that weighs 3 tons, but a kitten sits in your passenger seat, that the bridge will collapse.
There will be variations in each individual casings, too. Some underwater cases will happily go to 80 metres, others might make it to 90 metres, but some might fail at 68 metres. So, in order to keep your equipment safe, stay above 60 metres
For most people, all of this is moot, however, as a GoPro really isn't the right equipment for dives that deep. I'm a Divemaster, and I've dived extensively, both with and without photographic equipment -- and I don't think I've ever taken a half-decent photo at depths deeper than 30 metres or so. The light doesn't penetrate that deep, for one thing, but 40 metres is actually the maximum depth you can safely dive on air (see Recreational diving) -- so if you want to go deeper than 40, you're looking at becoming a 'technical diver' (see Technical diving), which is a different kettle of fish altogether.
Realistically with a camera without additional lighting, like the GoPro Hero 3, you'll probably only get good footage at depths down to about six metres, and usable footage down to about 15.
In the comments of this article (originally published in 2013), a series of divers started posting how deep they've taken the GoPro stock housings, and I was in for a surprise! Have a look at the comments below, but some of the data points are here:
Please do keep the comments coming!
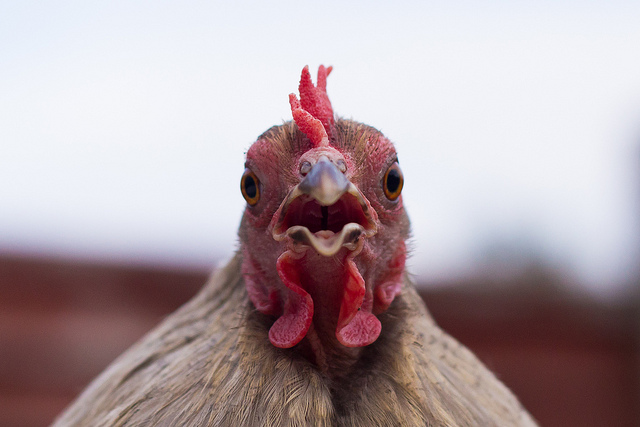
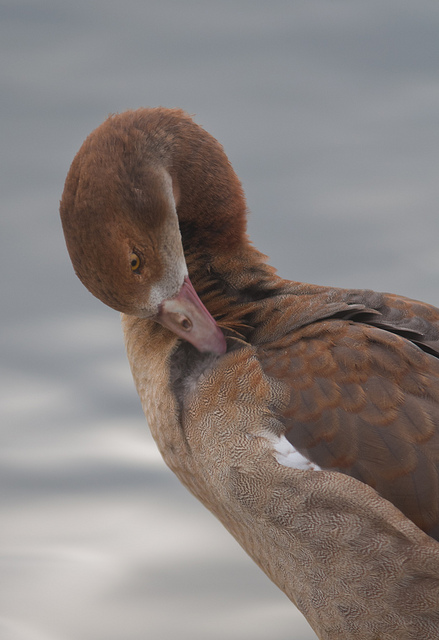
The number of photos of cats floating about the Intergoogles is testimony to how much we love photographing animals. But I bet we could all do it a bit better, whether they're our pets, cows on the closest farm, or gazelles in the wild. We've put together our top tips, dos and don't, and favourite recommendations for animal photography.
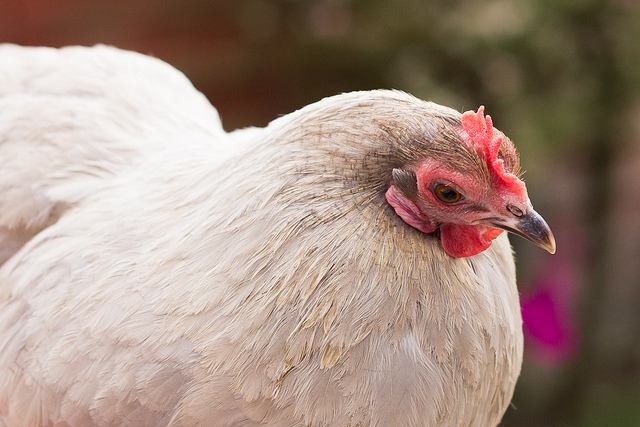
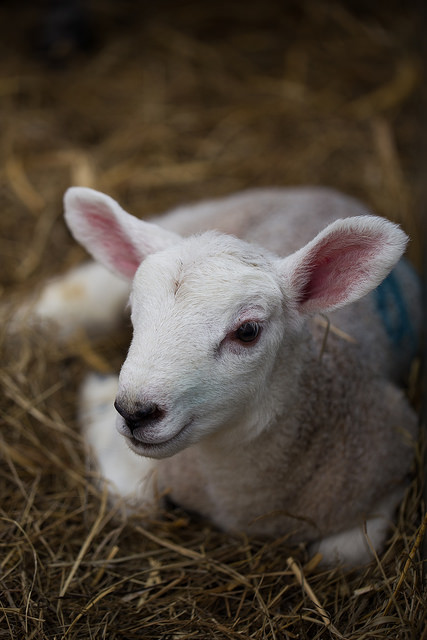
Photographing pets is distinctly similar to photographing children: get down to their level, gird yourself with patience, and be ready to move fast. Much like my favourite photos of my nieces and nephews, many of my favourite photos of animals have been captured sitting (or crouching, in the case of mucky straw) on the floor, allowing them to play about me and simply being ready to capture kittens, lambs, hens, dogs, and various assorted being cute or idiosyncratic.
The chances are that you'll be exhausted and maybe a bit dirty at the end of it, but you should have some good photos. There is, of course, a bit more to it than that.
When it comes to taking photos of animals, some things should be on the checklist every time.
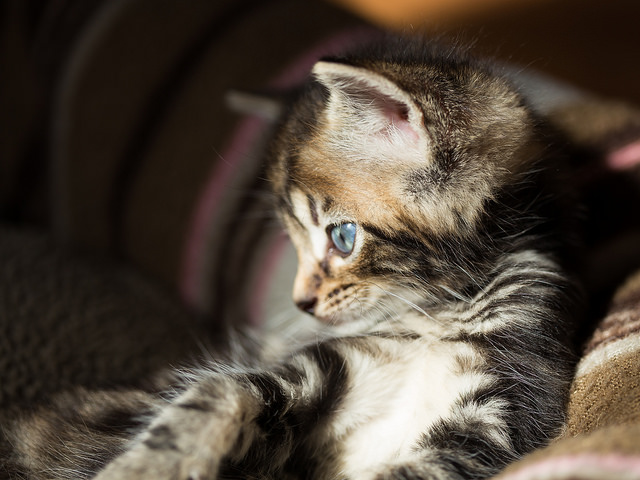
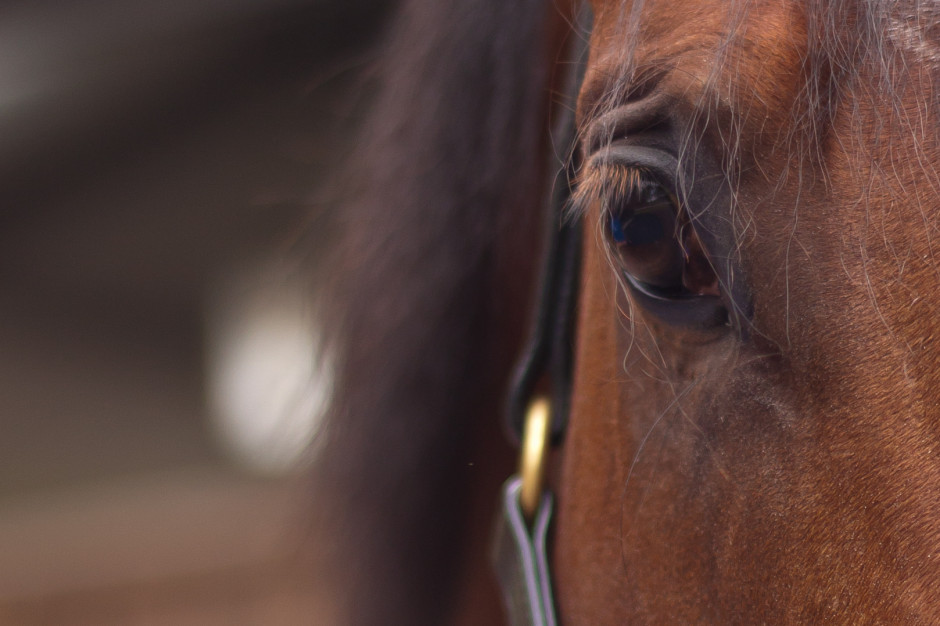
Get the eyes in focus - just like a portrait of a human, your viewers will be looking to make eye-contact with the subject, so get the eyes sharp.
Capture spirit - again, it's the same with humans, you need the photograph to convey the playfulness, the inquisitiveness, or the quirkiness of the animal.
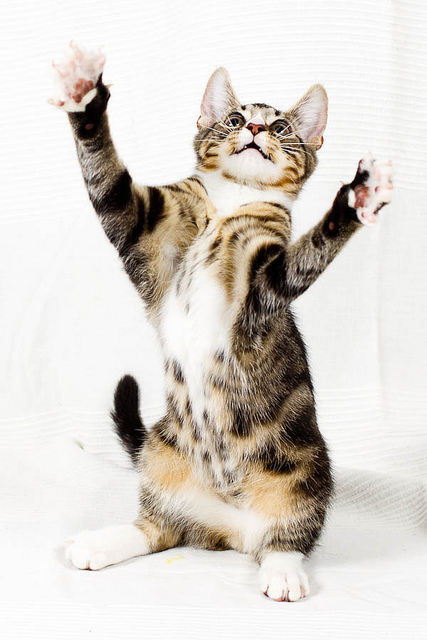
The subject needs to be doing something - it doesn't matter if it's a dog asleep in a contrived position or a kitten chasing a toy, there needs to be something of interest happening in the shot.
Consider the background - you don't want clutter or a litter tray in the background of your photos, so pay attention to where you're taking them.
Be respectful - Don't do anything that hurts or distresses an animal for the sake of a photo. Don't pick up rabbits by their ears, provoke dogs, or yank horses' chiffneys or headcollars. Not only will the animal not like you for it, but it's unacceptable behaviour.
Depending on the type of photo you're trying to take, you will need to make some choices. There's no right or wrong to these points; they're up for consideration.
Flash - Some people say avoid it altogether, others say use it judiciously. I'd say for heavens sake don't startle a sleeping dog or potentially damage a very young animal's eyes with flash, but used properly, you can produce some cracking shots with artificial light.
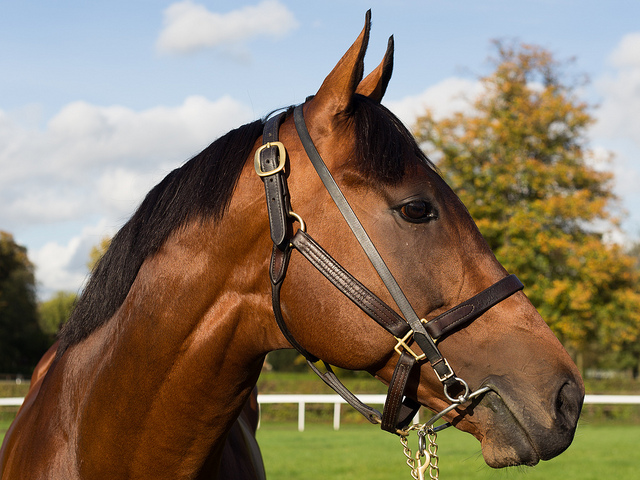
Kit - I've photographed animals with all sorts of camera and lens combinations. Sometimes, it's been a case of grabbing what's closest, so my iPhone, to ensure that I didn't miss the moment. Then again, I've headed down to the yard armed with all manner of lenses and a dSLR for photographing horses. Remember the adage that the best camera is the one you have with you, but don't forget to think about what you're trying to achieve with your photos, from portraits to macros to action shots, and select your kit appropriately.
Use a fast shutter speed - Unless you're trying panning, do aim to keep your shutter speed as fast as possible to avoid motion blur, particularly if you're aiming to capture animals at play. Up the ISO if you need to; noise is easier to fix than blur.
Consider your angles and proximity - while it's advisable to get down to the same level as your subjects, do consider shooting from above and below, too. The key here is to consider what you're doing and the story you're telling, rather than reverting to the default of standing up to shoot.
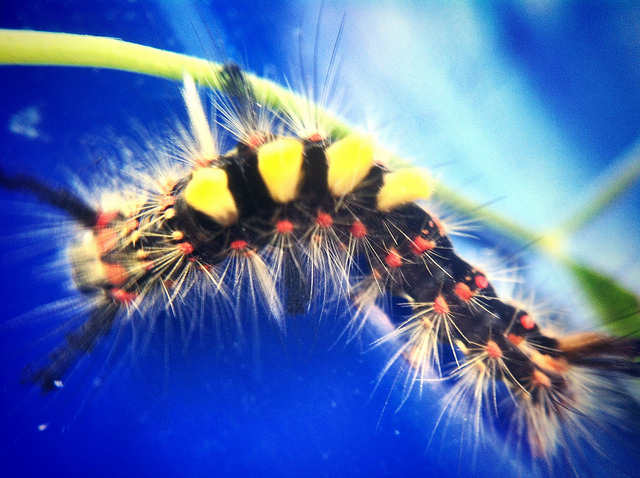
As well as the usual recommendation of getting closer, have you considered getting really close to your subject? Macro and abstract shots can work wonderfully to intrigue, inspire, and give a different perspective on your subject.
Grabbing their attention - I talk to dogs, use toys for cats, and make clip-clopping noises to encourage horses to prick their ears. If you know your pet, you'll know how to distract it or attract its attention. If the subject isn't your pet, talk to its owner.
Cats scratch, dogs bite, and horses kick. They're also sentient and can be unpredictable. Don't do anything to upset your subjects or that endangers you. It's common sense, really.
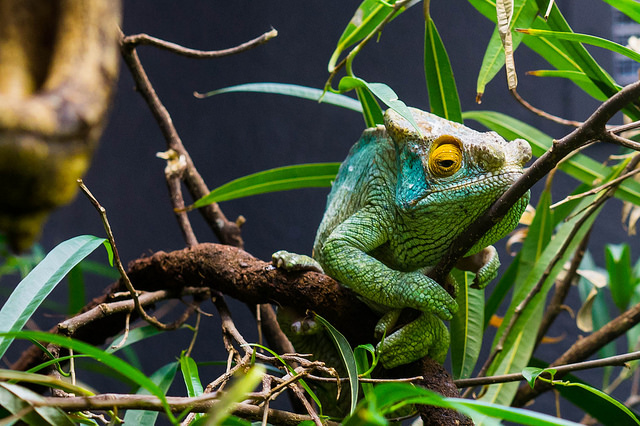
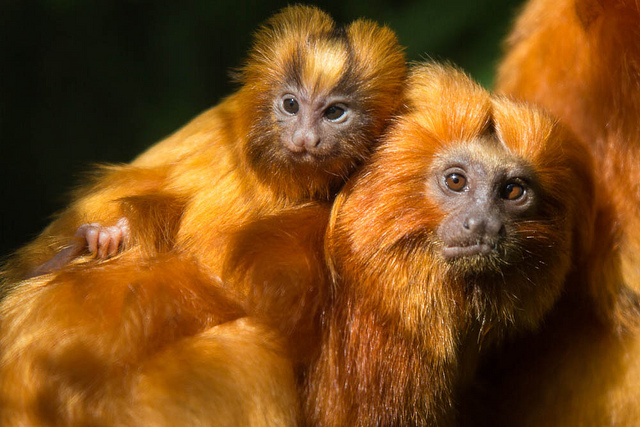
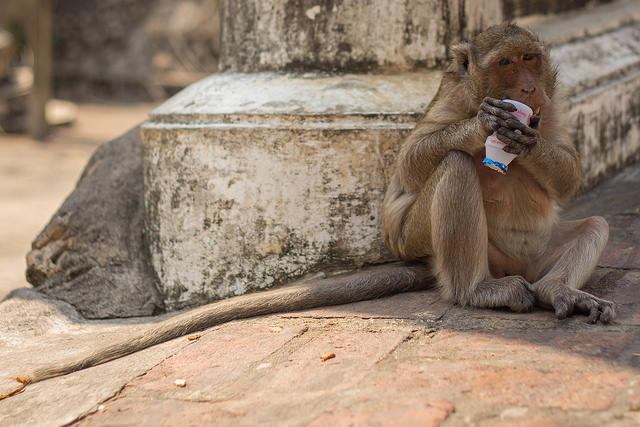
While photographing pets is similar to photographing children, you might notice some similarities between wildlife and sports photography. You're going to be out in the elements, watching for the perfect moment, and most likely with a big lens. However, wildlife photography isn't restricted to the African savannah. There are squirrels in the park, birds in the woods, spiders in their webs, and wild monkeys in the Thai temple complexes. You don't have to travel to exotic locations to take wonderful wildlife photos. And if you are fortunate enough to be going on safari, you can always get in some practice with deer at home.
Know your subject - If you want to make the most out of your subject, then you need to know what to expect from it. Where are you likely to find it? When is it active? When does it feed? What should and shouldn't you do around it? There's little point arriving in the Serengeti in June and expecting to see wildebeest, as by then they'll be on their way to the Masai Mara.
Know your kit - In order to be able to capture the wildlife images of your wildest dreams, you need to be intimately acquainted with your kit and understand its precise capabilities. How many extra stops does your image stabilisation really give you? What's the slowest speed at which you can hand-hold your camera? How high can you push your ISO before noise really becomes a problem? What's the optimal aperture for sharpness with your lenses? Do any of them have a proclivity to flare?
The better that you know your kit, the less time you'll have to spend fiddling and faffing and the more likely you are to make a crucial moment.
Use support - You might not necessarily want to use a tripod: it could be too cumbersome and too slow to move, but the chances are you'll need some kind of support for your camera when out in the field, particularly if you're using a long lens. Think about all of the options, from monopods to beanbags, and decide which one will work best for you.
Be prepared - This isn't just about ensuring that you have the right camera kit with you and to hand, but also the right personal kit. In addition to cameras, lenses, filters, supports, remote triggers, batteries, and memory cards, you need to be dressed appropriately for the conditions and with changes of clothes if necessary. If you're as much as a feast for mosquitoes as I am, you'll need suitable insect repellant. You need to consider food and drink and appropriate storage for it. Do you require permits or a guide? And don't forget your sunscreen.
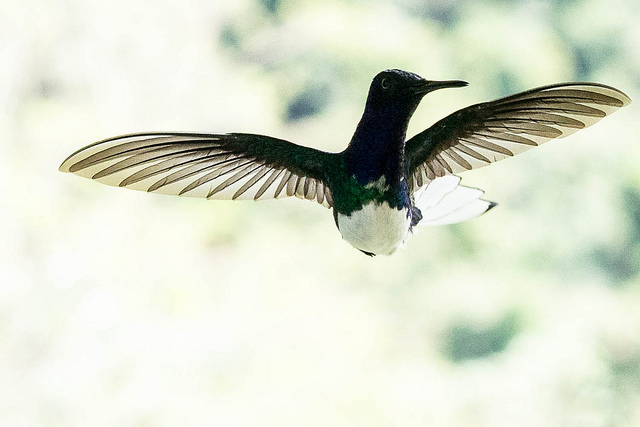
Capture action - The same as with pets and domesticated animals, aim to photograph action. Or at least if an animal is doing nothing, it needs to be doing nothing in an interesting way, for example with a glorious sunrise behind it, or curled up asleep in an unlikely pose.
Wide and close - You might well be using a long lens to photograph wildlife just to get close enough to identify it, but don't restrict yourself to close-ups. Think about placing your subject in its environment and providing it with context. Primarily, this is important for story-telling, but if you have travelled a long way to experience something magical, you'll want to record that, too.
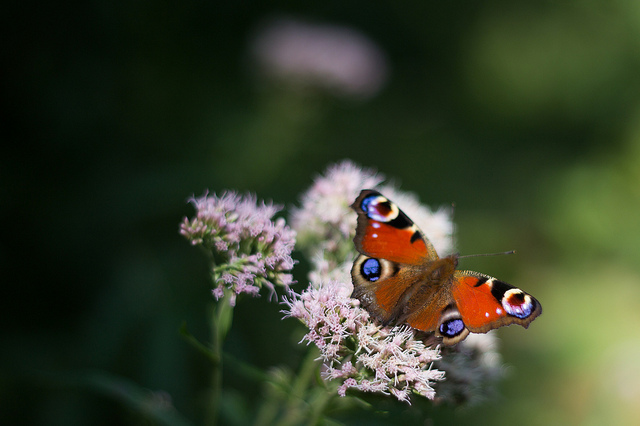
Conversely, abstract close-ups can make for very striking photos. Don't be afraid to experiment!
Consider the light - While it probably should go without saying to think carefully about the quality, quantity, and direction of light, it's worth repeating. You might well find that as well as providing the best light for photography, the golden hours are also when many animals are at their most active.
Be careful and enjoy - Just as with pet and domesticated animal photography, be careful and be respectful. Don't do anything to endanger yourself or your subjects. Remember to adhere to the required codes and to clean up after yourself.
Finally, remember to enjoy it. Absorb the atmosphere and don't be afraid to put down your camera, either. Sometimes the picture in your memory can be better than the one taken by your camera.

You’re working as a photographer, you take fantastic photos, and you’ve even got a pretty sweet website to show off your work… So why is your web server just sitting around in the corner, smoking a fag and nipping at a cup of coffee? Why aren’t the buyers running the door off its hinges, and, come to think of it, where are your damn groupies, already?
The internet is a cold and heartless place, and the biggest source of traffic to any website should be coming from search engines (Photocritic, for example, gets about 70% of its traffic from search engines. Mind you, it’s mostly people looking for pictures of nude women. Go figure.)
 Luckily, there are quite a few things you can do as a photographer to make your site really zing in the search engines – and for the sake of making a nice round figure (and, of course, so the Digg and Reddit crowds will love it like a kitten loves tuna fish) – here’s a lovely top-10 list to get you started!
 For the sake of photography, you can basically optimise your site for two types of search: Text search (what most people think of when they think ‘search’) and image search (take a guess…).
It’s worth noting that this list is in no particular order – but the more of them you implement, the better you are likely to do.
First of all, check out the phenomenal SEOMoz, and check out their ‘Google Search Engine Ranking Factors‘ document. It outlines a lot of the stuff you need to know about making your site accessible to Google etc, the most important of which is ‘Don’t use Flash / Flex to build your site’, and ‘Make sure you haven’t inadvertently blocked search engine spiders from entering the site by using a drop-down menu for your navigation system’
First off, you could do a lot worse than making sure to update your site frequently, no matter what kind of content you have. Many SEO experts have observed that Google tends to give higher ranking to sites that are updated more frequently.
That might mean that, instead of posting 100 new photos once a month, you post 10 or 12 every 3 days. Another way to have new content often is to have a blog. Sprinkle your photos throughout the blog content and the search engines will eat them up like the proverbial fat lady at a cake sale.
 Context is important. The search engines want to know what your site is about. You might want to use the word “photo” in all of your filenames, to keep the context of a photography website consistent.
The next step is to stop and think for a secon – what types of photos do you take? Try to organize them into categories and maybe even sub-categories, so that you have some context for each page. See Rolf Hicker’s Photography website for a good example of photo categories. Of course he also…
Once you’ve placed your photos on their pages, the nearby text becomes important. Google gets clues about the content of images from the text near them. Consider using captions or quotes that have the same keywords as apply to your photos, and place them next to the photos for maximum value in the search engine ranking.
Linnea Lenkus Fine Art Portrait Studios website, for example, is an excellent example of good use of quotes next to the photo. Contrast this with the Chesler Photo site doesn’t come up on the first several pages in a “maternity” image search, despite having a whole gallery of such photos, probably due to not having enough textual content on the site.
The Digital Photography School website is another fab example of the use of text on a photography page.
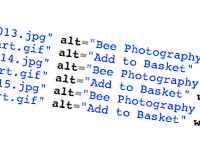 When you add an image to your website, you’re using an <img src="[URL]"> tag. You can – and should – add attributes to this tag, including an alt attribute.
Put an explanation of what the image depicts in your ALT tags. Not only do you make it easier for blind people to navigate your site (although why blind people would want to visit a photography site remains a mystery to me…), but it is one of the few sure-fire things that a search-engine has to go on when deciding what your photographs are about.
 In addition to using keywords in your ALT tags, make sure that the actual file-name contains the same keywords.
Remember that your alt attribute can have spaces; use dashes to separate individual words if you want your filename to contain multiple words.
Don’t stuff the “alt” tag with lots and lots of keywords, however, or it will appear to be spamming; just describe the image honestly in the same way you would describe it to someone over the telephone.
Example: <img src="http://pixiq.com/images/kitten-eating-tuna.jpg" alt="Photograph of a black and white kitten eating tuna. Nom!">
The Mackins Design Studio website is an example of good use of descriptive alt tags as well as filenames. As a counter-note: PremierPhotographer Pat McNulty’s site doesn’t come up on the first several pages of an image search for “castles” despite having a castle category – there could be many reasons for this, but not using ALT attributes will be at least part of the reason.
You probably never knew that Photocritic started off as a blog-belonging-to-a-photo-site, but it’s the truth. I guess it says quite a lot about me as a photographer that the photography blog became at least a bazillion times more popular than my photography site(s), but I guess it was a godsent: I was always a better writer than a photographer anyway.
Maybe it’s because blogs are generally updated regularly, but images used in blogs are often numbered in the top of image search results, even for blogs which have as their regular topic something that has nothing to do with the keyword. See Mr&Mrsijunky’s blog for a good use of blog with photos. In addition, it’s a lot easier to SEO the hell out of a blog than to make an image-led site really fly. Sad, isn’t it?
Use the image “title” tag. Similar to the “alt” tag, it isn’t compatible with all browsers, yet, but will be accessible to Firefox users, and the spiders from Google and other search engines will see it. You can put text similar to what you put in the alt tag in this tag.
Usability expert Roger Johansson explains:
[The ALT attribute] is not meant to be used as a tool tip, or more specifically, to provide additional information about an image. The title attribute, on the other hand, is meant to provide additional information about an element. That information is displayed as a tooltip by most graphical browsers, though manufacturers are free to render title text in other ways.
If you fancy geeking out about alt vs title tags, Johansson’s blog is the place to go…
 Use keywords in the page title. The page title is a header tag that causes text to appear in the top bar of the window when the page is open in your browser.
Each page of your website should have a different title, a title that contains the keywords applicable to that page, but in title form, not as a list. Check out the browser window title of this very blog entry for a good example…
Also check out how the home page of Photocritic uses different keywords in the title tag, when compared to all the other pages on the site. This differentiation is designed to guide users (and, I admit, search engines) to the right place.
That really means the HTML filename for that page. Don’t name your pages page1.html and page2.html. A much better name would be castle-photo-gallery.html or dover-castle-panorama-photos.html
Use image folders and sub folders. Put all of your images into a folder called “images” when you upload them to your web host. Then, use sub-folders for common categories. The image named Sorbie_Castle.jpg should be in /images/castles/, for example. Not only does it make it easier for yourself, you’ll be able to
 Anchor text is the text that appears on a page when there is a link; it’s the text that is underlined and/or in a special color to denote a link. These anchor text links should be descriptive, and – if possible – contain keywords relevant to the page you are linking to.
If you put a link to your castles page somewhere else in your site, don’t say “click here” to see my castle photos. The text comprising the link should have the keyword in it, so it should say see my “castle photos” and the words “castle photos” would be the link to that page.
Do this on your own site and encourage others who link to you to do the same. You can even provide actual text they can use to link to you which contains your keyword. A good way to do this is to have a small note at the bottom of every page inviting people to link back to you, and including a link to a page containing the appropriate code with your keyword in the anchor text.
Do you enjoy a smattering of random photography links? Well, squire, I welcome thee to join me on Twitter - Follow @Photocritic
© Kamps Consulting Ltd. This article is licenced for use on Pixiq only. Please do not reproduce wholly or in part without a license. More info.