We've covered image size for the web. But what about if you want to hang a picture on your wall? Or sell it for use in print materials?

When you hear the term 'high-res' thrown about with such abandon when it comes to images for web use, have you ever stopped to think just how big or how high quality and image meant for the web needs to be?
There's an assumption that high-contrast images are more dynamic, more compelling, more inviting. Have a go at some low-contrast photography. You might surprise yourself with the results.
Balance doesn't mean symmetry; it means an internal consistency and tension within your photos. And it's a vital element of composition.
Great photos might be down to a little bit of luck, but most of that 'luck' you make yourself. Don't believe us? Read on...
For all that our cameras are capable of rendering the world in glorious Technicolor, their light meters are remarkably simple: they can only 'see' in shades of grey. When a light meter attempts to judge the correct exposure for a scene, it does so under the assumption that the scene's average brightness is middle grey (18% grey), which is exactly half-way between absolute black and bright white.
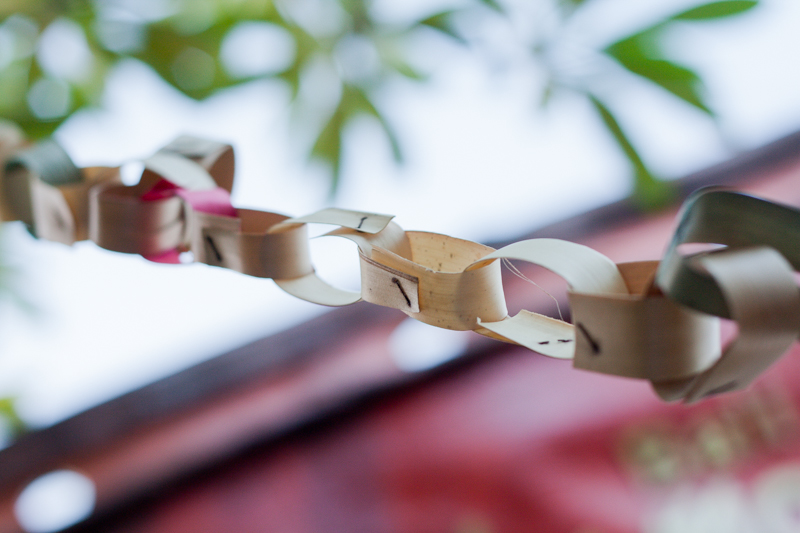
In the run-up to the festive season, it's possible that people will be taking more photos than usual. Parties, pretty lights, and present-opening, afford ample opportunity to take photos and share them on social media. However, research recently commissioned by the online learning company lynda.com revealed some interesting facts about people's photo-taking habits. Aside from the fact that 64% of Brits now use smartphones or tablets to take photos, it would also seem that quite a few people are also too intimidated by the process, or by technology, to have a go themselves. Based on the figures that came out of the survey, we've put together five tips to help anyone who might feel a bit afraid of photography to start taking better photos without too much fuss.
60% of the people questioned spent fewer than 30 minutes learning how to use their cameras properly. Whether you use a smartphone, a point-and-shoot, or an interchangeable lens camera, read the manual. Or the destructions, as we call them. Understanding the capabilities of your picture-taking device will have a noticeable impact on what you can achieve with it.
Apparently, only about 45% of the sample made any attempt to improve the composition of their photos. Our top tip: get closer. And if you're working with a smartphone, get closer physically; don't rely on digital zoom.
Of those surveyed, 71% responded that they relied on the law of averages to return a decent photo. They work on the principle that if they take lots of shots, at least one should work out. Our advice? Slow down and think about what you're doing. What story are you trying to tell? A little contemplation should bring you better results than aerosol clicking.
Almost everyone who responded to the survey stated that they wanted to be able to make their photos look better, but the majority didn't feel that they have the skills to do so. While you can't turn a sow's ear into a silk purse, it is possible to make a few fundamental edits to a photo and elevate it from ordinary to much better looking.
There are three simple adjustments that you should make to every photo you take: to the crop, the colour, and the contrast. They're not time-consuming or complicated and can be accomplished with a basic editing package. You don't need to master Photoshop—or fork out for it—to make them.
As few as one-in-fifty of the survey group made use of any training to help them improve their photography. Seeing as the photographer is the most significant element in creating a great photo, doing a little learning will help enormously in the quest for better images. The good news is that by reading this, you've made a start. To help you even more, you can try a book or two or sign-up to any number of courses. There are hundreds, maybe even thousands out there. Obviously lynda.com, which commissioned the research would like you to look there, but may we suggest that you take a look at the Photocritic Photography School. It's free!
If you want to check out the findings from the survey, click and explore!
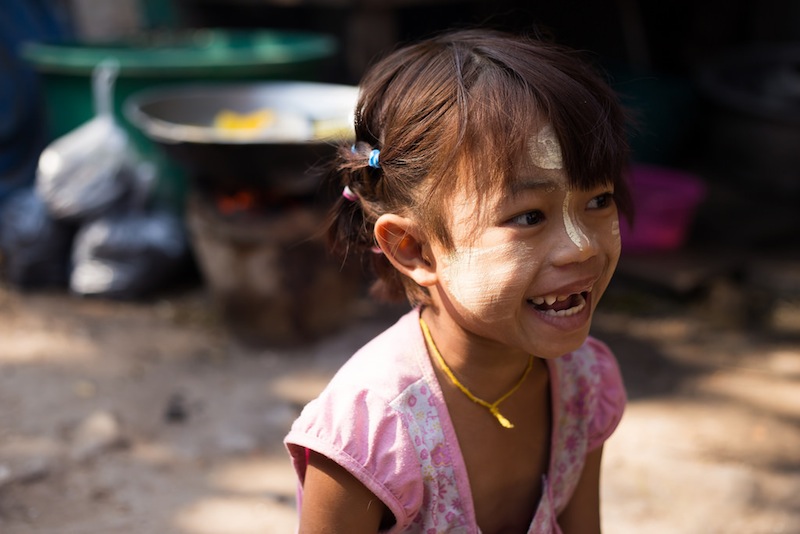
There's an adage which suggests that your life will be easier if you choose not to work with children or animals. Eh... I disagree. While photographing both children and animals can be highly demanding and occasionally somewhat frustrating, it's also wildly satisfying. Some of my favourite photos in my archive are of my nieces and nephews or of the animals that have galloped and jumped and hopped and tumbled and gallumphed and snoozed through my life. And I've had immense fun doing it. Seeing as the holidays are pretty much upon us, thereby increasing the chances that you might want or need to take photos of small people, now seems as good a time as any to present you with the Photocritic guide to photographing children. There are two crucial attributes to photographing children. First, patience. You will require it in bucket-loads. Second, you need to remember to think like a child. I doubt that you sprang fully-formed from your father's thigh, like Athene, so cast your mind back and try to remember what thrilled and bored you and interested and irritated you as a little one. By getting into their mindset, you'll give yourself heaps more opportunities to capture great photos of them.
With those two factors at the forefront of your mind, let's move on.
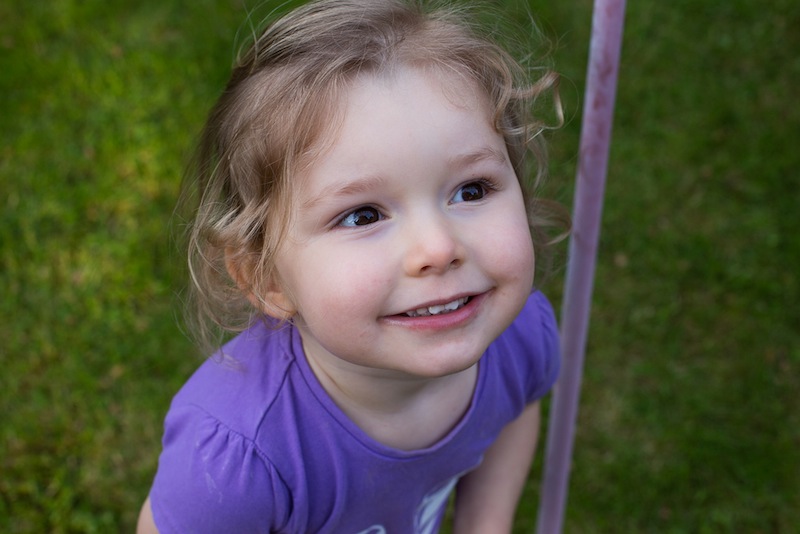
The best photos of children come when you get down to their level. Apart from it being so much easier for little people to relate to someone who's on their level, your photos won't take on an awkward, condescending air. Sure, every now and again photographing from above works a treat, but mostly it's about capturing life on their level. That means getting down on your knees or belly and seeing the world from your subject's-eye view.
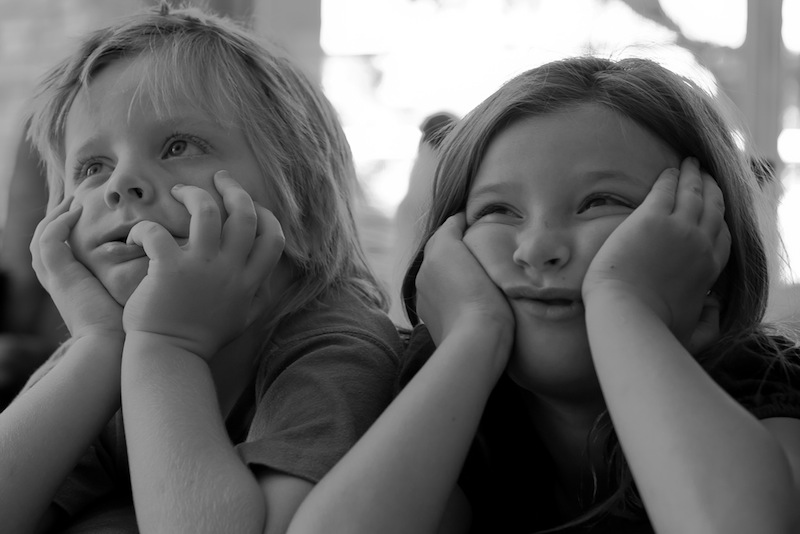
If you want natural smiles and pictures of unhibited child-like joy, for heaven's sake do not attempt to pose a little one and elicit a grin with the power of 'cheese!' It might look terribly sophisticated to have them dressed in their party outfits and posing as if butter wouldn't melt in their mouths, but I doubt that's an accurate reflection of them or the most fun way they've ever spent 20 minutes.
Let them play.
If they're opening presents, you have plenty of opportunities for looks of concentration, puzzlement, wonder, and excitement flooding their faces.
They're going to be moving fast—children usually do—so unless you want motion blur in your photos, it means that your camera will need to be moving fast, too. Think about a fast shutter speed, a fast aperture, and a fast ISO if you need it.

With a large aperture you can let plenty of light onto the sensor, which will allow for a fast shutter speed, and it'll keep the background blurred, too. You might not necessarily want an out-of-focus background, but if it's cluttered or untidy, it will draw your viewer's eye to your subject.
As with any other portrait, the eyes need to be in focus when you're photographing children. It's the first place your viewer will look and if the eyes are out of focus, her or his interest will wander. Rather than using one-shot auto-focus, you might find that your purposes are best served by either continuous auto-focus or intelligent auto-focus to keep the subject sharp even when it's on the move.
When you're setting up a shoot, sure some studio lights might be a good idea to help get the photos that you want. But for those times when you're sitting on the floor surrounded by scraps of wrapping paper? They're probably not what you want. I'm not that fond of on-camera flash around babies and small people, either. It can be far too harsh and startling for them. Make the most of the light that you have, and bring out a reflector if you need one.
If you're not enjoying yourself, neither will the kids whom you are trying to photograph. And why should they? Smile, talk to them, take an interest in what they're doing. The more relaxed you are, the more relaxed they'll be, which makes things better for everyone.
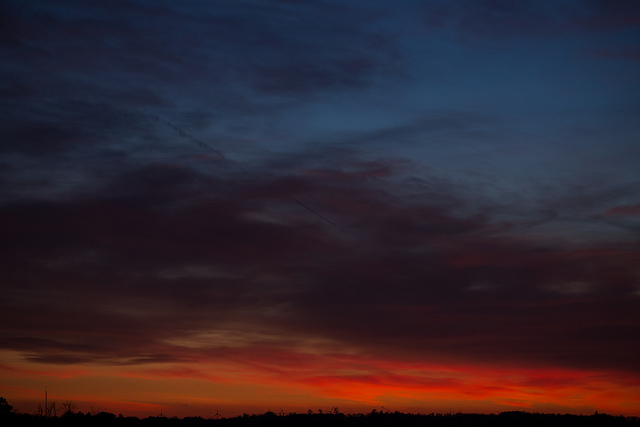
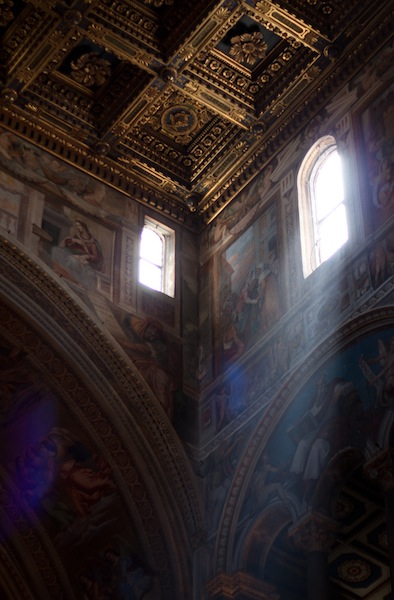
Here in the northern hemisphere, the shortest day is fast approaching and whether we like it or not, much of our photography will be of the low-light variety. We've put together some suggestions for coping as best you can when things are a little dim and the light with wish you wish to draw is a scarce commodity.
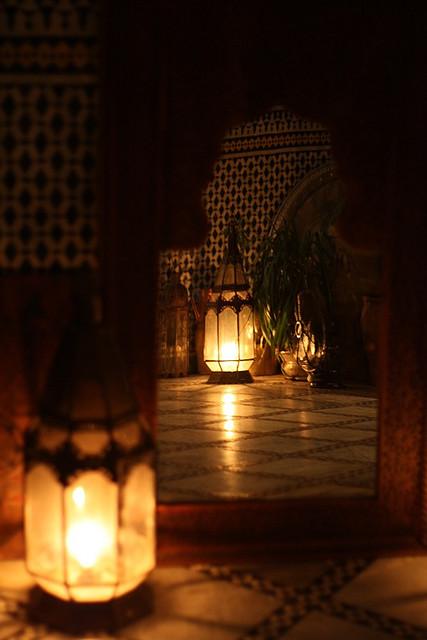
This might sound terribly obvious, but it's a fundamental of photography: look for the light in your scene and use it to your advantage. Use the light from streetlamps, from candles, from the moon to illuminate your subject—even be the subject—and create interesting shadows in your photos.

While a too-high ISO can be responsible for noisy, grainy photos, advancements in sensor technology mean that it's possible to push ISO much higher than was previously acceptable to get the shot you want. Remember: a little grain can be better than motion blur; if you shoot in Raw, images can be cleaned up; a black and white conversion can produce noise-negating miracles.
The wider the aperture you select, the more light you'll let onto the sensor and the faster shutter speed and lower ISO you'll be able to use. This will of course come with the caveat of a shallower depth-of-field, but that can be applied creatively.
A slower shutter speed will permit more light to reach the sensor, but it also has the potential to introduce motion blur if it isn't sufficiently fast to freeze the action in your scene, as well as camera shake if you're hand-holding your camera. Sometimes, however, motion blur contributes to the story that you wish to tell, so don't dismiss it entirely.
The general rule for hand-holding a camera is that you shouldn't do it if your shutter speed dips below the inverse of the focal length of the lens you're using. Thus, for a 50mm lens, you shouldn't attempt to hand-hold your camera using a shutter speed slower than about 1/60 second. If you find that you need to go slower, you might wish to bring out your tripod. Think about a remote shutter release, too.
If you adhere to matrix or multi-segment metering, your camera will attempt to adequately expose the entire scene. That might not be what you want if you're looking to play with light and shadow. For dramatically lit shots, switch to spot metering and meter from the illuminated area that you wish to be in focus. This will maintain dark shadows while correctly exposing the point-of-focus.
Spot-metering might not be appropriate for your scene, but at the same time, matrix or multi-segmented could render it over-exposed. If that's the case, try dialling in a stop or two of negative exposure compensation.
Auto-focus can struggle to hit its mark in low-light situations, in which case manual focus might render better results if you're both confident enough using it and the scene isn't changing so fast that you miss the photo opportunity. Should auto-focus be the better option, ensure that you're using one-shot auto-focus. Try, too, shining a light where you wish your camera to focus. The illumination will assist it in locking-on to the point-of-focus.
Whether it's reflection off of pale clothing, off of glass, polished metal, or liquid, or from a reflector, keep an eye out for reflected light and put it to use in your shots. That might be making reflections on water the focus of your photo, but it can also be bouncing back reflected light to illuminate shadows.
If you're not already shooting in Raw, switch now. Not only will help you to tidy up any noise in your shots, or even to adjust the exposure a little if necessary, but it will allow you to adjust the white balance of your photos more effectively. Accurately white balancing low-light shots can be tricky; the more flexibility that you have, the better.
How warm or cool is your light source? Or are you working with mixed light sources? If you're shooting by candle light, you can set the light temperature on your camera to more accurately render colours in your photos. For mixed-light sources, remember to white balance according to the light falling on your subject. If you're shooting in Raw, you might find that adjusting the white balance in post-processing will give you the most accurate result.

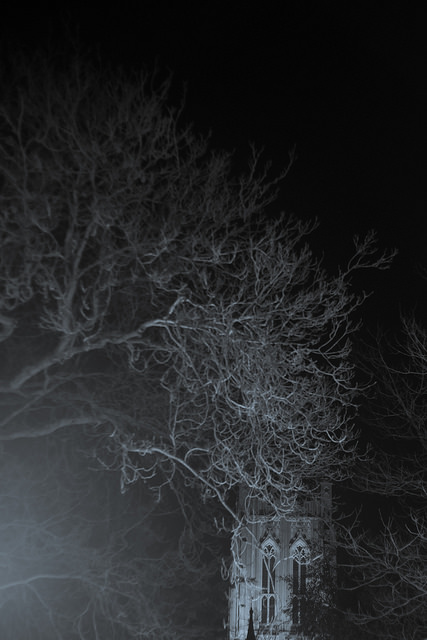
Finally, have fun with the darkness and put it to creative use. Let reflections dance or shadows draw you in to moody scenes. Low-light might force you to think for a moment, but remember that you often have longer than you think you do, and experimenting is half the fun.
The end of term is drawing nigh and primary schools across the country are preparing to roll out their annual festive act featuring a miserable Mary, a startled Joseph, three kings, a flock of shepherds, a mega-flock of sheep, and likely a rendition of that well-known Christmas classic, 'Let it Go'. If you're a proud parent, doting aunt or uncle, or adoring grandparent and want to capture the event on camera, what's the best way of going about it?
First of all, if anyone tries to tell you that you're prohibited from photographing the nativity play because of data protection tell them that they're wrong. The Information Commissioner's Office has stated quite clearly that family members wanting to photograph or video their children's (or grandchildren's, nieces', nephews' &c) school plays in no way violate data protection regulations, provided that it is for personal use. So ner! (Insert sticky-out tongue here.)
Individual schools might have tighter regulations relating to photographing their pupils, especially if any of them are looked-after children—that's young people who are in the care of their local authorities, and most likely are being fostered, are in care, or are in the process of being adopted—whose identities need to be protected. If photos of them made their way onto social media sites, it could lead to difficult, or even nasty, situations. Please do bear that in mind.
If you're really intent on getting the best photos of the show, ask the school if you can drop by for the dress rehearsal. Everything should run just as it would for the real thing, but the children won't feel under pressure from a huge audience and you should be at liberty to move about to get into the best positions without disturbing any other spectators. It also means that you get two bites of the mince pie: one to photograph it, and another to enjoy it and swell with pride like a Christmas pudding in a steamer.
Of course, the school might not want the dress rehearsal descending into the production's semi-official photo-shoot or it might not be convenient for you to attend. In which case, you'll need to make sure that you're at the real thing in time to get the best seat. Ideally you want to be close to the front, but make sure you consider your fellow audience-members. They're just as invested in this production as you are and will not appreciate their enjoyment of the show being obscured by you and your kit wriggling, fidgeting, and readjusting.
The best camera is the one that you have with you. If you've only a smartphone or a point-and-shoot, so be it. The important thing to remember is to turn off the flash. First, it likely won't have a discernible impact on the shot; second, it will distract the Angel Gabriel. If you can, bump up the ISO to give you the best chance of getting a blur-free image. It might be as noisy as Hark the Herald Angels Sing, but grain beats blur.
For anyone with an interchangeable lens camera, I'd advise selecting one lens and sticking with it if you're photographing the real thing. You don't want to be changing lens mid-performance. It will disturb the audience and possibly the cast, and you might well miss something crucial in the process. You have more latitude at the dress rehearsal, though.
Ideally, you want something fast, with a focal range to enable wide-angle and zoomed-in shots, and image stabilisation to help defy blur. We're not all blessed with these sorts of lenses, so select the fastest glass you have. You're going to need all the light you can get.
The two key points for performance photography have already been mentioned: turn off the flash and set the ISO as high as you reasonably can. You should be shooting in Raw anyway, but if you're not, go make the change the now. Skin tones under stage lights will thank you for it.
Plays and shows are fast-moving things: you're going to need a fast shutter speed coupled with a fast aperture to capture anything that isn't as fluffy as a sheep. Around 1/100 second should freeze action, but if you want to capture the blur of dancers spinning, you can always slow it down!
Switch your auto-focusing mode from one-shot auto-focus to something that can help you capture moving subjects; either Continuous/Servo or Intelligent/Automatic auto-focus should help you.
When it comes to metering, you might find that if you want to capture illuminated faces, switching to spot metering will give you the best chance of doing so. Just remember to meter what's in the light: if you accidentally meter off the dark backdrop, you'll end up with a ridiculously over-exposed image. For anyone with a smartphone, tap your focus box onto your subject's face: it'll meter better and do its best to get the subject sharp.
It's already been mentioned, but it's so important, we'll re-state it: don't distract the cast and don't disturb or obstruct the view of anyone else in the audience. You need to be as discreet as possible. Keep your elbows in and noise to a minimum. And for heaven's sake, don't stand up.
If you can, try to take a photo of every person on stage, and those who've worked behind the scenes, too. You don't want anyone feeling left out. And in contravention of our general guidance, take lots of photos. It's the best way to ensure that you capture the action because things happen so fast.
Don't forget to keep an eye out for things that are happening away from the main action, too. Small children get bored, pull faces, and do cute and funny things. These are always worth capturing if you spot them.
Finally: enjoy it. Don't become so focused on taking photos that you miss your daughter's big line or your son's solo. They're meant to be the stars of the show and the centre of your attention, not your photos!
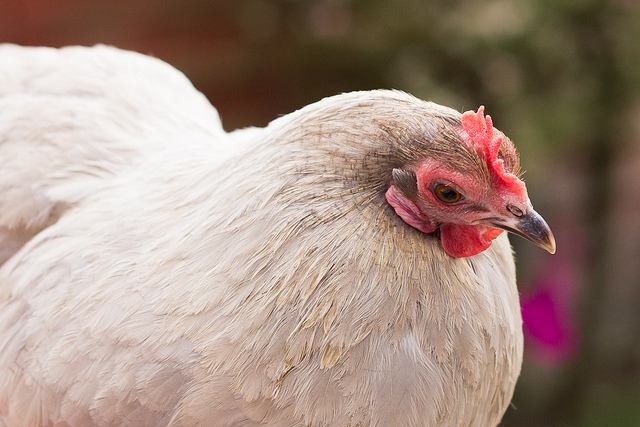
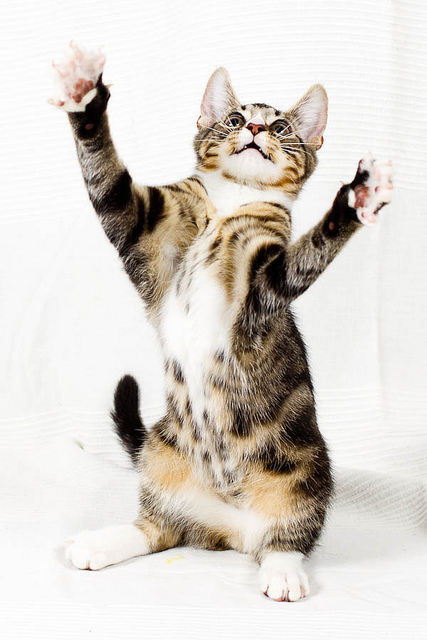
The number of photos of cats floating about the Intergoogles is testimony to how much we love photographing animals. But I bet we could all do it a bit better, whether they're our pets, cows on the closest farm, or gazelles in the wild. We've put together our top tips, dos and don't, and favourite recommendations for animal photography.
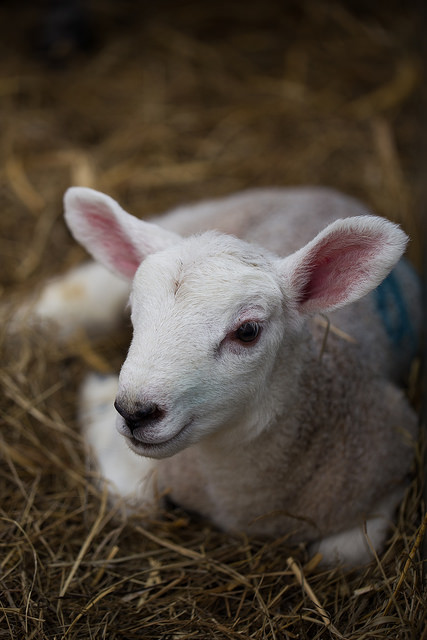
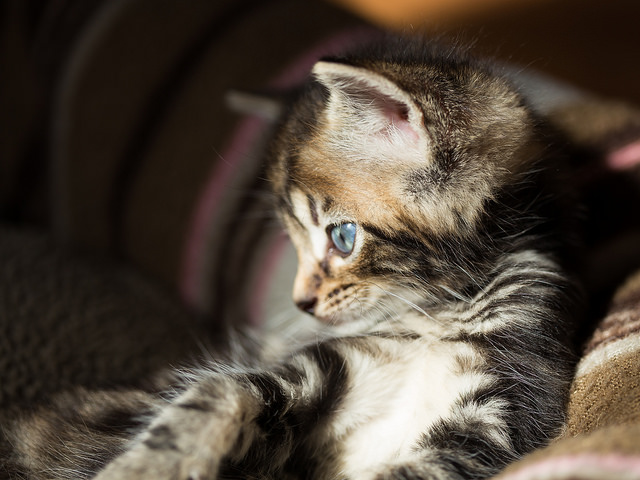
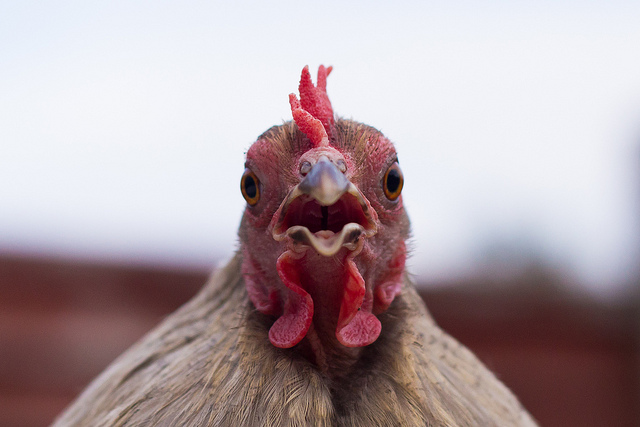
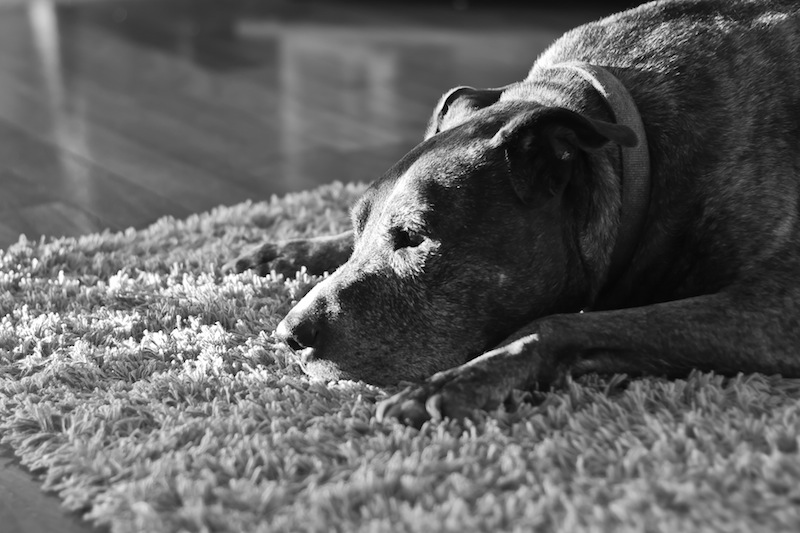
Photographing pets is distinctly similar to photographing children: get down to their level, gird yourself with patience, and be ready to move fast. Much like my favourite photos of my nieces and nephews, many of my favourite photos of animals have been captured sitting (or crouching, in the case of mucky straw) on the floor, allowing them to play about me and simply being ready to capture kittens, lambs, hens, dogs, and various assorted being cute or idiosyncratic.
The chances are that you'll be exhausted and maybe a bit dirty at the end of it, but you should have some good photos. There is, of course, a bit more to it than that.
When it comes to taking photos of animals, some things should be on the checklist every time.
Get the eyes in focus - just like a portrait of a human, your viewers will be looking to make eye-contact with the subject, so get the eyes sharp.
Capture spirit - again, it's the same with humans, you need the photograph to convey the playfulness, the inquisitiveness, or the quirkiness of the animal.
The subject needs to be doing something - it doesn't matter if it's a dog asleep in a contrived position or a kitten chasing a toy, there needs to be something of interest happening in the shot.
Consider the background - you don't want clutter or a litter tray in the background of your photos, so pay attention to where you're taking them.
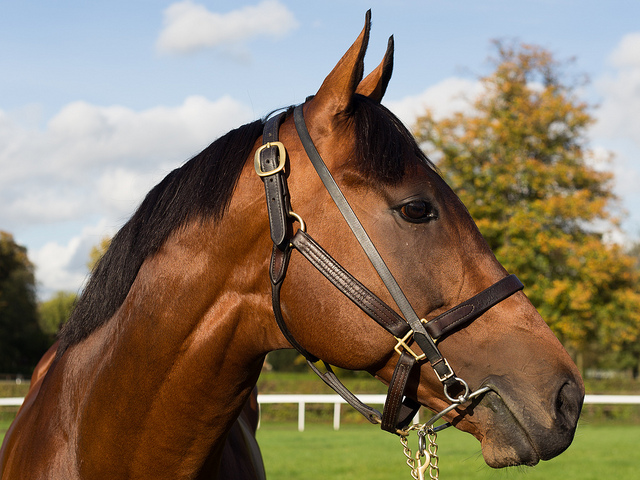
Be respectful - Don't do anything that hurts or distresses an animal for the sake of a photo. Don't pick up rabbits by their ears, provoke dogs, or yank horses' chiffneys or headcollars. Not only will the animal not like you for it, but it's unacceptable behaviour.
Depending on the type of photo you're trying to take, you will need to make some choices. There's no right or wrong to these points; they're up for consideration.
Flash - Some people say avoid it altogether, others say use it judiciously. I'd say for heavens sake don't startle a sleeping dog or potentially damage a very young animal's eyes with flash, but used properly, you can produce some cracking shots with artificial light.
Kit - I've photographed animals with all sorts of camera and lens combinations. Sometimes, it's been a case of grabbing what's closest, so my iPhone, to ensure that I didn't miss the moment. Then again, I've headed down to the yard armed with all manner of lenses and a dSLR for photographing horses. Remember the adage that the best camera is the one you have with you, but don't forget to think about what you're trying to achieve with your photos, from portraits to macros to action shots, and select your kit appropriately.
Use a fast shutter speed - Unless you're trying panning, do aim to keep your shutter speed as fast as possible to avoid motion blur, particularly if you're aiming to capture animals at play. Up the ISO if you need to; noise is easier to fix than blur.
Consider your angles and proximity - while it's advisable to get down to the same level as your subjects, do consider shooting from above and below, too. The key here is to consider what you're doing and the story you're telling, rather than reverting to the default of standing up to shoot.
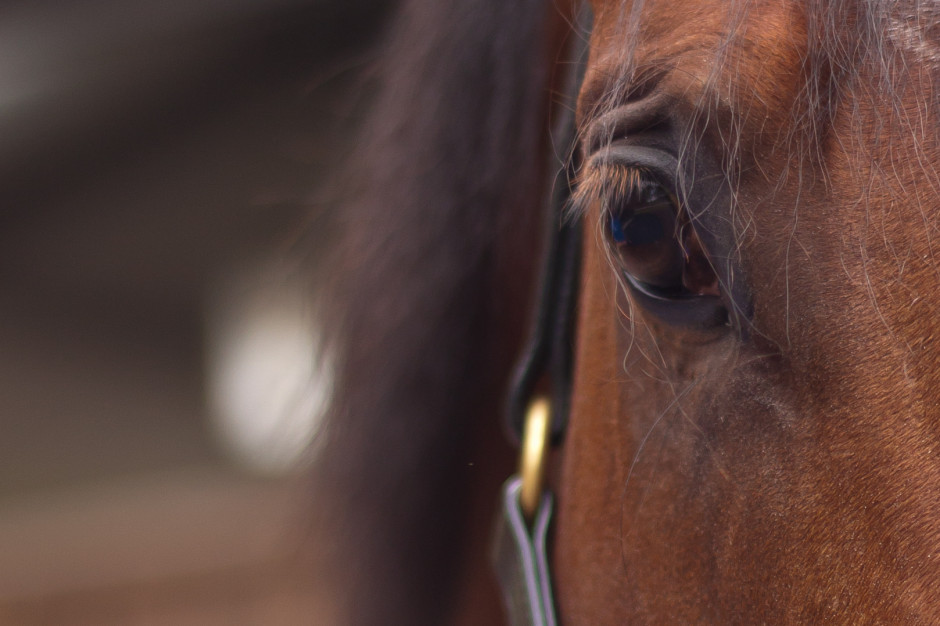
As well as the usual recommendation of getting closer, have you considered getting really close to your subject? Macro and abstract shots can work wonderfully to intrigue, inspire, and give a different perspective on your subject.
Grabbing their attention - I talk to dogs, use toys for cats, and make clip-clopping noises to encourage horses to prick their ears. If you know your pet, you'll know how to distract it or attract its attention. If the subject isn't your pet, talk to its owner.
Cats scratch, dogs bite, and horses kick. They're also sentient and can be unpredictable. Don't do anything to upset your subjects or that endangers you. It's common sense, really.
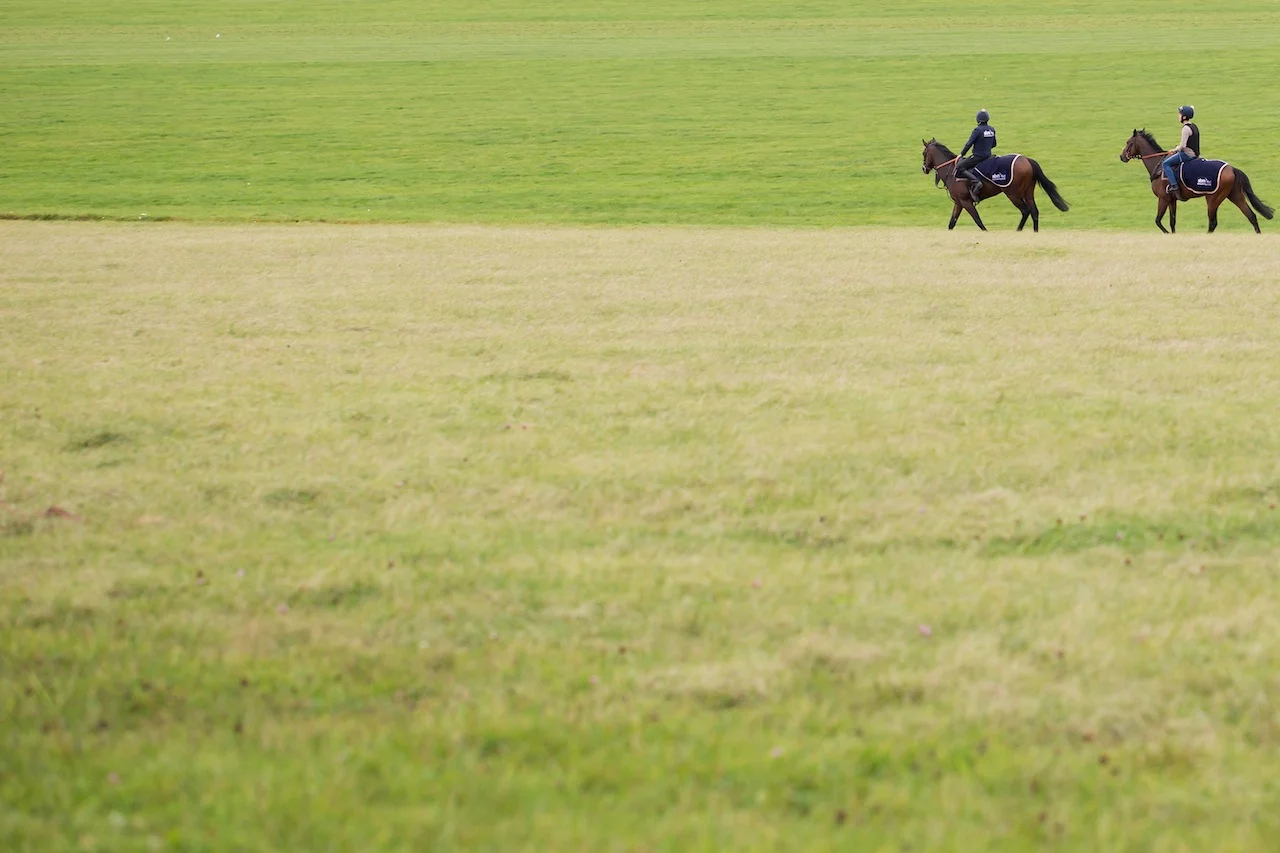
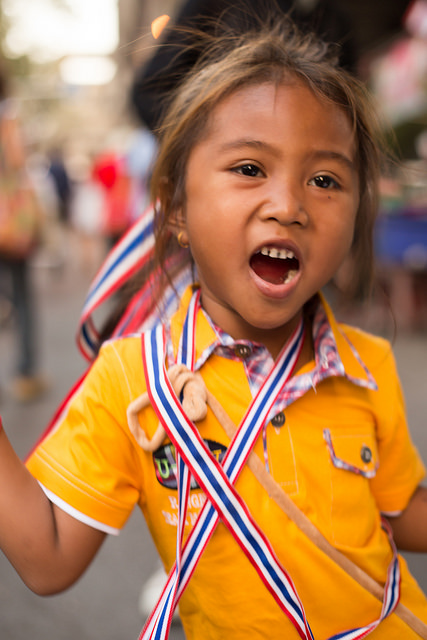
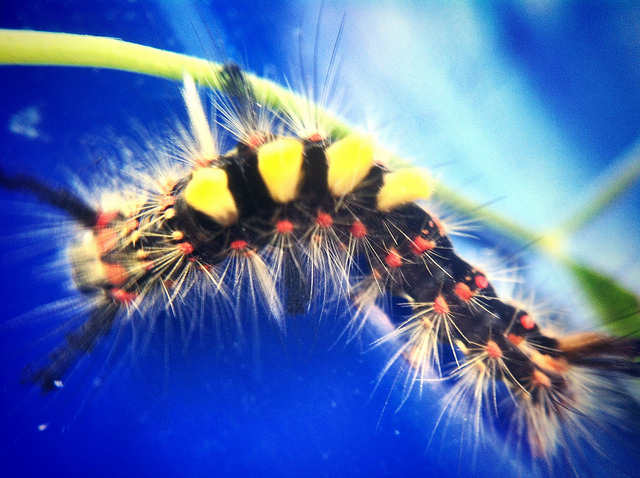
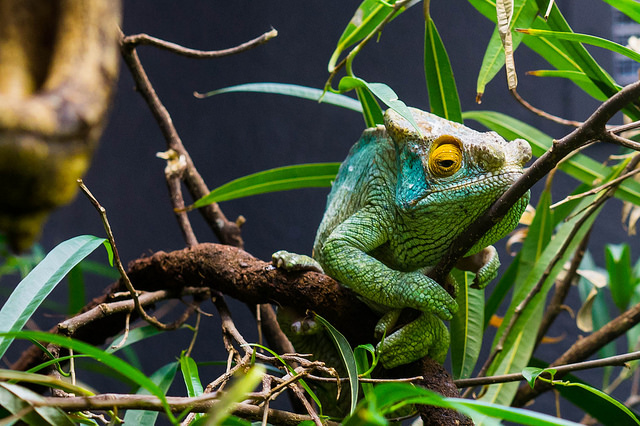
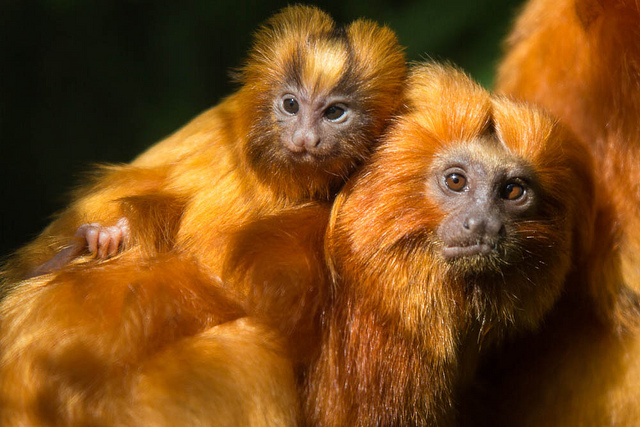
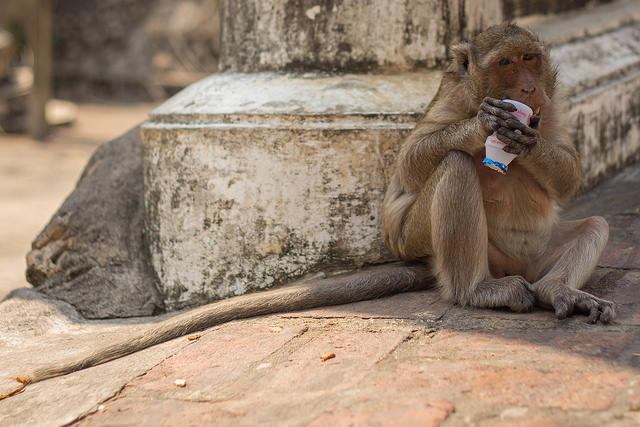
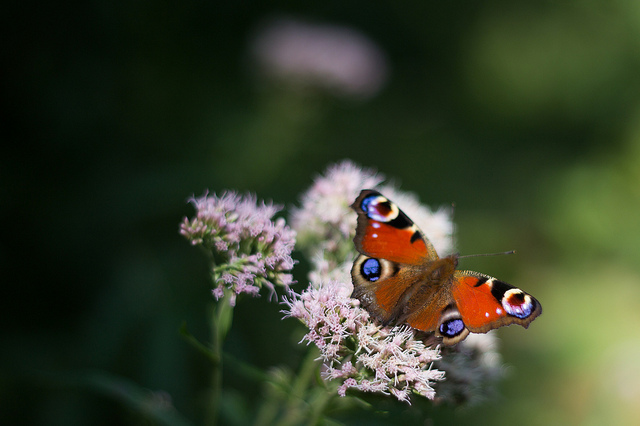
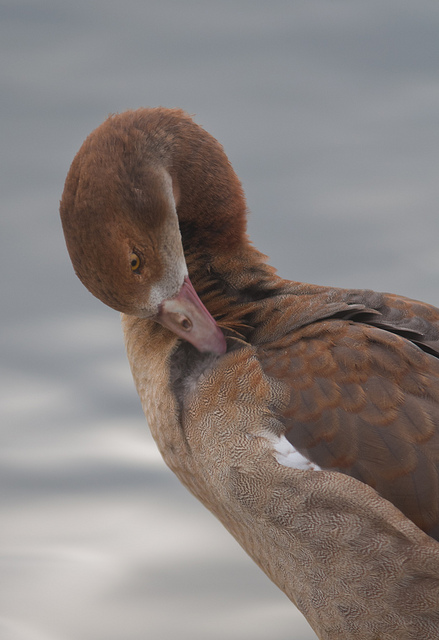
While photographing pets is similar to photographing children, you might notice some similarities between wildlife and sports photography. You're going to be out in the elements, watching for the perfect moment, and most likely with a big lens. However, wildlife photography isn't restricted to the African savannah. There are squirrels in the park, birds in the woods, spiders in their webs, and wild monkeys in the Thai temple complexes. You don't have to travel to exotic locations to take wonderful wildlife photos. And if you are fortunate enough to be going on safari, you can always get in some practice with deer at home.
Know your subject - If you want to make the most out of your subject, then you need to know what to expect from it. Where are you likely to find it? When is it active? When does it feed? What should and shouldn't you do around it? There's little point arriving in the Serengeti in June and expecting to see wildebeest, as by then they'll be on their way to the Masai Mara.
Know your kit - In order to be able to capture the wildlife images of your wildest dreams, you need to be intimately acquainted with your kit and understand its precise capabilities. How many extra stops does your image stabilisation really give you? What's the slowest speed at which you can hand-hold your camera? How high can you push your ISO before noise really becomes a problem? What's the optimal aperture for sharpness with your lenses? Do any of them have a proclivity to flare?
The better that you know your kit, the less time you'll have to spend fiddling and faffing and the more likely you are to make a crucial moment.
Use support - You might not necessarily want to use a tripod: it could be too cumbersome and too slow to move, but the chances are you'll need some kind of support for your camera when out in the field, particularly if you're using a long lens. Think about all of the options, from monopods to beanbags, and decide which one will work best for you.
Be prepared - This isn't just about ensuring that you have the right camera kit with you and to hand, but also the right personal kit. In addition to cameras, lenses, filters, supports, remote triggers, batteries, and memory cards, you need to be dressed appropriately for the conditions and with changes of clothes if necessary. If you're as much as a feast for mosquitoes as I am, you'll need suitable insect repellant. You need to consider food and drink and appropriate storage for it. Do you require permits or a guide? And don't forget your sunscreen.
Capture action - The same as with pets and domesticated animals, aim to photograph action. Or at least if an animal is doing nothing, it needs to be doing nothing in an interesting way, for example with a glorious sunrise behind it, or curled up asleep in an unlikely pose.
Wide and close - You might well be using a long lens to photograph wildlife just to get close enough to identify it, but don't restrict yourself to close-ups. Think about placing your subject in its environment and providing it with context. Primarily, this is important for story-telling, but if you have travelled a long way to experience something magical, you'll want to record that, too.
Conversely, abstract close-ups can make for very striking photos. Don't be afraid to experiment!
Consider the light - While it probably should go without saying to think carefully about the quality, quantity, and direction of light, it's worth repeating. You might well find that as well as providing the best light for photography, the golden hours are also when many animals are at their most active.
Be careful and enjoy - Just as with pet and domesticated animal photography, be careful and be respectful. Don't do anything to endanger yourself or your subjects. Remember to adhere to the required codes and to clean up after yourself.
Finally, remember to enjoy it. Absorb the atmosphere and don't be afraid to put down your camera, either. Sometimes the picture in your memory can be better than the one taken by your camera.
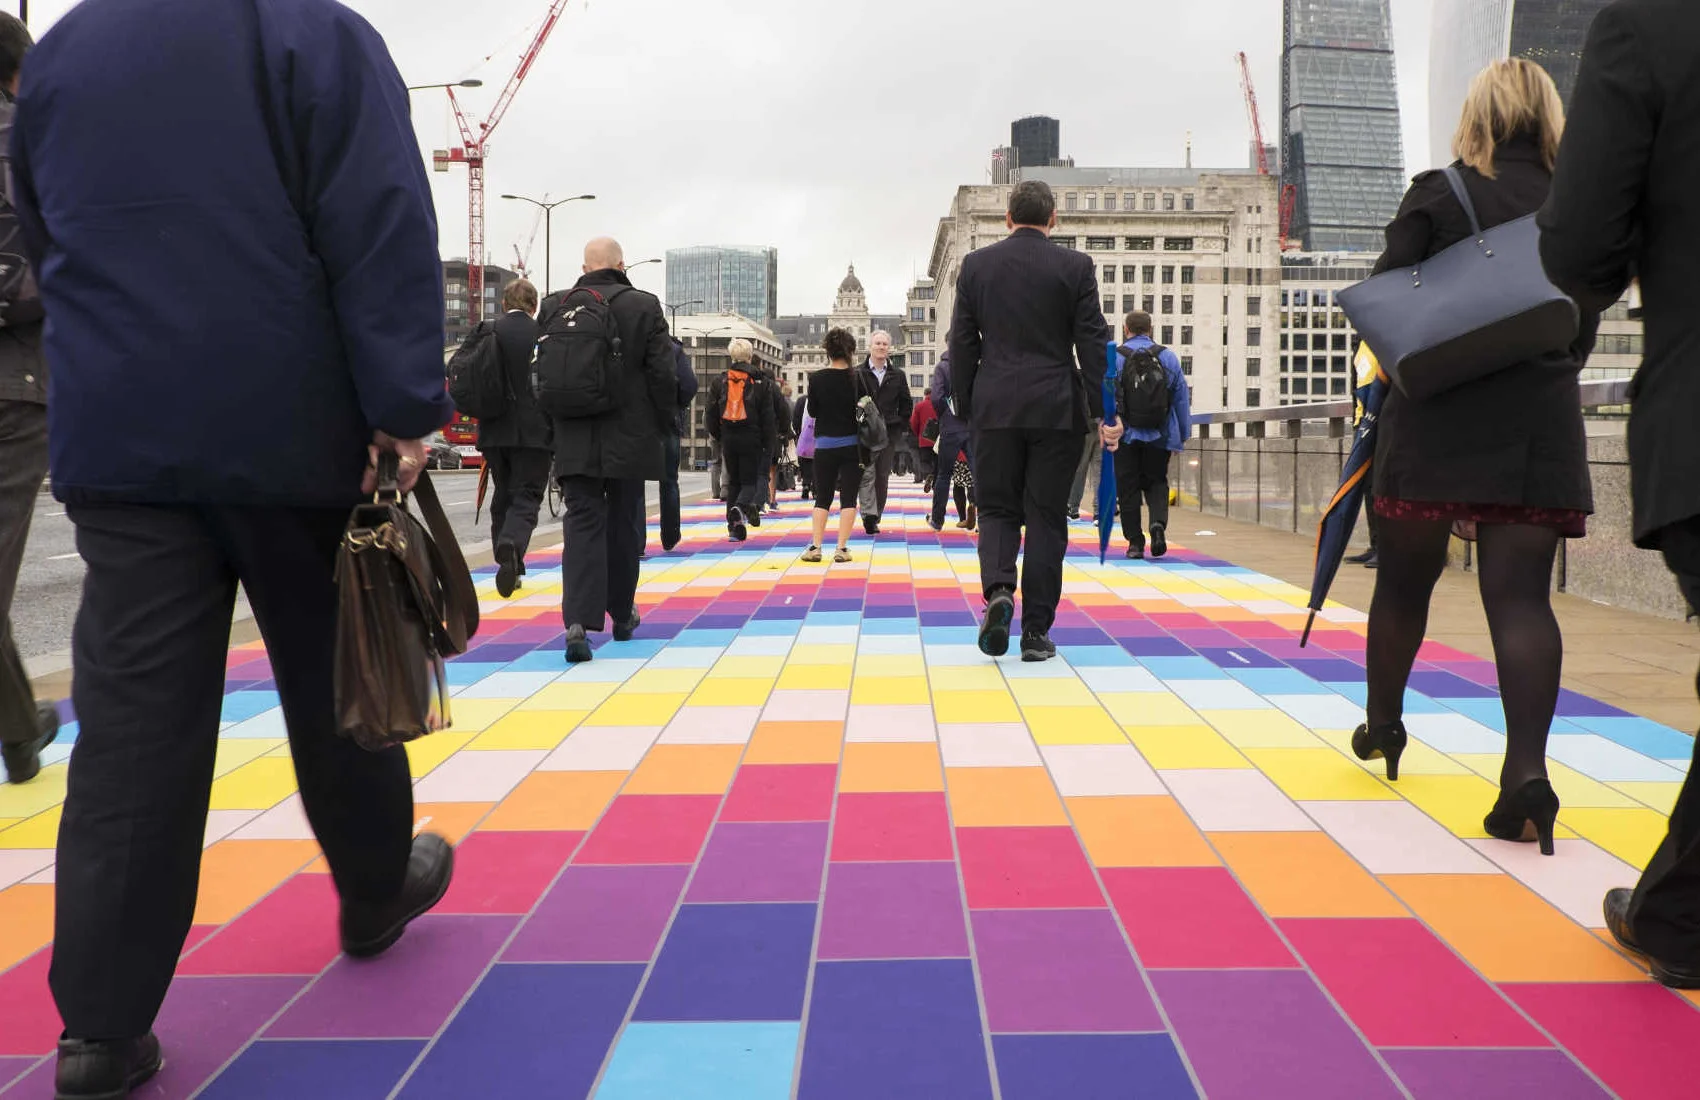
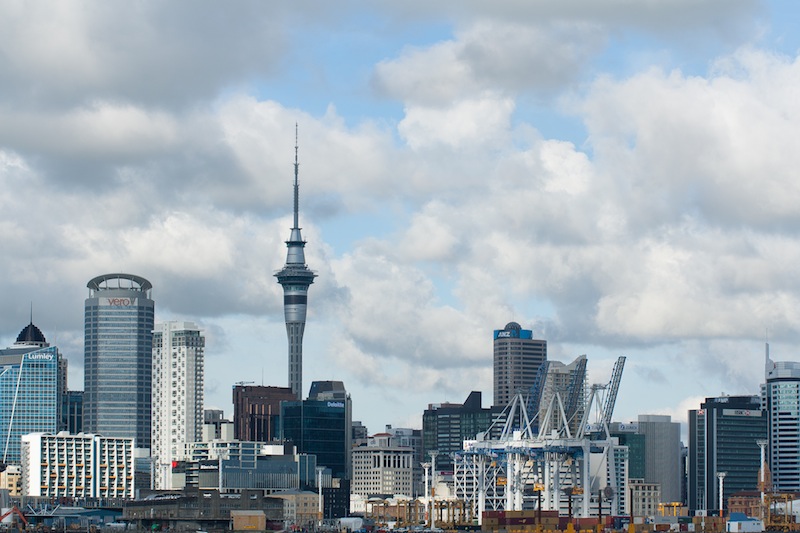
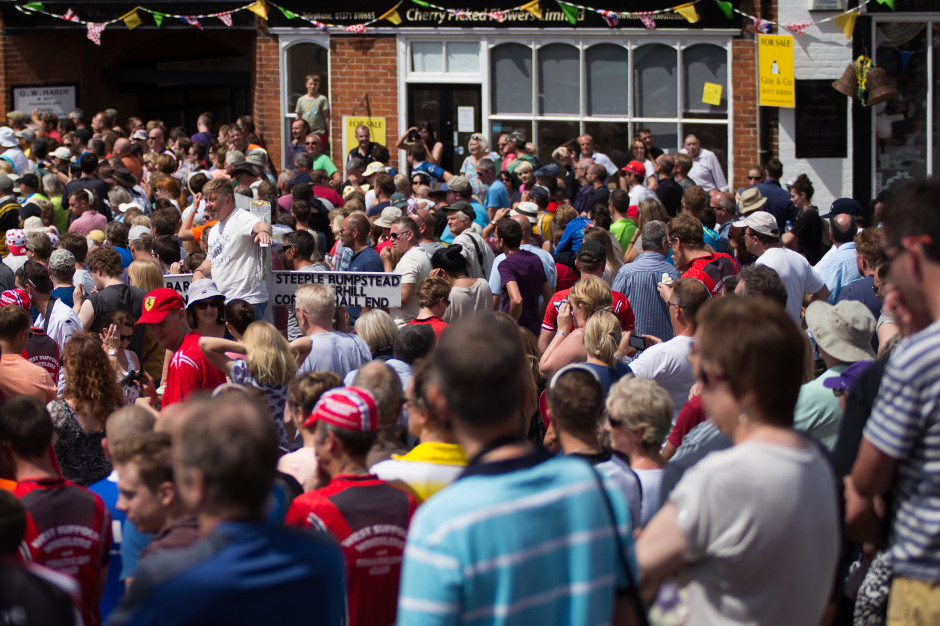
'Tis the summer (here in the northern hemisphere). 'Tis the season for festivals and fairs and fetes. 'Tis the season when people might want to capture crowd scenes with their cameras. Shooting crowd scenes is easy, yes? There's so much going on that all you have to do is raise your camera, point it in the right direction, and shoot to produce an interesting photo, yes? Ehm... no. Anyone who's ever tried to take a compelling crowd scene photo will appreciate that it's far harder to get it right than it is to get it wrong. Frequently, crowd photos emerge as amorphous collections of strangers with no clear narrative or obvious focal point. Anyone whose attention doesn't wander irretrievably will be left asking 'So it's a photo of what?' But mostly the eye will scan over an ordinary crowd scene shot, fail to find anything of interest and be drawn into the story, and move on to the next shiny thing. Your audience is gone.
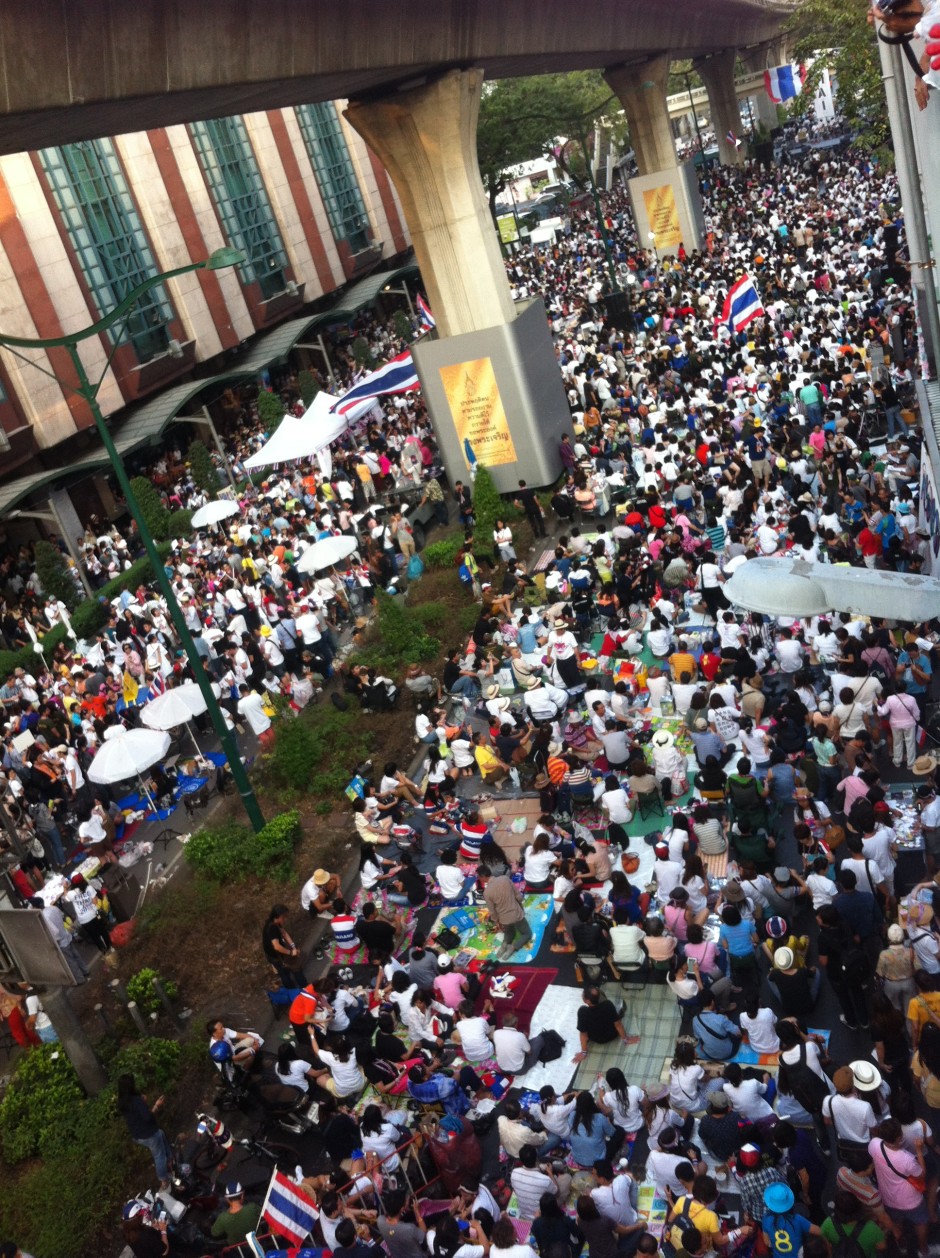
What makes crowd photos so difficult? The very fact that there is so much going on in these scenes is usually their undoing. Every photo must tell a story. (Along with 'Get closer!' and 'Just because it's on the Intergoogles, it doesn't mean it's free to use!' it forms the third edge of the Photocritic mantra triumvirate.) Rather than expecting your audience to determine what the story might be among the tens, maybe even hundreds, of people, you have to set about deciding on what the story is and composing an image that conveys that.
When you're thrust amongst a crowd, or are perhaps looking down upon one, ask yourself: 'What am I trying to relate here? What's the story?'
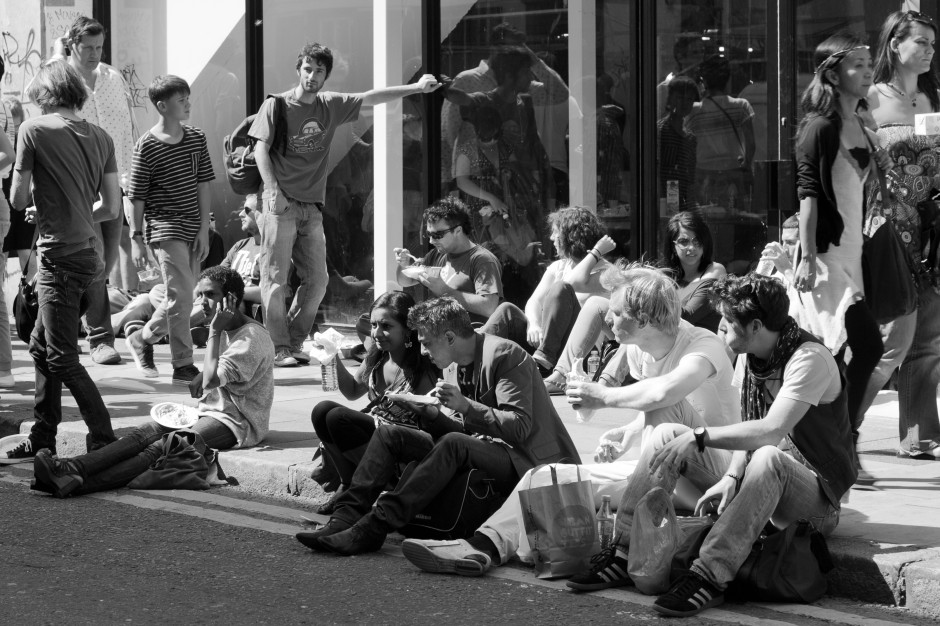
Perhaps it's the sheer number of people? Maybe it's the focus of thousands of individuals on one figure on a stage? Is it a solitary red shirt in a sea of blue? Sometimes it's a case of waiting patiently for that moment: a sting of eye contact, a dropped doll, a wearied pause. Define the story and you're halfway to creating a compelling image.
Now, ask yourself: 'What can I do to convey this?' How you compose and expose your photo will ensure that your audience can grasp what you're trying to say and will help them to connect with it.

When you're trying to express numbers, find a point of juxtaposition to emphasise them: look for something small or noticeable that stands out and contrasts against the heaving mass. When a horde is focused on one thing, use lines to direct the viewers' eyes and channel them into the moment. For an aberration in the flow of things, try to isolate the rogue figure and plant it amongst the norm.
Rather than point and shoot, hoping that you'll produce an image that people will find interesting, draw on your compositional skills—the rule of thirds, leading lines, colour theory, pattern and repetition—together with your technical knowledge—focal length, aperture, shutter speed, and metering—to tell a story. Then you'll capture the crowd.
Now that everyone has got over their shock that Apple will be consolidating its image editing and organisation features later this year, with the result that its top-end programme Aperture will be closing up completely, people are probably beginning to think about alternatives. I've pulled together ten Aperture alternatives and sought out their positive and negative features. They're all Raw compatible, but do double-check their non-destructive capability. A standard gripe for the majority of these programmes is that they're tricky to get to learn, or that the interfaces aren't intuitive. While it is entirely possible that some of these programmes do have seriously unfriendly workflows and interfaces, it might also a case of them being different to what you know. I remember opening Lightroom for the first time and wondering if it controlled the International Space Station, too. It's all a learning curve. Still, it's probably worth bearing in mind that the open-source options don't have such pretty interfaces as the paid-for programmes.
And finally, we really don't know what Apple's plans are for its photo management and editing programmes. It's possible that Aperture's features will be integrated into whatever comes next. Or maybe they won't, if Apple is looking for a simpler, more consumer-friendly package. But it remains to be seen.
Lightroom is probably the most obvious option for people looking for an Aperture replacement. It's a comprehensive editing suite that sets the standard in its field. In addition to the expected functions, Lightroom includes advanced features such as brushes, gradient tools and specific lens corrections. It's my editing suite of choice that I feel offers me almost everything I want in an image editor.
However, some photographers—me included—are concerned that the option to purchase Lightroom as a stand-alone editor will be subsumed into the subscription model Creative Cloud and we'll find ourselves beholden to Adobe in perpetuity. If the potential for that bothers you, you might wish to look elsewhere.
Lightroom perpetual licence: £102.57 Adobe Photography CC bundle (Photoshop CC + Lightroom): £8.78 ($9.99)/month
If anyone doubted that Corel were still in business, yes, it is. And if you're wondering what happened to image editing software Bibble, it was bought by Corel... and became AfterShot Pro. The first version met with significant criticism for lack of basic features such as red eye correction and a reset button. This has been corrected for version 2, together with improved batch editing features and new noise reduction features. By all accounts, it's a pretty nippy piece of kit.
Corel has also stated that it is looking to make life as easy as possible for Aperture users who are looking for a alternative programme. It's reasonable price together with its comprehensive feature set makes AfterShot Pro a compelling option. And you can check it out for free before buying, too.

Corel After Shot Pro: £57.99 (usually $79.99, currently $59.99)
PhotoDirector claims itself to be 'a unique application that combines all the features you need for photography in a single workflow – efficient photo management, complete adjustment and creative editing.' It comes with some serious editing firepower—from body-slimming tools to content aware object removal—and some sparkling reviews. You can try before you buy with a 30 day free trial. If the PhotoDirector Suite is a bit too pricey for you, have a look at PhotoDirector Ultra, instead.

Cyberlink PhotoDirector: £114.99 (currently £89.99)
You might think of Capture One as being a medium format image processor, but it's capable of handling dSLR- and EVIL-created files, too. It's history of medium format processing means that many of the features that you're accustomed to seeing in places such as Photoshop as well as Aperture and Lightroom come as standard in Capture One. You might need to take a deep breath when you look at the price, but there is a free trial to test it out first.
Phase One Capture One: €229 (currently €114)
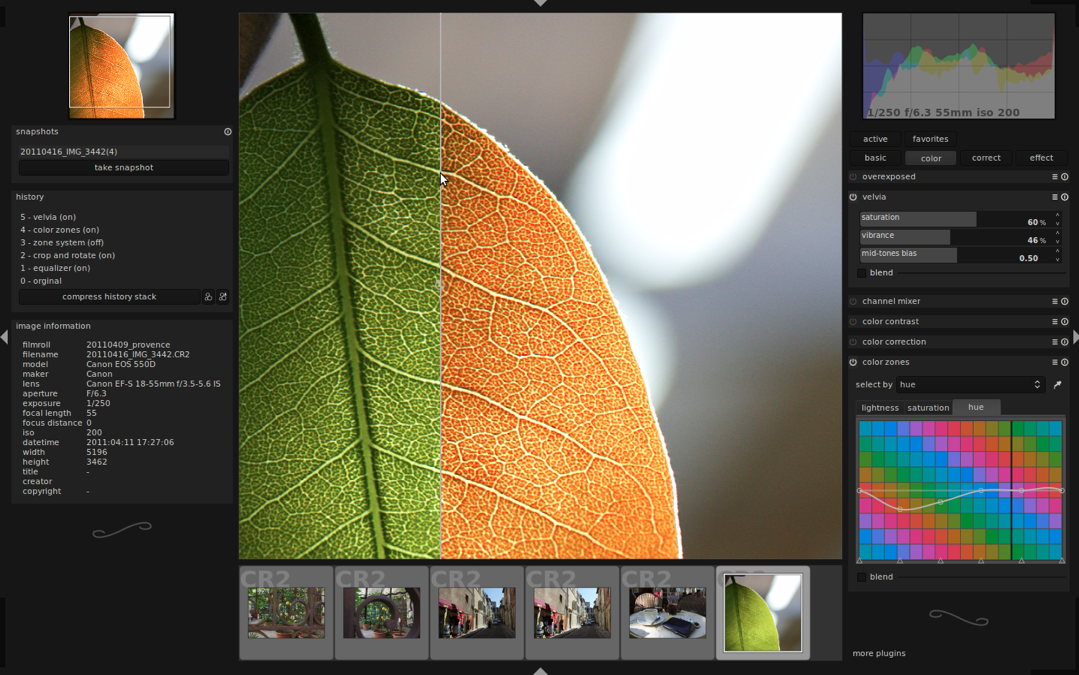
Darktable is a free, open-source image editing suite that does seem to offer the most comprehensive and user-friendly experience without having to pay for anything. While one should never judge a book by its cover, the Darktable website is the most professional looking one in the open-source category.
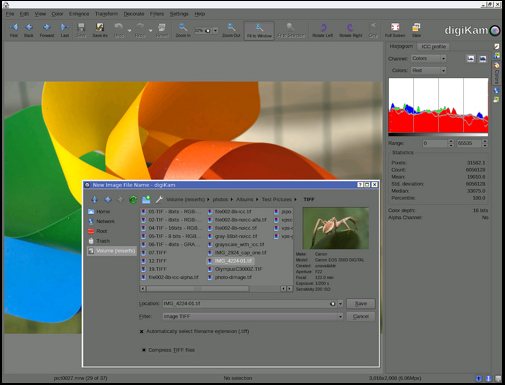
The digiKam website does give me a mild headache, but plenty of people seem to like the software. In particular it includes some features that aren't available in places such as Lightroom yet, for example fuzzy search and facial recognition.
Once upon a time, Lightzone was a commercial enterprise under the aegis of the now-defunct Light Craft company. It went off-line unexpectedly in Sepember 2011, but resurfaced as an open-source initiative tentatively in December 2012 and then more fully in June 2013. Given it was once a commercial product, Lightzone does benefit from better-than-average-for-anope-source-project documentation.

Hasselblad's Phocus might have started out for Hasselblad cameras, but it now supports a wide range of manufacturers' devices.
Most of what I've read about Photivo suggests that it's a powerful piece of kit, but that it isn't necessarily easy to leap into it and get started. It doesn't offer any management features, just development functions, and is open about it not being for beginners.
Raw Therapee seems to offer a peculiar mix of some incredibly advanced editing capability with some serious oversights. While its demosaicing feature is super for low noise images, it's reported that it doesn't cope well with noisier photos. With today's strospheric ISOs, it might be a dciding factor.

There have been at least two pieces of news this week featuring companies that sell stock images created on mobile devices: first, EyeEm announced that it has redesigned its Android app and has partnered with Uber to offer new users a free ride to let them go places to take photos; second, Fotolia has also released a new Android app—Fotolia Instant—to complement its iOS version, which allows photographers to upload and sell their mobile images via the stock site. This got me thinking: how many stock agencies are mobile photo-friendly? Or where can you buy images made on mobile devices if that's what you want or need? I did a little digging and a little thinking and put together this list. I've tried to limit it to agencies or sites that are mobile-specific, have dedicated mobile collections, or easy means of uploading mobile images. There are sites such as Picfair that readily accept mobile images, but that's just part of its library.
![]()
EyeEm is a mobile photography sharing app and community that launched Market, a platform for its members to sell their photos, earlier this year. Invitations are still being issued to join Market, but it's simple enough to request one.
EyeEm Market EyeEm apps: Android; iOS

Images can only be uploaded to Foap via its app. As well as adding images to the Foap library, image-makers can participate in missions set by brands and agencies searching for more specific content. Foap's terms of use are quite broad, which is worthy of consideration before deciding to sell images there.
Foap website Foap apps: Android, iOS

Scoopshot expands on Foap's model, with buyers setting tasks for photographers in order to acquire the images they want. If someone sees a news image that they think is vaulable, it can be sent to the news task. Scoopshot doesn't go in for manipulated or filtered images; they prefer fresh and newsworthy content that meets task criteria.
Scoopshot website Scoopshot apps: Android, iOS

We took a look at Twenty20 last year and while we thought its simple pricing structure for selling mobile image files was great, the sales mechanism required some refinement. It's still in the beta stage, but it is there!
Twenty20 website Twenty20 app (iOS only)

The more traditional Alamy stock agency has embraced mobile photography and its photographers can use the Stockimo app to upload their mobile images for sale amongst the Alamy library. Buyers can look for mobile images in the dedicated Stockimo collection.
Alamy website Alamy Stockimo collection Alamy Stockimo app (iOS-only)

Depositphotos is a microstock agency that sells images under royalty free licences. It has a dedicated mobile photography app and collection: Clashot.
Depositphotos Clashot Clashot apps: Android, iOS

Fotolia is home to over 20 million images and it's prepared to add mobile photos into that mix. You can find all its mobile images in its Fotolia Instant collection.
Fotolia website Fotolia Instant collection Fotolia Instant apps: Android, iOS

When people think of stock agencies, they think of Getty. If they don't think specifically of Getty, they might well think of a Getty subsidiary. Getty photographers are being invited to join Moment, along with the old Flickr collection, while new photographers should be able to join in due course. Whether or not you want to get involved with the Getty licensing machine is another matter.
Getty Images Getty Moment app (iOS-only)
Any other suggestions? Leave them in the comments section!