Blur isn't always bad. We show you why, and how to manipulate it to your creative advantage.

When you hear the term 'high-res' thrown about with such abandon when it comes to images for web use, have you ever stopped to think just how big or how high quality and image meant for the web needs to be?
There's an assumption that high-contrast images are more dynamic, more compelling, more inviting. Have a go at some low-contrast photography. You might surprise yourself with the results.
Balance doesn't mean symmetry; it means an internal consistency and tension within your photos. And it's a vital element of composition.
Great photos might be down to a little bit of luck, but most of that 'luck' you make yourself. Don't believe us? Read on...
As a photographer one of the first things that you need to understand is exposure, or how to control light to create an image. If you're new to photography or have just picked up a camera with manual control for the first time, we suggest that you start here. Learning how to manipulate light to achieve the shots that you want is a life-long project, but these are the foundations.
We're probably all familiar with the notion of aperture controlling the depth-of-field in our photos. By using a faster aperture, you create a shallower depth-of-field. To keep more of your image in focus, you need to use a smaller aperture. But there's a whole lot more to depth-of-field than adjusting your aperture to get more or less of the scene in focus.
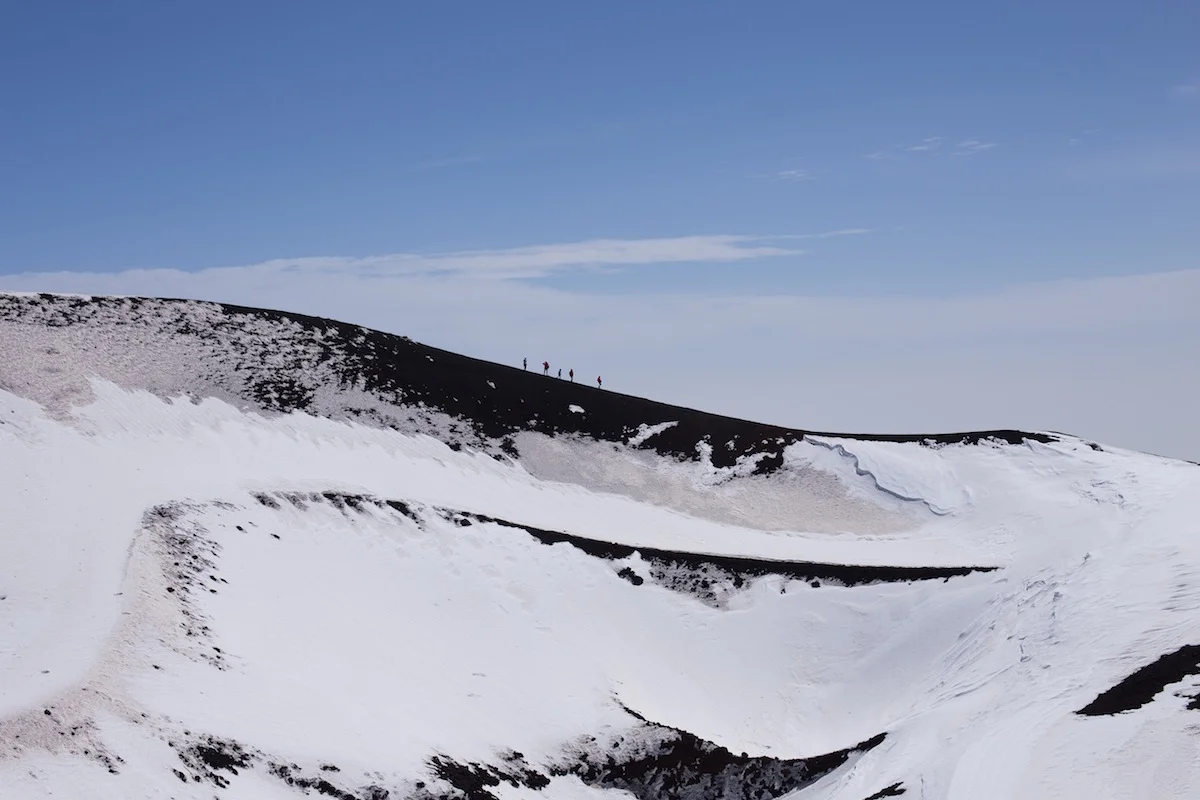
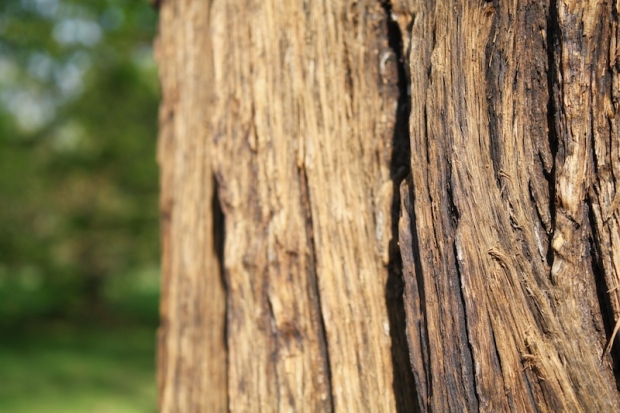
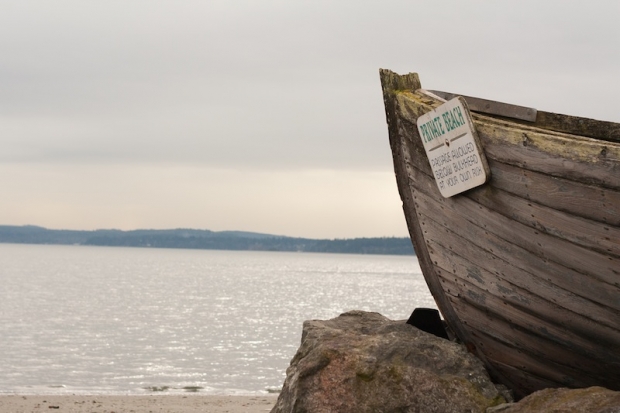
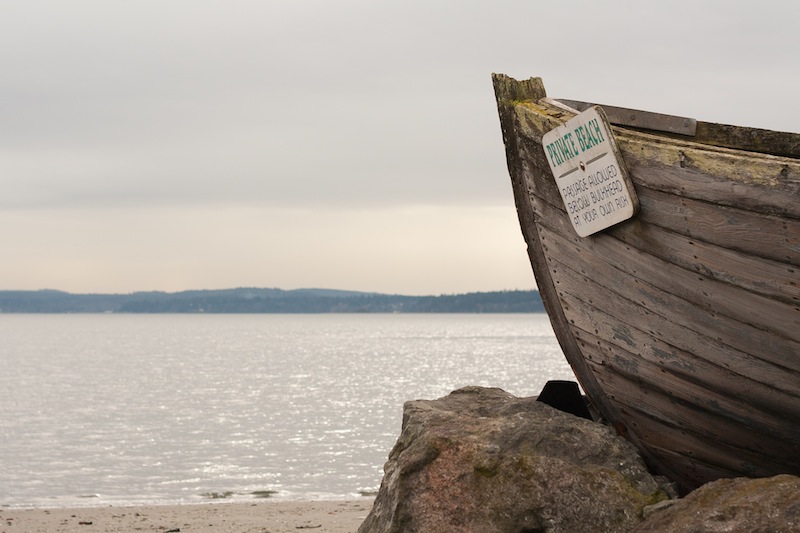
Let's start with setting out what we mean by depth-of-field. It's the range of distance in a photo that is considered to be 'acceptably sharp', or what we would regard as 'in focus'. Only the actual point of focus in a photograph is definitively sharp and 'in focus'; depth-of-field describes the zone of acceptable sharpness either side of it. A wider band of 'acceptable sharpness' running through an image equates to a greater depth-of-field. To introduce more blur into your photos you would want a shallower depth-of-field with a narrower band that's 'acceptably sharp'.
It's worth remembering that there's no sudden transtition from 'sharp' to 'unsharp': focus falls off gently on either side of the plane of focus, regardless of the aperture you use. It is fair to say, though, that larger apertures have a more rapid transition from in- to out-of-focus than larger apertures.
[gallery ids="6855,6856,6857"]
Controlling the depth-of-field in an image is achieved primarily by adjusting your aperture—a smaller aperture for a greater depth-of-field; a larger aperture for a shallower depth-of-field—however, there are other factors that affect it, too.
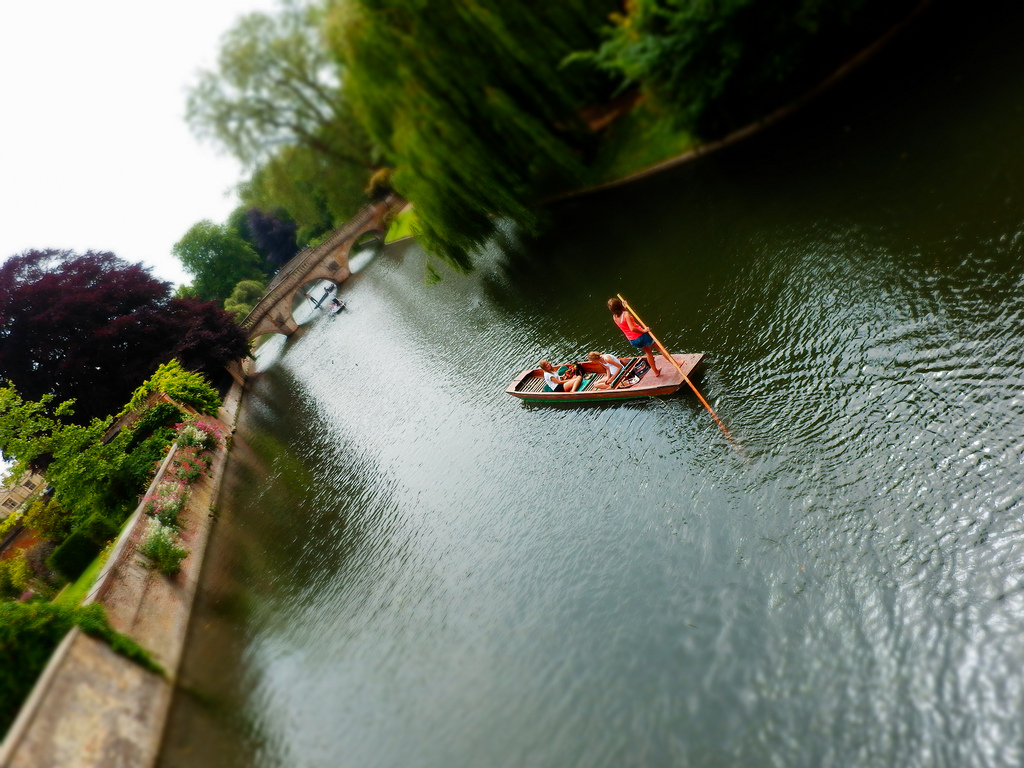
You'll often hear people say that telephoto lenses have a shallower depth-of-field than wider angled lenses. This isn’t strictly true. It’s more accurate to say that because telephoto lenses are mostly used to magnify subjects, and the subject will then fill more of the frame relative to the background, the depth-of-field appears to be shallower.
All the same, it's worth capitalising on the magnifying effect from telephoto lenses to pick out your subjects and surround them with blurred foregounds and backgrounds.
If you've ever practised macro photography, you'll appreciate how getting closer to your subject makes it harder to get it all sharp. The closer that you position your subject to your lens, the shallower your depth-of-field will be. Choose a subject further into the background and you'll find that the depth-of-field surrounding it is larger.
Depending on the focal length you use, you will find that the depth-of-field isn't divided equally in front of and behind the plane of focus. Instead, the area of acceptable sharpness behind the point of focus is generally larger than that extending in front of the focal plane. As focal length increases, so too does the distribution of the depth-of-field in front of the subject.
When you shoot with a focal length of 15mm about two thirds of the depth-of-field will be behind the subject and one third in front of it. When you get to 400mm it's closer to a fifty-fifty divide.
Depth-of-field: not just about aperture.
Now that everyone has got over their shock that Apple will be consolidating its image editing and organisation features later this year, with the result that its top-end programme Aperture will be closing up completely, people are probably beginning to think about alternatives. I've pulled together ten Aperture alternatives and sought out their positive and negative features. They're all Raw compatible, but do double-check their non-destructive capability. A standard gripe for the majority of these programmes is that they're tricky to get to learn, or that the interfaces aren't intuitive. While it is entirely possible that some of these programmes do have seriously unfriendly workflows and interfaces, it might also a case of them being different to what you know. I remember opening Lightroom for the first time and wondering if it controlled the International Space Station, too. It's all a learning curve. Still, it's probably worth bearing in mind that the open-source options don't have such pretty interfaces as the paid-for programmes.
And finally, we really don't know what Apple's plans are for its photo management and editing programmes. It's possible that Aperture's features will be integrated into whatever comes next. Or maybe they won't, if Apple is looking for a simpler, more consumer-friendly package. But it remains to be seen.
Lightroom is probably the most obvious option for people looking for an Aperture replacement. It's a comprehensive editing suite that sets the standard in its field. In addition to the expected functions, Lightroom includes advanced features such as brushes, gradient tools and specific lens corrections. It's my editing suite of choice that I feel offers me almost everything I want in an image editor.
However, some photographers—me included—are concerned that the option to purchase Lightroom as a stand-alone editor will be subsumed into the subscription model Creative Cloud and we'll find ourselves beholden to Adobe in perpetuity. If the potential for that bothers you, you might wish to look elsewhere.
Lightroom perpetual licence: £102.57 Adobe Photography CC bundle (Photoshop CC + Lightroom): £8.78 ($9.99)/month
If anyone doubted that Corel were still in business, yes, it is. And if you're wondering what happened to image editing software Bibble, it was bought by Corel... and became AfterShot Pro. The first version met with significant criticism for lack of basic features such as red eye correction and a reset button. This has been corrected for version 2, together with improved batch editing features and new noise reduction features. By all accounts, it's a pretty nippy piece of kit.
Corel has also stated that it is looking to make life as easy as possible for Aperture users who are looking for a alternative programme. It's reasonable price together with its comprehensive feature set makes AfterShot Pro a compelling option. And you can check it out for free before buying, too.

Corel After Shot Pro: £57.99 (usually $79.99, currently $59.99)
PhotoDirector claims itself to be 'a unique application that combines all the features you need for photography in a single workflow – efficient photo management, complete adjustment and creative editing.' It comes with some serious editing firepower—from body-slimming tools to content aware object removal—and some sparkling reviews. You can try before you buy with a 30 day free trial. If the PhotoDirector Suite is a bit too pricey for you, have a look at PhotoDirector Ultra, instead.

Cyberlink PhotoDirector: £114.99 (currently £89.99)
You might think of Capture One as being a medium format image processor, but it's capable of handling dSLR- and EVIL-created files, too. It's history of medium format processing means that many of the features that you're accustomed to seeing in places such as Photoshop as well as Aperture and Lightroom come as standard in Capture One. You might need to take a deep breath when you look at the price, but there is a free trial to test it out first.
Phase One Capture One: €229 (currently €114)
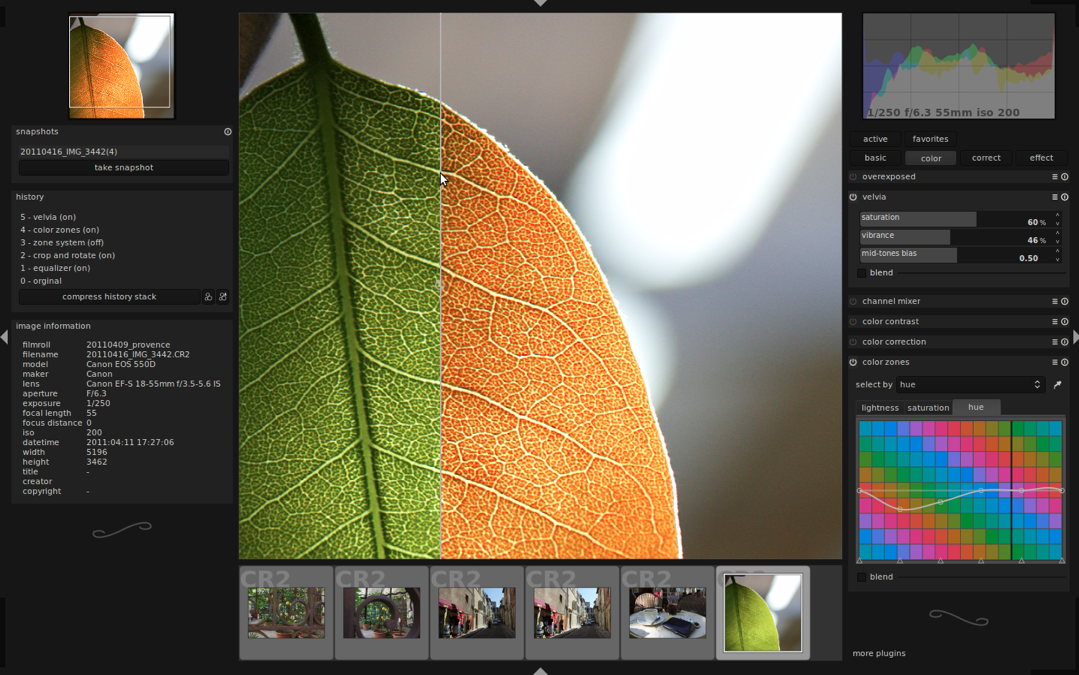
Darktable is a free, open-source image editing suite that does seem to offer the most comprehensive and user-friendly experience without having to pay for anything. While one should never judge a book by its cover, the Darktable website is the most professional looking one in the open-source category.
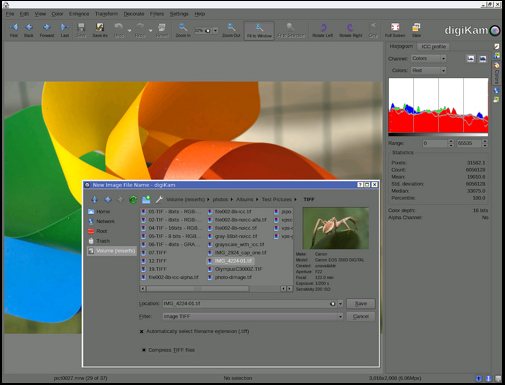
The digiKam website does give me a mild headache, but plenty of people seem to like the software. In particular it includes some features that aren't available in places such as Lightroom yet, for example fuzzy search and facial recognition.
Once upon a time, Lightzone was a commercial enterprise under the aegis of the now-defunct Light Craft company. It went off-line unexpectedly in Sepember 2011, but resurfaced as an open-source initiative tentatively in December 2012 and then more fully in June 2013. Given it was once a commercial product, Lightzone does benefit from better-than-average-for-anope-source-project documentation.

Hasselblad's Phocus might have started out for Hasselblad cameras, but it now supports a wide range of manufacturers' devices.
Most of what I've read about Photivo suggests that it's a powerful piece of kit, but that it isn't necessarily easy to leap into it and get started. It doesn't offer any management features, just development functions, and is open about it not being for beginners.
Raw Therapee seems to offer a peculiar mix of some incredibly advanced editing capability with some serious oversights. While its demosaicing feature is super for low noise images, it's reported that it doesn't cope well with noisier photos. With today's strospheric ISOs, it might be a dciding factor.

Just in case you've not had quite enough of your fill of Apple news over the past day or so, here's a run-down of the camera spec for the new iPhone 5s and 5c.

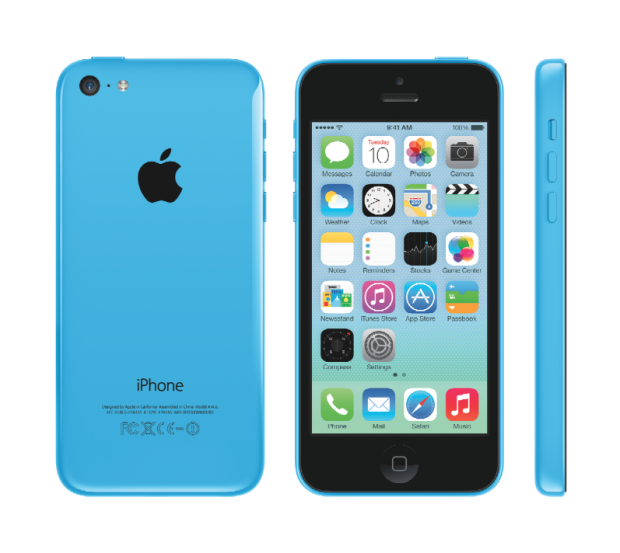
This camera is more akin to the iPhone 5's. It has an 8 megapixel sensor, but not the larger one of the 5s, and it is powered by the A6 chip so won't be as fast as the A7 version. It has an ƒ/2.4 lens, an LED flash, and no burst mode or slow-motion video.
I'm not the kind of person to go out and upgrade my phone on the basis of its camera alone, especially not when you're looking at paying $199 for the 16GB 5s, $299 for the 32GB version, and $399 for the 64GB 5s (if you qualify). If you're an iPhone 4s owner, you're not looking at any major camera upgrade by hopping to the 5c, so it really isn't worth the $99 for the 16GB model or $199 for the 32GB model, again, if you 'qualify'. If you're in need of a whole new phone, however, it might be a different matter.
Learning anything new comes with a whole spectrum of principles, terminology, and practices that have the potential to boil your brain, leave you mildly confused, or anywhere in between whilst you're getting to grips with them. Photography definitely comes with its own theories, vocabulary, and conventions and not knowing what people are talking about when they refer to 'noise' or 'speed' can make you feel about a pixel tall. To try to ease people's paths in photography and prevent eye-swivelling, mind-frying, and either mild or acute embarrassment, we're running a series on photography fundamentals, throwing a bit more light on the things you need to know. I could say that we're starting with aperture because it begins with a, but I'd be lying. We're starting with aperture because it was the first thing that sprang to mind.
Aperture: it might be basic, but it can also be a bit of a stumbling block for people who are just beginning in photography. For a start, altering aperture doesn't have a single effect on your images, but a dual one. As if that isn't enough to confound people, its scale isn't exactly intuitive. Still, understanding aperture is critical for both exposure and composition—the bedrock of photography—so we'd best crack on.
Aperture means ‘hole’ or ‘opening’. In a photography sense, the aperture is the gap that allows light to pass through the lens. The bigger the opening, or the aperture, the more light passes through. That’s pretty intuitive. When you’re taking pictures in low-light settings, a bigger aperture will help you to take a photo where you can see something.
If you’re taking pictures in bright sunlight, using a smaller aperture will help to prevent the image being one mass of white.
The second effect that aperture has on photographs concerns depth of field, or how much of an image is in focus. If you use a small aperture, you will notice that the depth of field in your photos will increase: more things in the background and foreground will be in focus.
Conversely, by increasing the size of your aperture (and allowing more light to reach your sensor), you will decrease the depth of field in an image. That means that less of the scene will be in focus.
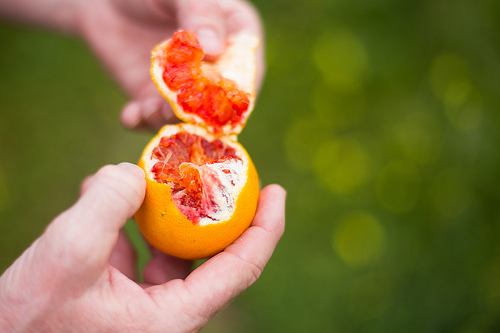
An aperture of ƒ/1.8 meant only a sliver of this blood orange was in sharp focus
When you hear people throwing around numbers such as ƒ/1.8, or ƒ/22, they are referring to aperture. Aperture is measured in ƒ-stops, with ƒ/1.4 being a very big aperture and ƒ/22 a very small aperture.
That the large number represents a small aperture and the small number indicates a large aperture can be more than a bit confusing. It will probably help to think of the ƒ-stop scale like this: those numbers correspond to fractions; the fraction being how big the aperture—or the opening—is. Thus ƒ/4 corresponds to a quarter and ƒ/8 to an eighth. An eighth is obviously smaller than a quarter; this means that it is a smaller aperture, it lets in less light and it gives a greater depth of field.
Finally, perhaps you're wondering what those fractions are fractions of? They’re fractions of the length of the lens you’re using. The aperture of a 28mm lens at ƒ/1 will be 28mm. Similarly, the aperture of a 50mm lens at ƒ/4 will be 12.5mm. The bigger the ƒ-stop, the smaller the aperture.
You know what, go out and take some photos altering the aperture value on your camera. Then you’ll see what we mean!
Photography Fundamentals >> Contrast
There's a lot of wood in Kew Gardens
We'll keep this simple. The theme for November's photo contest is wood, from trees coming into bud in the southern hemisphere, to bonfires piled high in the UK, or log cabins in mountainous retreats.
Yes, I might've been inspired by the terrible threat of ash dieback to UK woodlands, especially in East Anglia where my family home is.
You have from today (Friday 2 November) to Friday 30 November to submit your entries to the Small Aperture Flickr pool. It's one submission per person, and the picture that we like the most will win a 12" Fracture.
I've reproduced The Rules for you, and if you're in the UK, I'm adding a small reminder to be careful and avoid spreading the horrible fungus.
The Rules
If you've any questions, please just ask!

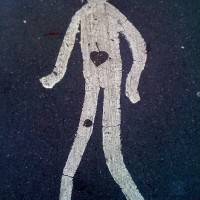
For my sins, that's a portrait of me, by me
For the past month, and for the next couple of months, Haje will be immersed in self portraits as he writes his latest book. No, no, don't get the wrong idea! He doesn't boost his ego by surrounding himself with inspirational pictures of his mush when he's writing. He's writing about self-portraiture. We thought, then, that you might like to share your favourite self portraits for September's competition.
Dress up or dress down, drag out your tripod, and set your self-timer. We want pictures of you!
A 12" Fracture is up for grabs for the entry that captures our imagination.
Entries can be submitted to the Small Aperture Flickr pool from today (Friday 7 September) until Friday 26 Septembr 2012. The next bit I want to put in big letters, but that looks ugly, so I shall restrict myself to bold: it's one entry per person. Thank you.
In case you missed what I said last month about the attributes that we look for in photos, I'll reproduce it here:
Both Haje and I have written on the subject of winning photography competitions, so you might want to look at those articles. It's probably also worth knowing that for both us, the story in your image is key. Haje's a stickler for good lighting, I'm hot on composition, and if Gareth joins the party he'll always comment on sharpness.
The Rules are here for your reference. Otherwise, good luck!
The Rules
If you've any questions, please just ask!

Flax against the dawn. Lake Wanaka.
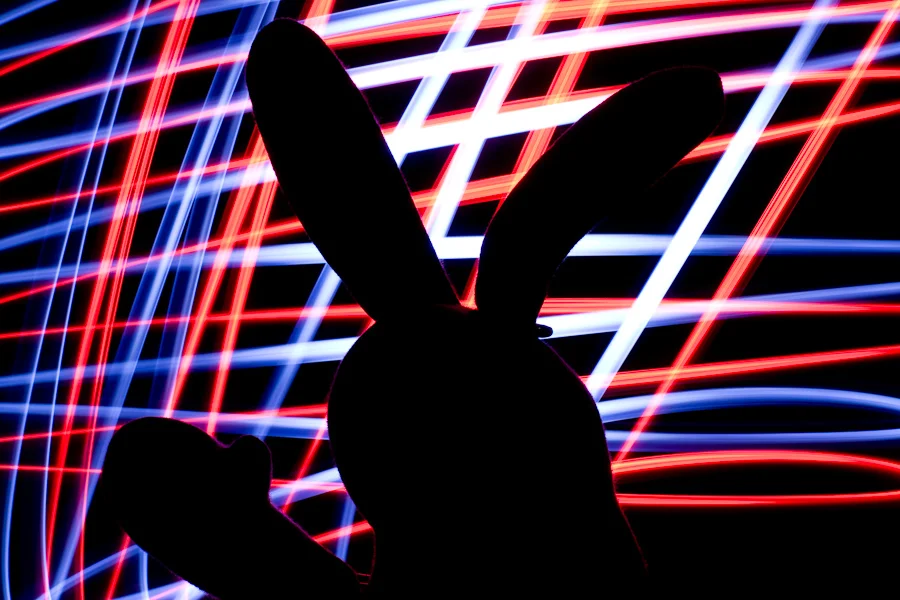
Okay, I've got a bit of a thing for silhouettes at the moment, so I thought it'd make an excellent competition theme this month. There, pretty simple then: silhouettes.
If you submit the winning entry, you'll win yourself a 12" Fracture courtesy of the wonderful guys at Fracture. (And if you've not checked out their work, then you should!)
The competition opens today (Thursday 8 March) and closes on Thursday 29 March. Entries need to go into the Small Aperture Flickr pool, but please remember that it's one submission per person.
I've reproduced The Rules, in case you need to refer to them, but otherwise, good luck! (And don't forget, if you follow @SmallAperture on Twitter, you get up-to-date competition and other photographic news!)
The Rules
If you've any questions, please just ask!
Horizons: they are very definitely meant to be level in our photos. Whenever I see a lop-sided horizon, it sets my teeth on edge. Nature intended that they be straight, at least as far as our eyes can see, and our inner ear knows this. A wonky horizon will likely make anyone looking at it feel uncomfortable, as their eyes will be telling them one thing and their feet another, but they won't necessarily be able to pin-point why. And you definitely don't want that.
They also seem to be something that I am perenially unable to get right when I take a photo. (Unless I'm using a tripod, of course, then you use a dinky spirit cube in your hot shoe.) I know that they need to be level, so I try my utmost to make them that way, but they always need tweaking. I don't know, maybe I stand funny, or something.
The fix, however, is easy. Whether you're using a free online editing service or have the mighty power of Lightroom or Aperture behind you, there're tools to straighten photos. I've picked two as examples - one free, the other paid-for and swanky - to give you an idea.
If you use Pixlr (Pixlr.com, possibly my new free online suite of choice, following the demise of Picnik), it's very simple. Upload your JPEG photo into Pixlr Express, select Adjustment, and then Rotate. Then all you need to do is use the slider to alter the angle of the image so that the horizon comes up straight. There's even a useful grid to help you get it right.
Use Lightroom 3 and you have three straighten options, all of which are found in the Crop panel on the right-hand side. The first is under the Crop tool, and you adjust the angle by eye, using a grid overlaid on the image to help you. The second uses the slider, allowing you to adjust the slant of the image by a precise number of degrees. The third is by far the easiest. Click on the Angle tool and then use it to draw on your image, following the line of the horizon. It'll correct the angle of the image to that line. Simple! (And it also works the same for vertical alignment, too, ensuring that buildings don't lean to the left, or whatever.)
Of course, if you want to deliberately set your skyline askew, there's nothing wrong with that and you can use these same tools to achieve that end. Just make sure that it's off-kilter enough that it's easily identifiable as deliberate. (And I'm reliably informed by one Haje Jan Kamps that a purposefully skewed horizon is called a 'Dutch Tilt'.)
If you're now permanently unable to look at another picture without being able to spot the wonky skyline, I'm sorry. But you never have an excuse to be riding off into a crooked sunset again!

Seeing as it's a new year, which is traditionally a time for optimism, hope, and positivity (despite the current economic climate), we thought that we'd go for a theme that reflects this. So how about some light, bright, and airy high-key photographs for the month of January?
The lovely people at Fracture are continuing to provide the prize, entitling the winner to have a photograph of her or his choice made into a gorgeous 12" Fracture.
Entries can be submitted from today (Thursday 5 January) until Thursday 26 January. They need to go in the Small Aperture Flickr pool, and please remember - it's one entry per person.
So that's about that. The Rules are below for your reference, but otherwise, good luck!
The Rules
If you've any questions, please just ask!

When you read the specs for the Pentax Q, you know intellectually that it's small, but it doesn't really hit home until you see it for yourself. It really is tiny. In fact, it's so dinky you'd be forgiven for thinking that it's a toy… before you hold it in your hand (just the one).
It definitely doesn't feel like a toy. There's a decent heft to it and nothing about its build feels tinny or plasticy. It's a camera that's been made to do business, despite its diminutive size. Fitted with the standard 8.5mm (47mm equivalent in 35mm format) f/1.9 lens, it slipped into my handbag or coat pocket, but not my jeans pocket.
So it came with me everywhere for almost a week, including a visit to my brother over the weekend, a walk in the park to photograph some wildlife, and a Christmas party where it generated plenty of oohs and aahs. It's these experiences on which I've based my review, so there aren't any painstakingly photographed charts to test white balance. But I'll admit to setting up a shot to test the filters when I felt a bit creative, and I wanted to take a closer look at the ISO, so I messed around doing that for a bit.
I got used to the layout and menu system fairly quickly. Sure, it was unfamiliar initially, but that was to be expected. You choose your mode, from fully manual to fully auto, using the dial on the top of the camera, where there's also the wheel to adjust aperture or shutter speed. There's a dial on the front that can accommodate your favourite filters and a green button on the back that you can customise to access your most-needed function.
The four-way controller on the back covers white balance, ISO, flash, and the timer. There are also the information and menu buttons to take you down into the guts of the camera. Seeing as the camera's so small, it's hardly a surprise that its buttons are, too. I coped fine with them, but anyone who's a touch bigger than me or has finger nails a sliver shorter than mine might struggle, let alone if you're a body-builder in your spare time.
The flash has a pop-up facility, which I found suitably amusing and of course is useful for preventing the curse of red-eye and ensuring that your extra light won't just bounce off of a longer lens. I was slightly concerned that it might take out my eye if I were to deploy it in a hurry, though.
The response time between switching on and being able to take a photo was good, and navigating between and adjusting shutter speed, aperture, and ISO was intuitive. But when I began taking photos, I ran into a couple of problems.
First, I kept running into arguments with the autofocus. There would be occasions when it simply focused where it thought it should be focusing, not where I wanted it to focus. If I'd had it on auto mode, that might be just about understandable, but in fully manual, it's beyond comprehension and terribly frustrating. You don't get many second chances in photography and seeing them float by because of a tipsy autofocus was disappointing.
Second, every now and again the metering would seem to waltz away and have a party of its own, leaving my images wildly under-exposed. This wasn't nearly so prevalent as the autofocusing issue, but it did mean that I was more exasperated with a camera than was exactly healthy.
So what of the images? I've taken some photos that I really like and my favourites are up there for you to see. The colours weren't muddy or washed-out, although the white balance was occasionally off by a quarter country mile - so much so that my poor brother looked green in a few portraits - but that was nothing that a bit of post-processing couldn't fix. The noise levels didn't want to make me scratch out my eyes until at least ISO 800 or 1000, which is entirely reasonable.
When I compared the RAW and jpeg images straight from the camera, what struck me the most was the barrel distortion from the lens. The warped horizons on landscape shots was very noticeable, and I found the bent look in my office floor almost alarming. Sure, the jpeg option straight from the camera does correct it, and it's something that you can fix yourself in the RAW file in post-processing, but it's rather significant.
There are more filters and options to do crazy things with colour and processing in the Q than I think I've had hot dinners this year. At first it was almost overwhelming, but as soon as you surrender to your childish desires to combine posterising with bleach-bypassing, or grimace at just how hideous you can make a perfectly decent picture look with selective colour, it's a lot of fun.
When it came to packing the Q into its box and sending it back, I was a lot more reluctant to do so than I thought I'd be. Despite the odd temper tantrum involving autofocusing or exposure, I've enjoyed playing with this camera over the past week or so, and doubtless I'd continue to if I had it for longer. But I've a sneaking suspicion that a great deal of this fun is reliant on knowing that I've a proper optical viewfinder and a much better sensor waiting for me in my dSLR, and my S95 slips into my jeans pocket, has a lens that's far more versatile than the 8.5mm standard lens on the Q, and produces images of about the same quality. If the Q were my only camera, I think I'd spend a fair chunk of my time feeling frustrated.
There's no denying that Pentax, Nikon, Olympus, they're all on to something with teeny-tiny interchangeable lens cameras. These are a significant development in the photographic world, but they're not there yet. So I can't recommend that you buy a Pentax Q when for less you could pick up a Canon S100, a Nikon P300, or an Olympus XZ-1 that delivers just about the same image quality with greater versatility and in a more compact package. One day, maybe; but not today.
If Android users have been feeling a bit left out by the dearth of remote controllers available for their cameras, that might be about to change. A Dutch company, Chainfire, has just released a beta dSLR controller app that needs only a USB cable to give you control over the aperture, shutter speed, ISO, white balance, metering, zooming, and loads of other things that you’d get bored if I listed. Only problem? As yet it’s only cmpatible with Canon Eos cameras. But, it is a start.
The app costs $8.51, but this is expected to increase once it comes out of beta. In fact, Chainfire wasn’t due to release it yet, but demand has been so high that they felt it was better to get the beta out there and work on the kinks than keep people waiting.
The developers have a huge wish-list of things that they’d like to introduce once things are running more smoothly, including but not limited to: video support, timelapse, scripting, and image review and transfer.
Want to know more? Head here.
(Headsup to TechCrunch)


I was doing a photo shoot a few days ago, where I was photographing a lemon suspended from a piece of thread. I wanted to make it look as if it was hovering in pitch darkness.
Upon seeing the results, someone asked me an interesting question: Isn’t it difficult to focus your camera in the dark? Well, no, because the photo was taken in the daytime, with my lights on. So, how come does it look like it was taken at night?
That, my friends, is the power of contrast in lighting. You have to remember that you don’t need a dark room in order to make a background completely dark – you just need to ensure that your foreground is significantly brighter than the ambient light. Here’s how and why…
To take the lemon photograph, I used a pretty simple set-up: A couple of flashguns aimed at the lemon, from a very close distance. Because the flashes were so close to the subject (they are just out of frame, in fact), it adds a lot of light. If you’re curious why that is, check out the inverse-square law on Wikipedia.
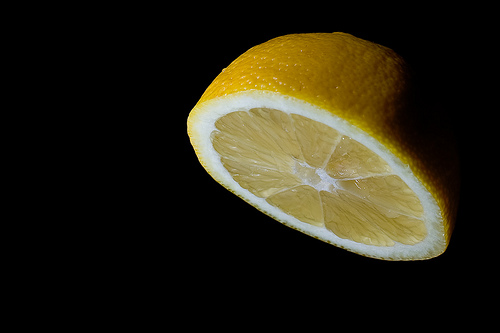
Say 'bonjour' to the magical space-lemon. It's citrus powered, awesome, and magical. Oh, and it hovers in space, clearly. That's what makes it awesome. If you want to take a closer look, click on the photo!
The reason why the photo came out as it did, is because of the camera settings: The camera was set to ISO 100, with f/9.0 aperture and 1/200 second shutter time. If you can’t visualise what those settings would do in the circumstances described, I welcome you to try that right now. Don’t worry, we’ll wait. Set your camera to precisely those settings, and take a photo indoors, without using a flash.
If you can’t be bothered to do the experiment: Even in a relatively well-lit room, that will result in a very dark photo indeed.
So, as far as the camera is concerned, it is taking a horribly underexposed photo. Which is perfectly fine, because I want a dark background. It’s the foreground that is important, and that is where my flashes come in.
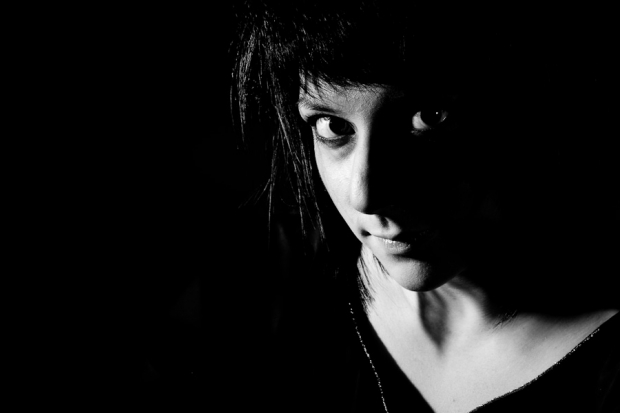
This portrait was also taken in a relatively well-lit room - but again, because of the high flash output and the fast shutter time (in this case, f/8.0 and 1/500 second at ISO 100), it looks like it's taken in pitch darkness. Groovy. Clicky for bigger.
Short answer: Yup.
Slightly longer answer: Yup. You can do this by settin your camera to manual, and use an exposure which results in a dark room (by choosing a fast shutter time). The next step is to use your flashes to light the subject.
Of course, this doesn’t work if the light from your flashguns spill onto the background (you’re trying to keep that as dark as possible, remember?) so it is a good idea to use a snoot or a honeycomb grid to ensure that the flash light isn’t accidentally re-lighting your background, because then you’re back to square one.
Well of course. Always remember that it’s all about the contrast in lighting: If your flashes are more powerful than the light you are photographing in, then you can ‘darken the room’ with your camera settings, and use the flashes to light your scene.
Hell, if you’ve got enough flashes, you can turn even broad daylight into night. Don’t believe me? Check out this article on ganging flashes, and scroll down to “Turning Noon Into Night With High-Speed Sync”. Pretty impressive stuff, but there’s a pretty ridiculous amount of money in flash equipment being used right there.
You don’t have to go to those extremes, though – using flash outdoors on a shady day can give great effects, because when done well, your subjects look as if they are brighter than the surroundings. When done subtly, it can look bloody fantastic – your eyes are automatically and subconsciously drawn to the main subject – always a good sign in a photograph.
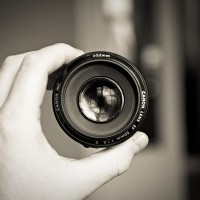
“Only a complete idiot would pass up the opportunity to grab a 14-50 f/2.8 Zoom EFS EX IS USM ASPH L DFS OMG LOL Mark II at that price”. You may have heard this sentence (with fewer made up acronyms at the end) from some grumpy camera store owner who decided to bite your head off because you dared to consider buying a lens beyond the kit lens your new DSLR came with. (disclaimer – only 94% of them are like this, some are nice). Intimidated by the camera shop troll, you decided to go online, where the user ratings were either “5 stars! Buy this! Remortgate your house it’s worth the £3,000!” or “0 stars! Avoid! This lens gives you smallpox somehow!” and nothing in between. Well now you can relax, because here at Small Aperture, we’re going to help you on your way to a relaxing, informed first lens purchase.
First off, let’s look at an example lens name and go over what each part of the description means, so you know what features you’re looking at. I’m going to use the Canon EF-S 55-250mm F/4.0 – 5.6. I’ve picked this lens purely for the name, as it has the most commonly occurring type of description and it will allow me to run through what it all means.
Canon EF-S is the brand name and the fit of the lens – it tells us what kind of cameras it will fit on. I’m a Canon user, so if you have a Canon, take a look at your camera now. If it has a red dot and a white square, your camera can use lenses that are described as either “Canon EF” or “Canon EF-S”. If you only have a red dot, you can only fit EF lenses to the camera. It’s worth pointing out at this stage that you don’t have to buy only Canon lenses as a result of this – any lens that is described as “Canon-fit” will be OK for your camera. If you’re unsure, your best bet is to take your camera with you to the shop, endure the eye rolling and see whether the lens you’re after will fit your camera. It’ll give you a chance to test it, too.
On location, my "walkaround lens" allows me to zoom out and capture environmental detail which my prime would have trouble with.
55-250mm indicates the focal length range. Simply put, the low number is how wide your lens will go (literally how much width and how “zoomed out” your point of view can get) and the high number is how far you can zoom in. For reference, a 17mm focal length will give you a decent amount of width for landscape images and 250 will give you a decent amount of zoom for basic wildlife photography (although those looking to travel abroad on safari and the like would probably be interested in a higher zoom, something like 500mm).
F/4.0-5.6 describes the maximum aperture at both ends of the focal length range (more on aperture in our first PCoF here, read this first if you’re not sure about aperture). In this example, F/4 is the lowest aperture you can set at the “wide” 55mm end of the focal length range, and F/5.6 is the lowest aperture you can set at the “zoom” 250mm end of the focal length. You will notice that some of the more expensive zoom lenses only have one number here, for example the Sigma 70-200mm F/2.8. This means that the lens is able to be set to its lowest aperture of F/2.8 at any focal length, be it 70mm or 200mm.
These are the most commonly occurring suffixes to a lens name that you’ll need to know and understand. There are many, many other suffixes – some that describe features, some that describe the particular product range that brand of lens is in. For example, “L” on a Canon lens is referring to the top of the range series of lenses that Canon make (indicated by a red ring around the base of the lens) whereas “USM” refers to “UltraSonic Motor” and refers to a small motor built into the body designed to aid speed of autofocus. There are so many of these and they tend to be company-specific. In addition, they tend to be half product description, half marketing tool, so don’t get too dazzled or excited by these things.
To know what lens to buy, it’s important to ask yourself what kind of photography you undertake the most.

I took this using a 50mm prime for the extra detail it provides me.
As a portrait photographer who takes a lot of head / head and shoulders images, my main lens is a Prime Lens. A prime lens is one that has a fixed focal length: that is, you can’t zoom in nor can you zoom out. A fixed focal length means that there are significantly fewer moving parts inside the lens. This allows the glass inside the lens to be much more precise, allowing for sharper, higher quality images. This is exactly what you need for striking portraits. The other advantage is that this sometimes brings the price down. I don’t want to be seen as endorsing a particular company over another, but I have used the Canon EF 50mm f/1.8 II for a few years and it is dirt cheap for the quality it provides me. You can pick one up for about £80. For balance, Nikon have an equivalent lens of the same price, the Nikkor 50mm F/1.8 is a good buy and also seems to get very good reviews. Another good reason for using a prime is it teaches you to think about composition more, as you can’t just zoom out or in more to get the desired crop.
If you are a landscape and architectural sort of person, you will want a lens with a good wide-angle focal length. I only dabble in landscape for my own enjoyment, so I find my walkaround lens (see below) serves me just fine with a wide focal length of 17mm. Those that are serious about landscape will want to look at how wide the focal length goes (14mm is good) and the actual quality of the lens glass itself. Detail and sharpness are of the most importance for the landscape photographer. Maximum aperture is less of a problem, because you will be looking at setting your aperture to ranges of f8 -f11 and beyond anyway, to get all the detail of the landscape in. As I say, my Tamron walkaround creates landscapes that are sharp and vivid enough for me, but those of you looking for more might want to take a look at the Canon EF 17-40 F/4L (where it starts getting pricey), the Tokina 12-24mm f/4 which fits Nikon cameras (very wide angle) or you might even want to go super wide with the Sigma 10-20mm f/4-5.6 EX DC.
All this lens talk is making me want to buy things.
If you like looking at ants up close (weirdo) or if your photography is all about extreme close up, abstract work, you need a Macro Lens. These are lenses with very high levels of magnification, and are used for insect and other high-magnification photography. I can’t say I’ve done much of this but it sure looks like a lot of fun! I don’t have time for fun. I would advise reading up extensively on the subject if you’re serious about macro photography.

Don't forget that you can play around with the rules - here I've used a landscape lens to create a portrait. What a rebel!
If you do a bit of everything (and even if you don’t) you’ll want to find a good “walkaround lens”. This is a term used to describe a general purpose lens that will always come in handy for most situations – something that will do a variety of jobs to a decent level of quality. When on assignment for a magazine commission, I take my both my walkaround lens and my prime for portraiture. Again, not wanting to advertise, but you will find that many people recommend the Tamron 17-50mm f/2.8. Now if you’ve been paying attention, you will see that this means the lens has a maximum aperture of f/2.8 at both 17mm and 50mm focal lengths. You can pick one of these up for around £320-£360 these days and, for the price range, the image quality is excellent. Put it this way: I have been using it for published magazine work for over a year now, and my clients have been more than happy with what we’ve ended up with. It’s good for me because I can use it for portraits but also I can zoom out and grab some surrounding environmental detail aswell.
So who’s feeling spendy? Is spendy a word? Does anyone care? It’s Friday, which means tomorrow is Saturday, which means it’s time to buy your very first lens. Hopefully, by applying what you’ve learned from this, you’ll be able to stride into the camera shop and bellow “SHOPKEEP, PROCURE ME A CANON-FIT PRIME WITH A 50MM FOCAL LENGTH OF THE FINEST QUALITY, SPORTING AN ULTRASONIC MOTOR! MAKE HASTE!“. Go on, do it. I double dare you.
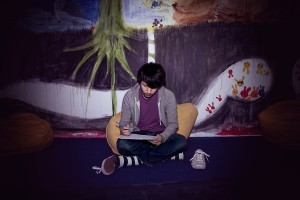
A follow up to a recent TechCrunch article caught our eye here at Small Aperture. The essence of the articles is as follows – the iPhone 4 is dominating Flickr stats as Flickr’s most used camera. The tone taken seems to be one of pure dismay, the Instagram app being the currently favoured target of demonisation. The suggestion is that the saturation of images taken using a camera phone is indicative of “the state of photography right now”. Personally, I am not convinced this is a bad thing.
With the advances in technology over recent years, those who could be classed as “casual photographers” have been able to enjoy the freedom of taking a photo using their phone, adding a few fun effects to it, and uploading it to Flickr, Facebook and other such social community sites to share with their friends incredibly easily and quickly. This upsets some, who feel that photos should only be taken with a “proper” camera, and that to take an image with a smartphone, upload it to Flickr, and have some of your friends praise it, even though you don’t even have an official photography degree or qualification of any kind, is a terrible insult to and a threatening encroachment upon our precious medium.
Passive aggressive sarcasm aside, my point is that I really don’t think it matters that a smartphone camera is at the top of Flickr’s most used stats, whether you’re of the opinion that Flickr is being used incorrectly or whether you’re seeing it as representative of photography’s general decline. In actual fact, I feel there are several positives to draw out of the significant increase in casual photography. Yes, I’m going to begin addressing them now, in a new paragraph which is coming up next. Seamless.

Disgustingly, I took this using my phone. Is it a photograph? Yes, yes it is.
First, it could be argued that the increase in the use of smartphones as cameras has shifted the market and helped to create better defined demarcations between the “casual user”, the “enthusiast” and the “professional” photographer. At one time, anyone with a passing interest in photography and a disposable income would have grabbed themselves a higher end point and shoot or even an entry level DSLR or bridge camera. These would be used purely for better quality family snaps, in anticipation of travelling abroad to document their time visiting various countries or, god forbid, to pursue it as a casual hobby, for fun. This still happens, of course, but now there is a greater degree and freedom of choice for people who enjoy dabbling in photography but can’t or don’t want to spend too much money. I can’t see how this is a negative development. Unless you hate people.
Essentially, we are witnessing the birth of the next generation of photography snobbery. The first generation (sadly still lingering, grumbling in the corner with its slippers and pipe) are the “film is just better” crew. It’s not photography if it’s not film, digital is cheating, I miss inhaling dangerous chemicals and so on. There is a place for both film and digital photography. Film is absolutely beautiful and has that romantic, inimitable quality to it, but when digital came along it brought photography to a brand new audience of enthusiasts and professionals, expanding and developing the medium. This is happening again: we will see photography tackled in new ways and artists will pick up and find a way to embrace the advantages new technology brings.
Another plus to introducing new people to photography is the overall increase in appreciation of the medium. The more commonplace it becomes, the more accepted it is, and we will suffer fewer problems down the line. It’s a bit like one of the other largely demonised interests in my life – videogames. Since the Nintendo Wii came along and introduced casual gaming to a massive new audience, when someone notices a games console in my house, they no longer immediately consider me a dangerous recluse who spends all his time dreaming up violent fantasies, entrenched in his own filth in a basement somewhere, not eating for fear of losing precious gaming seconds (I save all that for weekends). Similarly, the stigma and prejudices aimed at photographers, of which there are many, will start to soften and melt away.
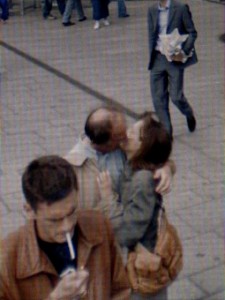
An image from Michael Wolf's "Paris Street View" series, taken by photographing and cropping an image found using Google Street View. See more of Michael's work here - http://www.photomichaelwolf.com
The important thing to take away from all this is that it is problematic and dangerous to hold the stance of “the better the camera, the better the photograph”. Photography should be seen as independent of the equipment used: for me, photography lies in the intangible essence of what you are trying to achieve. It’s about composition, choice of subject, timing and the story you tell by combining all these elements. A stunning example of this is a series of photos that have caused significant controversy this year – a series of images taken using Google Street View by Michael Wolf (link to a February BJP article here). I won’t go into depth on my thoughts of it here, that’s for another article, but I admire the thought process behind this series and applaud it. The outrage caused is most likely the same outrage from those who are upset by the increased use of smartphones being used to take photographs.
This all reminds me of the story of a good friend and fellow photographer of mine. He was once complimented on one of his images by an unwitting fan, who had no intention to offend by any means: “wow”, he enthused, “you must have a really good camera!”.
Visibly disgruntled, he replied “yeah, and Shakespeare had a really nice pen”.
Okay, this isn’t regular Small Aperture-fodder, but it was far too good not to share. Standing up for those of us who pay to see films on the big screen without the irritation of chit-chat, mobile phones, and general unnecessary interruptions, a cinema in Austin, Texas ejected a persistent texter. The Alamo Drafthouse cinema has a no mobiles policy and the young lady had been warned twice. But anyway. When she proceded to leave a (remarkably composed) tirade of complaint on the cinema’s voicemail, they turned it to their advantage. It’s become their no-mobile-phone trailer.
This is censored version (just in case). But if you want to see the uncut, potty-mouthed version in all its glory, toddle over to the Alamo Drafthouse’s blog.
 What is this? - In our NewsFlash section, we share interesting tidbits of news. Think of it as our extended twitter feed: When we find something that get our little hearts racing, we'll share it with you right here! Loving it? Great, we've got lots more News Flash articles - and, of course, we're still on Twitter as well, for even shorter news tidbits.

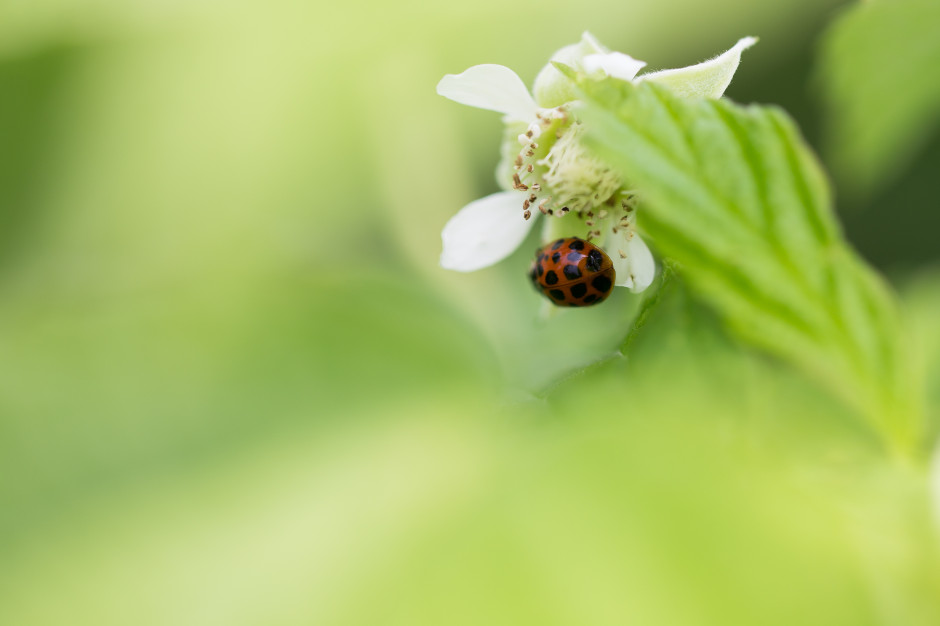
Last month we asked for pictures of insects, and you treated us to some absolute crackers. Thank you, everyone. However, for the first time in the… ooh… [counts on her fingers]… nine months that we’ve been running a monthly photo competition, we both settled on a single picture, immediately. In fact, when I laid eyes on it, it took my breath away. I really was that impressed. So without further ado, I present the winner of Small Aperture’s May photo competition:
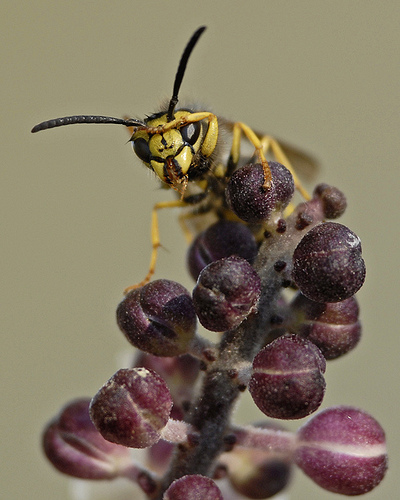
Guêpe sur cimicifuga (1), by Luc Marc
Many congratulations to Luc Marc! Do get in touch with me and I shall organise for you to claim your awesome prize from the wonderful people at Fracture.
June’s competition details will be winging their way to you soon!