


Blur isn't always bad. We show you why, and how to manipulate it to your creative advantage.

When you hear the term 'high-res' thrown about with such abandon when it comes to images for web use, have you ever stopped to think just how big or how high quality and image meant for the web needs to be?
There's an assumption that high-contrast images are more dynamic, more compelling, more inviting. Have a go at some low-contrast photography. You might surprise yourself with the results.
Balance doesn't mean symmetry; it means an internal consistency and tension within your photos. And it's a vital element of composition.
Great photos might be down to a little bit of luck, but most of that 'luck' you make yourself. Don't believe us? Read on...
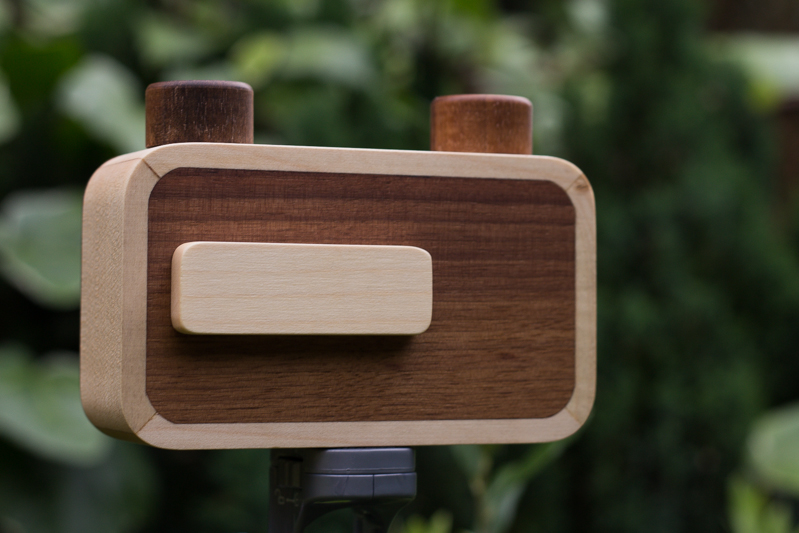
A few weeks ago I was contacted by Elvis Halilović, the man behind the ONDU Pinhole camera company, asking me if I'd like to try out one of his handmade, wooden pinhole cameras. It's not the sort of offer I'm likely to decline. Last week my entirely gorgeous 135 Pocket Pinhole arrived through the post. On Monday I took advantage of glorious sunshine and the flourishing abundance of the allotment and headed out with a few rolls of film to see what the camera could see. Today I collected an envelope of developed images from the shop in town.
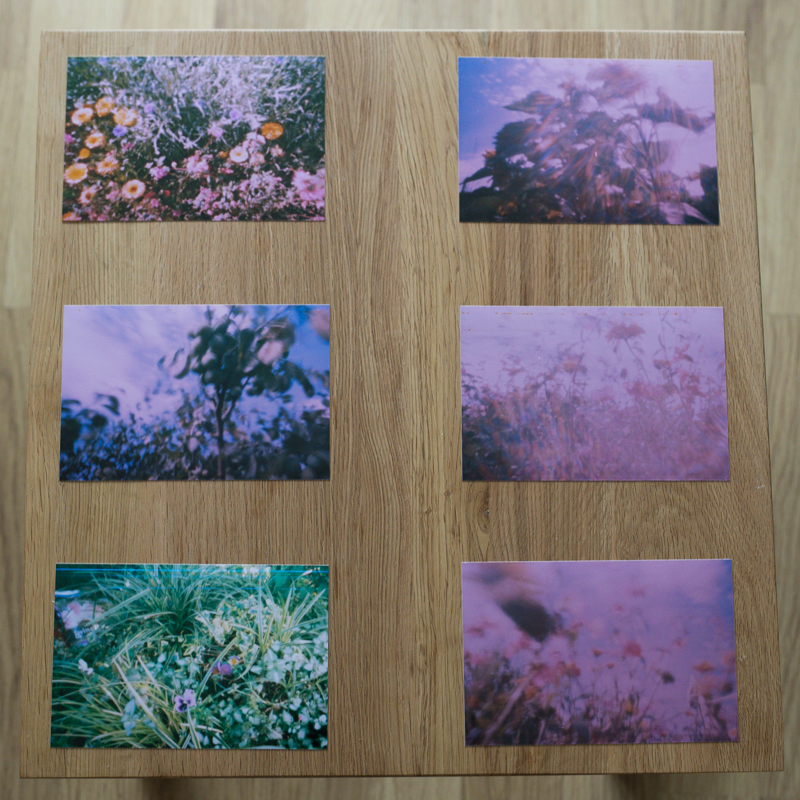
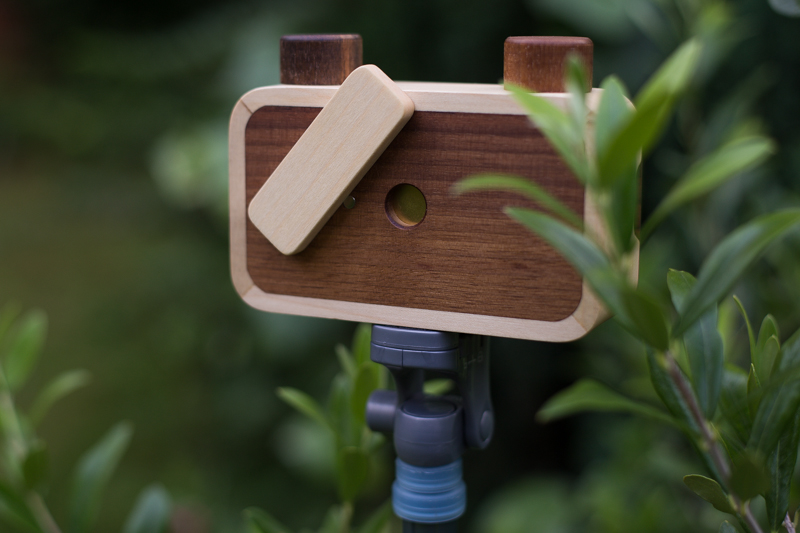
How did they turn out? Actually not all that brilliantly. The film was expired, which has resulted in all of my photos having a rose pink cast. Despite the very useful exposure guide provided by ONDU, judging shutter speed was a very hit-and-miss affair that was counted in pink elephants and almost everything is over-exposed. My little Lollipod stand is a perfect match for the ONDU pinhole, but I've not mastered opening the shutter without disturbing the camera, and of course the longer exposures means motion blur, so everything is hazy. And without a viewfinder, you're guessing at just what the camera can see, so what's in the frame isn't necessarily what I'd anticipated would be there.
But the truth is, none of that matters. What matters is that I'm proud of these pictures and that I had fun taking them. I enjoyed experimenting with exposure times and attempting to determine what the camera could see. I recalled the anticipation of my childhood, when I'd send films off to be developed and have no idea what would be sent back to me. It was, in fact, the most fun that I've had with a camera for a very long time.
I won't deny that I had a few frustrations, but they weren't enough to deter me. The ONDU requires you to tape the film onto the receiving spool and count one-and-half rotations to wind on between frames. Loading the film was a bit tricky and I succeeded in breaking one roll with a heavy-handed winding action. There were a couple of unintentional double-exposures, too. No one said this was going to be easy, or indeed fast, though.
Perhaps the best tip that I have is to head out with a notebook when you're shooting, to record the lighting conditions and exposure time for each frame. When I go out next time, if the lighting conditions are similar, I'll know to open the shutter for a fraction shorter duration. If the conditions are different, I'll be making more educated guesses. Whatever the light, I'll be having more fun.
Pinhole photography itself is intuitive, with the requirement to judge and estimate and guess. It's also visceral and plays on your emotions of surprise and vexation. The more that you practise it, the better you'll become, not just at pinhole photography, but at the general discipline of photography. It pulls you back to the founding principles of expose and compose: a simple concept but with a nuanced practice.
The opportunity that a pinhole camera gives you is to play with light in a box: photography in its most deceptively simple form. If that doesn't intrigue and inspire you, and remind you what's wonderful about taking pictures then I'm not sure what will. Get hold of a pinhole camera and go back to basics; you won't regret it.
I spent Saturday at the Cambridge Festival of Science and Royal Photographic Society's photography day, listening to talks on megapixels and watching videos of caesium react with water in slow-motion. It was mostly a fun and informative experience, but apart from the caesium videos, the best bit was sitting inside Fotonow's Camper Obscura. That, just as its name suggests, is a camper van that has been transformed into a camera obscura. A camera obscura is the basis of any photographic camera, from a pinhole to a dSLR. A camera obscura is literally a dark (obscura) room (camera) with a hole poked into it, through which light can pass to create an image of the outside world on a screen. There are room-sized camerae obscurae in Bristol and Edinburgh, but they don't have to be walk-in activities. It's easy enough to scale them down and make something portable. I was aiming for something more along these lines when I decided to devise my own.
Of course, if you replace the screen with photo-sensitive paper you have a pinhole camera and by steadily improving the light-gathering and focusing abilities of the hole, with lenses, you end up with a camera more akin to those we use every day. But that's another project for another day.
Undeterred, I looked around for some DIY camera obscura instructions and found the perfect example on Exploratorium, which used a Pringles can. Seeing as Haje has already used a Pringles can to create a cheap macro extension tube, it seemed entirely appropriate to transform the snack container into a portable camera obscura. A Pringles Can Obscura.
After securing a can of Pringles either from a nearby shop or your pantry, you'll need to divest it of its contents—whether you eat them all or transfer them to a new container is up to you—and then wipe it clean and keep the lid.
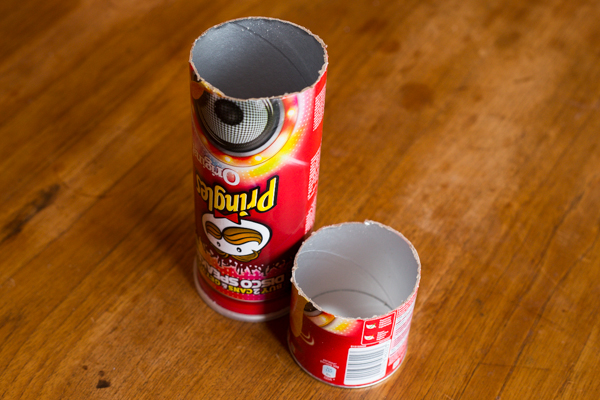
Draw a line around the tube, about 6cm or 2½" up from the base. Using a craft knife, or in my case, a bread knife, cut through the tube so that you're left with two pieces. The shorter section will be from the bottom of the can, and the longer section from the top.
You need to make a screen onto which your image will be projected inside the can. The cheapest and most readily available means to make one is from tracing paper.
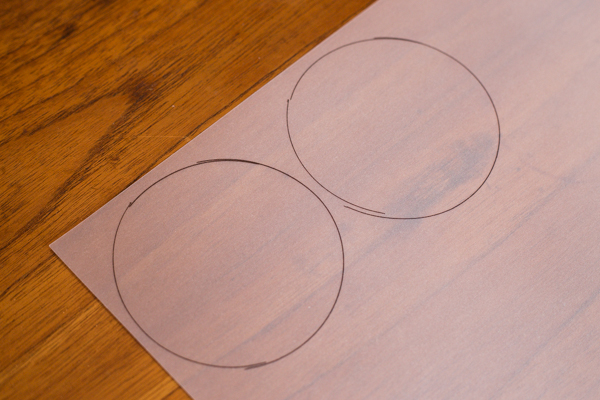
Place the lid of the Pringles can on a sheet of tracing paper, draw around it, and then cut it out. Secure the tracing paper on to the top of the tube using the lid.
Rather than reconstruct the can with the two cut ends meeting again, you want the cut end from the bottom section of the can meeting the lidded, tracing-papered end from the upper section. Secure them in place using gaffer tape or electrical tape. No light should be able to pass through the join.
I got so carried away sticking it together that I forgot to take a photo. I'm sorry.
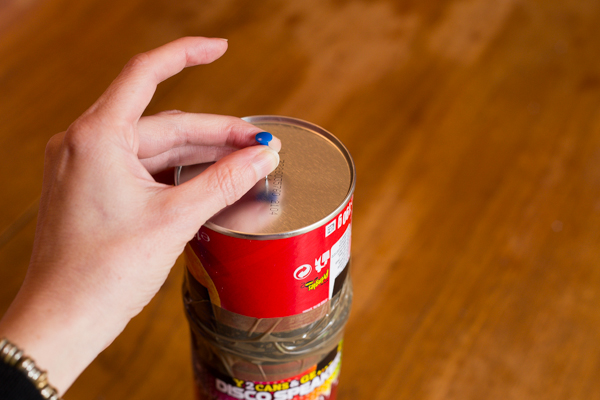
In order for the light to pass into the can and create an image, pierce a hole using a drawing pin in the base of the can.
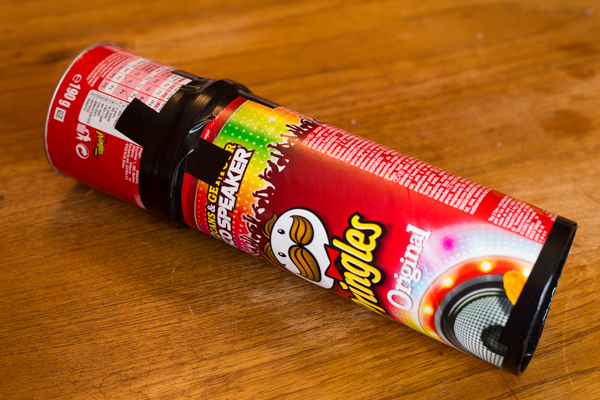
To make sure that you don't end up with spurs of cardboard poking into your face when you hold your Pringles Can Obscura to your eye, tape up the cut surface with some electrical tape. And if you don't want it to resemble a Pringles can that you've hacked up, wrap some coloured paper around it.
The brighter the day, the better the image you'll be able to render on your screen. Just remember that everything will appear upside down. And then it will be a case of moving nearer and farther away from your subject to get it in focus.
It's a great tool to remind you just how simple the principles of photography are, and to get you back in touch with moving subjects into and out of focus.
(And don't go getting any ideas about the gorgeous image of the tree. That's obviously, from the Camper Obscura.)
So much of the fun of pinhole cameras, apart from the pictures that they produce, is their simplicity. They're the very basis of photography: light, a box, and something to capture your image. What's more, they're simple enough that you can make them yourself, out of coffee cans, cardboard boxes, or canibalise a bodycap to make one for a dSLR camera. But what about if you introduced new world technology to old school simplicity, and you 3D printed a pinhole camera? Step forward Clint O'Connor and his Pinhole, Printed project on Kickstarter. By backing his project you can snap up a print-it-yourself kit that comes complete with the items that can't be printed—pinhole, O-rings, red window, screws—for $29. If you're not endowed with a 3D printer, you can buy a ready-printed camera along with two rolls of film and the STL files for $49. Whichever reward you opt for, it includes a guidebook to help you get your exposures right, too.
The pinhole camera you'll produce is the Flyer. It is printed in ABS, Acrylonitrile Butadiene Styrene—the same material used to make Lego—making it light but sturdy. It takes 120 format film, has a 70° field of view, an ƒ-stop of 133, and can be mounted on a tripod. Old school meets new world.
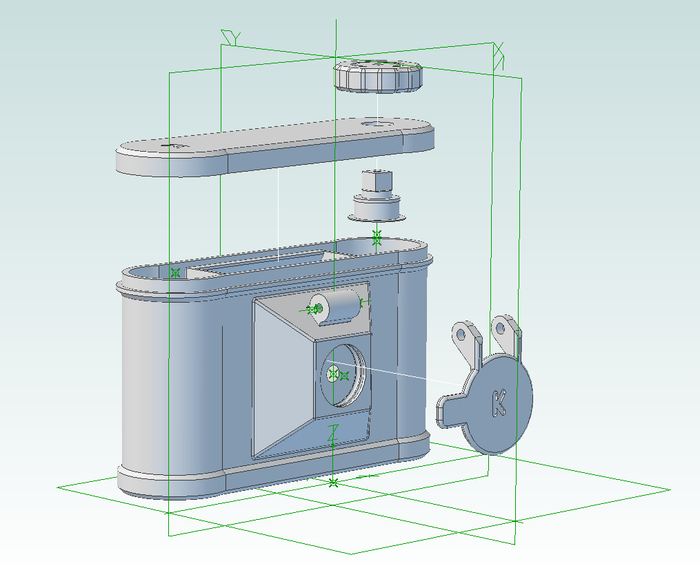
Pinhole, Printed managed to achieve its Kickstarter goal within 13.5 hours of going live on 10 October 2013, so now it's a case of staking your claim on one of the limited edition Kickstarter versions of the Flyer (they're marked with a 'K') or on the files so that you can print own (they don't come with a 'K'). You've until 10 November 2013 to make a pledge.