


Try these five tips to ensure you take sharp, blur-free images every time!

When you hear the term 'high-res' thrown about with such abandon when it comes to images for web use, have you ever stopped to think just how big or how high quality and image meant for the web needs to be?
There's an assumption that high-contrast images are more dynamic, more compelling, more inviting. Have a go at some low-contrast photography. You might surprise yourself with the results.
Balance doesn't mean symmetry; it means an internal consistency and tension within your photos. And it's a vital element of composition.
Great photos might be down to a little bit of luck, but most of that 'luck' you make yourself. Don't believe us? Read on...
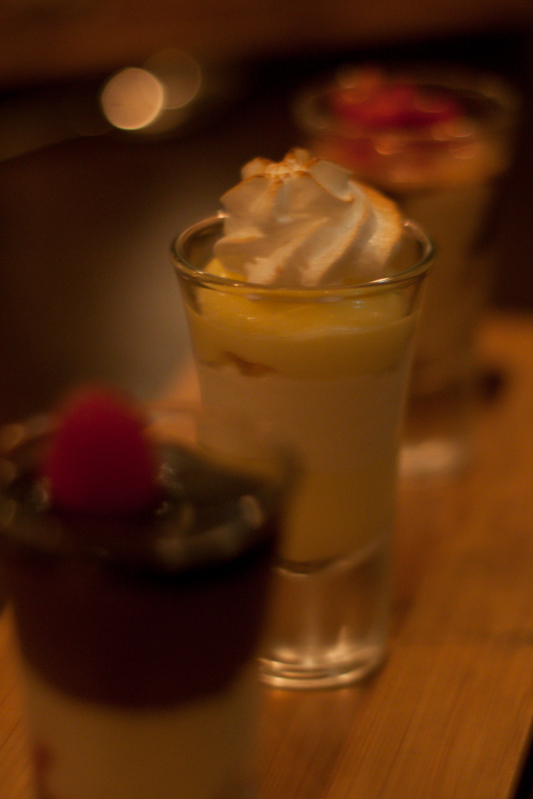
The picture-taking world appears to have been struck by an unfortunate bodily malfunction pandemic that is having an unnecessarily detrimental impact on the quality of photos the globe over. The malfunction affects camera users indiscriminately, with dSLR and CoSyCa owners, smartphoneographers, and compact camera users all under threat of its effects. It manifests itself as an inability for the camera user to hold her or his arms tight into the body when taking a photo, and instead standing with elbows projecting from the body, perpendicular to the torso. These unfortunately afflicted photographers resemble chickens attempting to flap their miserably clipped wings. Symptoms of this malfunction present themselves as camera-shake and unsalvageably blurry images, brought about by the inability to hold the camera steady. It leads to the records of hundreds, thousands of precious moments being consigned to the digital dustbin, notably those involving candles and birthday cakes, because the subjects are unclear, fuzzy, or even in double. Consequently, the emotional impact of the condition is thought to be quite distressing. If caught early, the condition is entirely treatable, but without speedy rectification there is no hope for affected photos.
The impact on photos taken by smartphoneographers is regarded as especially severe, as the reduced size and weight of these devices makes them inherently more difficult to stabilise.
Treatment involves a very simple modification of the body when holding a camera in preparation for taking a photo: the elbows need to be tucked into the abdomen and the arms held close to the torso. This enables the photo-taker to hold the camera with greater security and thereby minimise the chances of a photo obscured by blur and shake. In combination with other techniques, such as holding ones breath and taking a firm stance or leaning against something secure, positive results are anticipated.
Should photo-takers find it especially difficult to modify their stances, or should conditions be suggestive of camera-shake, it is recommended that a tripod or other stabilisation device is employed.
It is hoped that a general information campaign encouraging photo-takers to move their elbows down and in will see an overall improvement in the quality of photos taken and a reduction in people mimicking poultry.
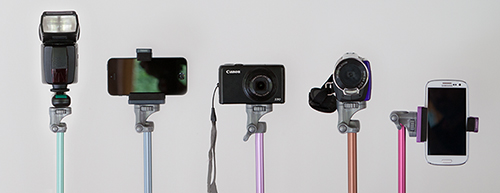
Just before Christmas the lovely guys at Lollipod sent me an ice blue version of their lightweight, compact, multi-functional support device to test. The Lollipod can't withstand anything that weighs more than 420g, but that makes it perfect for mobile phone photography and compact cameras, and it can be used a sound boom, too. I've given it a go with my Canon S95, which attaches to the Lollipod directly, and my iPhone 4, which attaches using Lollipod's additional spring-loaded adapter. (You can use a Joby Griptight, too.)

The Lollipod really is light. I took the liberty of plonking it on the kitchen scales and it weighed in around 275g, or 9oz. So much of the appeal of smartphone or compact camera photography is that it's convenient. You don't want heaps of weighty (and expensive) kit when your camera fits in your pocket. However, there are occasions when you want to be able to steady your picture-taking device, for example when you're taking night shots, or self-portraits. Schlepping around something designed to take a dSLR might be overkill, but the Lollipod isn't.

When it's fully retracted, the Lollipod isn't any more than 33cm (just over one foot) long. That's small enough to put in a daypack, a messenger bag, or even one of my larger handbags. Combined with its light weight, that makes the Lollipod supremely portable.
I was also impressed by the screw mechanism that secured your compact camera or the mobile adapter to the Lollipod. It's integrated into the Lollipod, so there's no ferreting around to find something to screw a plate into the camera or adapter, or even a plate to lose.

Extending and retracting the Lollipod is quick and easy. There are no locking mechanisms: everything just slides in and out. Despite my initial concerns that this could result in the Lollipod retracting into itself, that never happened. After all, neither my camera or phone were that heavy and you're not meant to put anything weighing more than 420g on a Lollipod.

Being so light means that the Lollipod isn't always as stable as it could be, especially when it's fully extended. Unless I set the self-timer on my compact camera it was quite difficult to capture an image without camera-shake. I had much more success with my iPhone, though. It is possible to weight down the Lollipod—you use the carrying case that comes with it, and something like a water bottle or handy rock—but I'd still be apprehensive about using it in windy weather. Without independently adjustable feet, it wouldn't be stable on uneven ground, either.
If you're accustomed to the flexibility of motion in a standard tripod head, you might feel restricted by the Lollipod's limited movement. It can only move through one axis, so you'll need to decide between setting your device so that you can switch between portrait and landscape, or so that you can tilt it. Tilting with a camera on the Lollipod wasn't a problem at all, but I didn't feel that my iPhone was sufficiently secure in its adapter for that.
When you're accustomed to a heavy-weight tripod with a head that moves in almost any direction imaginable, the Lollipod feels incredibly limited and restrictive. But that's comparing apples with oranges, really. The Lollipod has been designed as a lightweight, flexible support, and it fulfils that brief. If you need to stop your camera from shaking when taking photos in the dark, it'll do the job. If you want something to have a go at self-portraiture with your phone, it's great. If you need a lightweight and portable support for a small camera or smartphone, that's exactly what it is. Just don't try it out in a force nine gale.
Lollipods are available direct from Lollipod and cost £30.
Nice picture... shame about the blur. There are times when you expect to see some blur in a photo: panning shots, long exposures, and even in some short exposure photos when the subject is moving really fast (think the wheels on a Formula 1 car). But most of the time, we're looking for sharp photos without any evidence of fuzziness. In this photography fundamentals session, we're looking at vibration and camera shake, and how best to avoid it. Unfortunately, it's easy for the photography deities to conspire against us so that we end up with not-quite-sharp images. Often it's because our subjects move—about which there's little that you can do, especially if you're photographing children or animals—but frequently it's down to camera shake rather than motion blur. We might get the wobbles, we might need to use a slightly longer exposure to ensure that there's enough light on the subject and that means we can't hold the camera quite as still as it needs to be, or we might be using a lens that has a high magnification factor, in which case the slightest movement can show up as camera shake.
If you're not sure if a photo is exhibiting signs of camera shake or if you've just screwed up your focus, take a look at the nature of the blur. A plain old badly focused image will probably have at least one area in focus, but it won't be the right area. The blur will likely be quite smooth, too. A camera shaken photo, on the other hand, will be blurry all over, and the blur is probably sharp and jagged. You might have a double-exposure-like effect, with everything appearing twice in the frame. However it manifests itself, it isn't ideal.
Camera and lens manufacturers have made it easier for us to capture tack-sharp photos with the introduction of stablisation technology. You'll often hear manufacturers claiming that their vibration reduction or image stabilisation mechanisms can offer however many stops advantage, or let you shoot with a slower aperture or shutter speed than you could manage only hand-held without noticing any camera shake. Still, there's nothing like going back to basics and doing everything that you can to produce a blur-free photo.
First of all, you can take the technical approach and reconsider your exposure. If you can, use a faster shutter speed and compensate for it using a faster aperture and a faster ISO. If you're concerned about noise, remember that a smidge of noise is better than a blurry photo.
Second, brace yourself. If you're hand-holding your camera, keep your elbows in, against your chest. Don't stand there trying to stop traffic with your arms out at 90° to your body. If I had a penny for every person I'd told to keep their elbows in, I'd be a few pounds to the better by now. If you're using a long lens, make sure that you have one hand on the camera and the other supporting the lens. The combination of a long lens' weight and its magnification factor makes it a camera shake party.

Third, breathe right. Seriously. Inhaling or exhaling at the wrong moment can cause camera shake. Try not to inhale or exhale at the same time as you depress the shutter button. And while you're at it, depress the shutter button gently.
Four, use a stabilisation device. It doesn't matter if it's a tripod, a monopod, a brick wall, or a string tripod: get your camera stable. And trust me, the length of time for which you're capable of holding your camera steady is much shorter than you think it is.
Five, use a remote shutter release. We've already noted that breathing at the wrong moment and an over-zealous trigger-finger can lead to camera shake. If you're in a very sensitive situation, for example you're using a macro lens, using a remote shutter release eliminates your need to touch the camera and with it the inherent threat from your lungs and muscles.
That should help to keep your photos sharp.
Time-lapse << Photography Fundamentals >> White balance