


A digital camera sees more infrared than we do, and all you need to do to capture it, is to block out all the visible (non-infrared) light. You can buy filters that do this, but they can be ridiculously expensive – and buying stuff removes all the fun of creating stuff, n’est-ce pas? The trick? In order to be able to withstand the heat on projectors, slide film will be created so it lets through infrared light, even past the portions of the slide that are completely black. In other words: Unexposed, developed slide film can be used as an IR filter!
Top tip: If your camera lens is bigger than 35mm film, why not just buy a roll of 120 slide film? It’s bigger :-)
More information about the hows, the whys, and the wherefores can be found on Wim Wiskerke’s website.
Where can you get developed, unexposed film?
 1) Go into a camera store, buy a roll of slide film. (120 film is great, because it has larger surface area and no sprocket holes). If you can get film that is out of date, it’s cheaper. They may even give you a roll or two for free.
2) Hand the newly acquired roll of film back to the salesperson behind the counter, and tell them to get it developed. If they look at you in a confused way, explain why. Tell them to add a note on the film that yes, you know it is unexposed, and yes, you want it developing anyway.
3) Go back to the store 48 hours later, pick up your now-developed, still-underexposed slide film, which now is ready to be used as IR filter. The whole thing should cost you a fraction of the price of an IR filter!
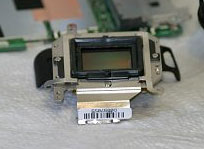 This one falls in the “if you are planning to do this, you have to hate your SLR” category. If you enjoyed our earlier tip about IR photography, you will probably have noticed that many cameras – especially DSLR cameras – have IR filters built into the body. Obviously, that means that you can’t use it for IR photography. Unless you remove the filter, that is…
I wouldn’t dare do it to my own camera, but if you have a destructive streak (or very steady hands), you could follow the instructions posted on
This one falls in the “if you are planning to do this, you have to hate your SLR” category. If you enjoyed our earlier tip about IR photography, you will probably have noticed that many cameras – especially DSLR cameras – have IR filters built into the body. Obviously, that means that you can’t use it for IR photography. Unless you remove the filter, that is…
I wouldn’t dare do it to my own camera, but if you have a destructive streak (or very steady hands), you could follow the instructions posted on