legs

Can you fix the focus on a blurry photo after the fact?

I seem to be on a roll this week, with finding incredibly interesting topics to write about over on Quora. In this case, the question was as simple as it was interesting: "Is it possible to focus an unfocused image with a computer program?".

Answer...

There are many technical challenges with focusing an image after the fact, and it depends heavily on how out-of-focus the original image is. It is possible to do some sharpening that gives the illusion of a photo being in better focus, but actually re-focusing the photo? Not so much.

Here's why...

Take an image like this for example (see the photo on my Flickr stream for a larger version):

Just chillin'

The bird in the foreground is in focus (well, more or less), but the plants in the background are not. Now, blurring this photo would be relatively trivial, because you are discarding information.

If your goal was to 're-focus' the photograph so the trees in the background were in focus, however, you're looking at a completely different problem, at least if your photo is taken with a conventional camera (Light-field cameras like the Lytro work differently)... The problem is that you're trying to re-generate information that simply isn't there.

Another example

Let's take another example. This photo, for example (see Flickr for a larger version):

What big eyes you have...

In this photo, you have an extreme macro shot of a fly. You can see the individual facet eyes of the fly, and count the hairs on its back. However, it has very shallow depth of field, and if you look at the legs in the background of the photo, they are just blurry stalks. Now, the technology you are looking for, would somehow magically be able to find out the size, direction, and shape of each of the hairs on the fly's legs that are out of focus in the background.

It stands to reason that this information simply doesn't exist. I took the photo, and I have no idea what colour the hairs were, how many there were, and how evenly they were spaced. This photo is a pretty good document of the fly, of course, but it is physically impossible to recreate information that isn't there - unless you have a data source to base this information on.

On the other hand, Adobe is doing some really interesting stuff with their 'deblur' technology. This isn't the same as focus blur, however; the idea of Adobe's deblurring is to take a photo that was sharp to begin with, but suffers from motion blur. This means that, in theory, a lot of additional information exists in the image, it is just spread over an even surface. As such, it is possible to 'unblur' the image by throwing clever algorithms and a lot of computing power at the problem. Sadly, this is only possible in very limited cases. It's not possible to re-focus an image, but it is possible to evaluate the photo to remove certain image artefacts, much like noise reduction filters etc.

For further reading, check out the vaguely related concepts of Focus stacking (which uses focusing at several focus depths, and calculates an image with deeper depth of field), HDR (which does a similar thing, but for images with various exposures) and, of course, the Lytro camera, which is able to focus after the fact, but struggles with its own problems (including much lower final resolution than we are used to from our digital images).

TL;DR: No, you can't focus an image after the fact.

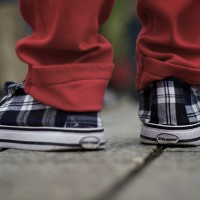
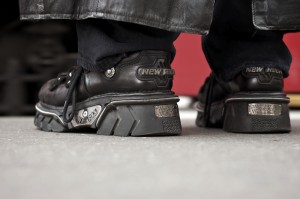
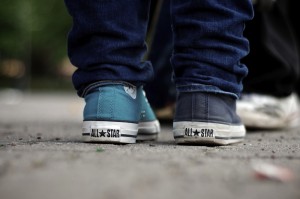
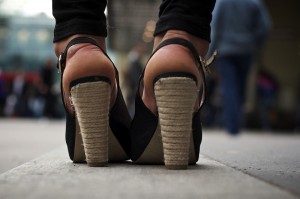
Today, I'm only shooting feet

_small_DSC_3339 - Version 2

We love a bit of street photography here at Small Aperture, and we’re always looking for new ways to tempt newbies to have a go at it or give old hands some ideas for their next outing pounding the streets. When Thomas Leuthard, a photographer based in Switzerland, dropped a couple of suggestions in my inbox, I asked him if he wouldn’t mind expanding on them a bit. So, here’s one of his suggestions, and I have to say, I love it. Thomas, over to you…

Today, I’m only going to shoot feet…

When you’re shooting on the street, it’s far too easy for your eye to get distracted. Therefore, it’s a good idea to have a small concept to concentrate on whilst out with your camera. Beginner or not, it helps to have a plan; something to hold on and to follow to. I like the concept of just shooting feet. The reason for that is very simple: feet are always out there and people wear different shoes.

In addition to saying that you’ll shoot only feet, it can help to set yourself some more boundaries. Try picking a few (or even all) from this list:

  • Detail only
  • Camera on the floor
  • From the back while standing
  • Same focal length
  • Same aperture (a small one)
  • Landscape format
  • In colour
  • A series of 10 photos
  • All in 60 minutes

I like time limitations as I find that I normally work better under pressure. It means that I know that I have to hurry up and can’t just hang around with my camera looking down at ladies’ legs. I have a mission and have to fulfil it in the time provided. (How very James Bond!)

If you target your focus, you’ll be astonished by how much you can accomplish. It doesn’t matter if you’re a beginner or an old hand, try to focus on one thing. It can be a colour, body part, accessories, or whatever you fancy, really. It is all about focussing on the essential and not getting overwhelmed by the rest of the street.

Anyway: back to our feet that we’re shooting. If you want to get a good and easy shot on a pair of shoes, try a bus stop, a pedestrian crossing, or anywhere else where people have to stand still for a moment. This is your moment and you have to be quick. Set your camera to aperture priority and try f/4. If you’re shooting with your camera on the floor, flick on autofocus. You’ll look like an idiot with your head down there, peering through the viewfinder. You might need to practise, but that’s half the fun, no?

Sure, you’re going to have to be brave, but if anyone asks, tell her or him that you study photography and that today’s topic is feet. They will think you are crazy and walk away. It’s true, people often don’t understand what I do and why I do it, but I often find that showing them some photos helps to explain it. They soon realise how beautiful street photography can be.

It’s all a question of good ideas, interesting angles, and composition. A good street photo doesn’t need to show faces. Feet are perfect, and the chances are you won’t have any legal issues, publishing someone’s feet.

Now, go forth and have fun, and try not to walk into lamp posts or anything whilst you’re looking down!

This article was guest written by Thomas Leuthard, and all of the images are his. You can see more of his street photography on his website: 85mm.

Making a time-lapse

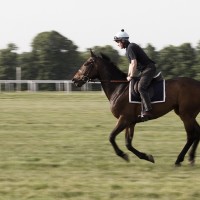
Canter

Every photographer experiences a creative block at some time or another. So what do you do when this happens? I personally fall into a foetal position on the floor, kick my legs, and spin around in circles while crying like a six-year old. But what do YOU do? Well, here’s a thought. How about a time-lapse? If you have a dSLR and a sturdy tripod, then you already have most of the ingredients for this magnificent recipe. So let’s get started!

Equipment

While many dSLRs have an “interval shooting” feature built in already, some don’t, so you’ll also need a way to time and trigger your shutter release. There are several pieces of hardware available, but I like to use a Hähnel Giga T Pro. It’s the only one I’ve ever used, but it seems to work perfectly fine and is easy enough to figure out. Whatever you decide to go with, make sure it has an interval timer function and an exposure count control. Without these two features, you won’t be able to create your time-lapse.

Essential kit, if your camera doesn't have an 'interval shooting' function

For this tutorial, you’ll also need QuickTime software, which you can download here. (If you own a Mac and you’re running Snow Leopard, then you’ll notice that you have QuickTime X and can’t install QuickTime 7. Read this post by Apple to get around this problem.)

The location

You can shoot a time-lapse of just about anything you want. Obviously, it makes more sense to shoot a scene that has a lot of motion in it, such as fast-moving clouds, a busy city square, or a train station. Once you determine your scene, it’s time to get set up. Keep in mind that you’ll need to dedicate some time to this project, so bring along a book or something to keep you occupied while you shoot. ‘How long should I shoot,’ you ask? Well, that depends. And in order to figure that out, you’ll need to do some basic number crunching.

The maths

To determine the time required to shoot your time-lapse, you’ll have to work backwards. For simplicity’s sake, let’s say that we want our final video to be one minute in length. A normal time-lapse video will consist of 15 frames per second. So 15 frames times 60 seconds is 900 frames.

How smooth or choppy you want those 900 frames to flow is up to you. If you’re shooting clouds, then you’ll probably want a smoother effect, so you’ll want to shoot in shorter intervals, say every five seconds. So 900 frames taken every five seconds is 4500 seconds, divided by 60 seconds per minute, which comes out to 75 minutes, or an hour and 15 minutes worth of shooting. Phew!

So now that you have your location picked and how long you’ll be shooting for, let’s get set up.

The set-up

Place your tripod where you want and frame your shot. Make sure your tripod is as stable as you can get it. Any movement during your 900 shots will be very visible once you combine everything together in your final video. If you brought your camera bag with extra gear in it, the added weight could help with stabilisation, so try hooking it onto your tripod.

Get comfy whilst your time-lapse is shooting

Now check your camera for settings. Because you’re taking 900 frames, you’ll want to shoot in JPG to make sure they all fit on your memory card. Also, since your video will likely be used for web-friendly applications like Youtube or Vimeo, you don’t really need to have extra-large high resolution photos.

Make sure you focus your shot and then disable your auto-focus to ensure consistency across all of your frames. You’ll also want to shoot in either manual or aperture-priority mode. If you’re out in an open field during high noon with a lot of clouds in the sky, you’re bound to be in bright sunlight during some shots and darker shade during others, so aperture-priority will help ensure proper exposures throughout your time-lapse.

Once you’re all set up, program your interval timer to the correct settings and start shooting. Grab your book and get comfortable. You’ll be there for the next 75 minutes.

Creating Your Video

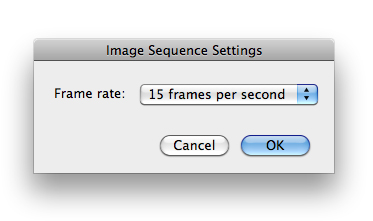
Once you’ve downloaded your photos to a folder on your computer, it’s time to put everything together. Open up QuickTime and click Open Image Sequence under the File menu. Select only the first image in your sequence and click Open. Next, you’ll want to select your frame rate. For our example, we’ll go with 15 frames per second. Click OK and QuickTime will do the rest for you.

You now have your master time-lapse video. Make sure to save it as is. You can then go back to the File menu and choose Export for Web to save the video as a more web-friendly version, ready for Youtubing.

Congratulations, you now have your first time-lapse video!

Extra Steps

While this tutorial simply covers the basics of time-lapse photography, there are plenty of other methods available to play with, so once you get some practice down, you can start experimenting a bit. For example, you may want to batch-edit your photos in Photoshop to create a more unusual time-lapse, such as one in monochrome.

If you’re shooting a busy street at night, you might want to use a slow shutter speed to make the car headlights streak throughout your video. Or you may want your time-lapse to pan across a large scene, a bit like this one, to give your video a wow factor. The options are endless.

Time-lapses can be a great way to create a fun and unique project on a lazy Sunday afternoon. Maybe you have things to do around the house, so you set up your gear in your backyard and shoot while you do your chores. Or maybe you’re at a cafe in a busy city square. Why not shoot a time-lapse of the buzz around you while you sip on a cappuccino and read a book? It’s simple to do and I’m sure you’ll be pleased with your results.

And just so that you know, this is my favourite time-lapse out there:

Hayaku: A Time Lapse Journey Through Japan from Brad Kremer on Vimeo.