shutter release

An auto-focusing modes primer

Autofocus is such a wonder-tool in our cameras that I'm sure quite a few of us have no idea how we ever managed to take tack-sharp photos without it. But how many of us actually use it to its full potential? There's a bit more to auto-focus than the single or one shot default. Without further ado, here's a quick primer into the different auto-focusing modes you're likely to find on your camera, and when best to make use of them.

One or Single shot

This is probably what you think of as 'auto-focus'. You point your camera at your subject, you line up your auto-focusing points over it, you half-depress the shutter button, and the camera attempts to focus on the subject. When it finds focus, it 'locks' onto it until you complete the depression of the shutter button or release it and re-focus your shot. This mode is great for most subjects that don’t move a lot.

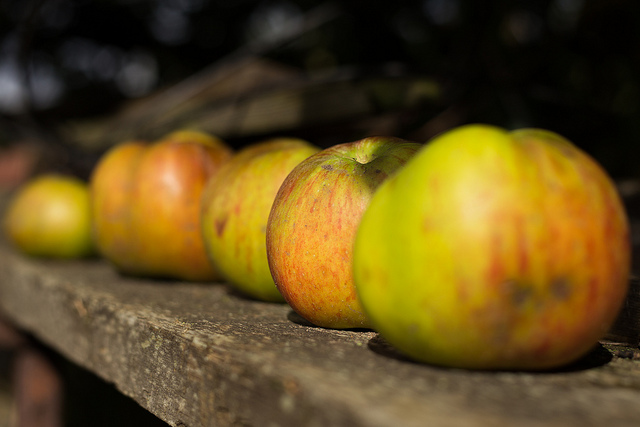
The apples weren't going anywhere; one shot was just fine

Canon calls this mode 'One shot'; you'll see it marked as 'AF-S' on Nikon, Fujifilm, and Sony cameras; Olympus refers to it as S-AF and Pentax as AF.S.

Continuous or Servo mode

When you're shooting fast-moving subjects and want to keep them in focus, try using continuous or servo mode. While you half-depress the shutter release button, the camera will repeat the auto-focusing operation in order to keep your subject sharp as it moves across the frame.

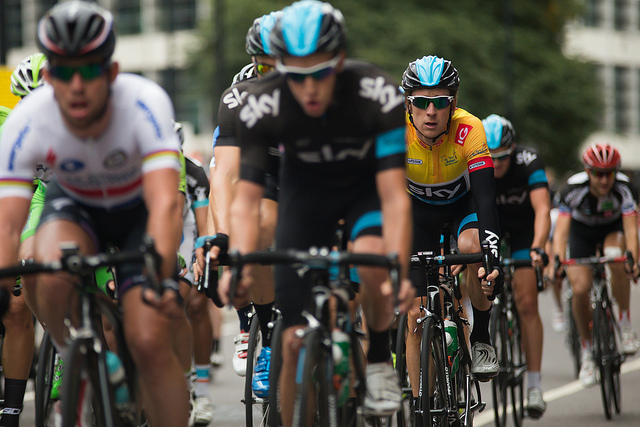
Tracking something fast moving? Try AI Servo or AF-C mode.

Canon reckons its servo mode can track subjects approaching or receding at upto 50 kilometres per hour, making it good for capturing plenty of sports.

Nikon, Fujifilm, and Sony refer to this mode as AF-C; it's marked as AI Servo on Canon cameras; on a Pentax you'll see it as AF.C; and it's C-AF on an Olympus camera.

Intelligent or Automatic auto-focus

'Intelligent' focus is a half-way house between single shot and continuous auto-focus. When you half-depress the shutter button, the camera is set to recognise movement in the subject. For subjects that don't move, the camera will use one shot auto-focusing. Should it detect movement from the subject, it will automatically switch to continuous auto-focus and start to track the subject.

Animals (and children) often favour AF-A mode

While this mode might seem like the best of both worlds, and it can be very handy particularly if you're photographing children or animals, it can sometimes be a bit of a let-down and isn't quite fast enough to deliver the results you want.

Canon calls this mode AI Focus AF. It's AF-A on Nikon and Sony cameras, while Pentax refers to it as AF.A.

Manual focus

It was learning to align the focusing markers in an SLR that first got me hooked on photography, almost 30 years ago. Back in the early 80s, auto-focus was only just beginning to make its way into cameras. Now we often wonder how we cope without it. But still, there are times when auto-focus simply won't do and you need to switch to manual focus, maybe for macro shots or some landscapes. If there's no obvious manual focus option on your camera, try looking on your lens: there's likely a switch to be flicked there.

Macro shots can benefit from manual focus (Image by Haje)

Often, but not always, your camera will help you by beeping or flashing when it thinks that you might have achieved focus on your subject. If you're using live view rather than through the lens, try using the manual focus assist option that lots of cameras have now. Rather than displaying the full frame, it zooms in on the area where you've focused, making it easier to hone in with precision on your subject. It's a useful tool to demonstrate just how big a difference a small adjustment can make to your focusing, too.

Exploiting your camera's capabilities

Your camera is gifted with heaps of different tools to help you get the shots that you envisage; there's more to it than exposure and metering. Don't forget to make use of them - that's why they're there!

Sleek and smooth: it's Triggertrap Mobile 2.0

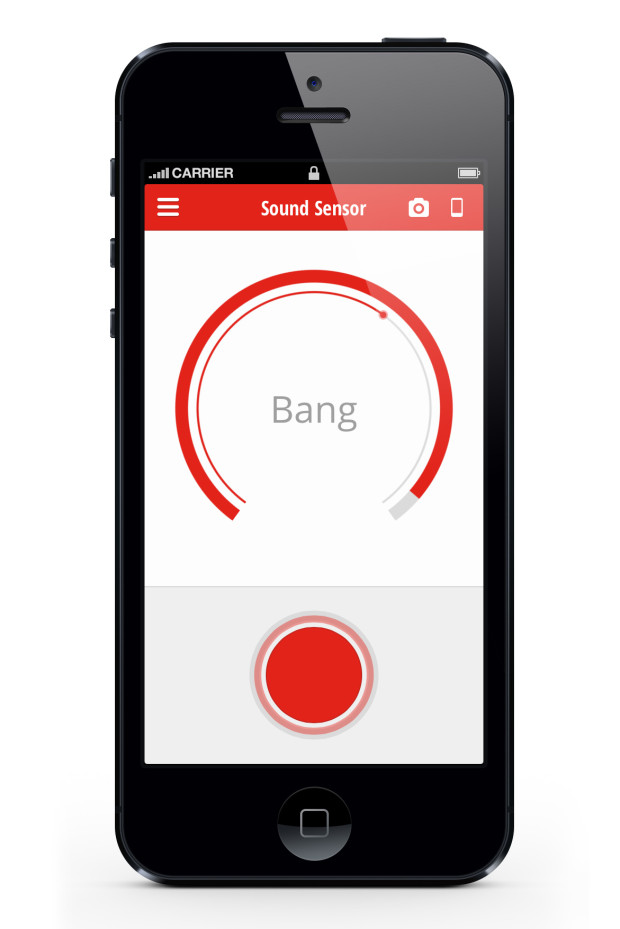
It's sleek, it's smooth, it's the new Triggertrap Mobile 2.0 that allows you to trigger your dSLR in 14 ways using your smartphone and a dongle. Want to record a timelapse—that is a sunset timelapse that makes use of bulb-ramping, or timewarped timelapse that has varied intervals between shots, or an HDR timelapse? Or trigger your camera using sound or vibration? How about create a distance-lapse? Maybe record star-trails? Fancy having a go at long-exposure HDR? And do it all wirelessly? Triggertrap has you covered. There's even a wireless flash adapter you can hook it up to for high-speed photography. Triggertrap-Mobile-20-iOS-Bang-Sensor

The new version is available for both iOS and Android devices and has a simplified design that's not just a pretty screen: switching between triggering modes is now easier. There were a few bugs in the old version that should now be squashed and Android users will be happy to hear that the app can now run in the background, even when the phone is locked, allowing you to timelapse away until your heart is content without fatally draining your battery.

The Triggertrap team is rather proud of version 2.0: 'We saw the opportunity to combine what we learned from the first generation app with the tips we received from our diehard fans to make Triggertrap what we always envisioned it could be,' said CEO and Triggertrap inventor Haje Jan Kamps. 'It certainly helps that our fans wear the pants around here and aren’t shy about letting us know what could be improved, and as a result, Triggertrap Mobile 2.0 is the best triggering solution you’ll find anywhere.'

If you don't already use Triggertrap, you can download the app for free from Apple's App Store or Google Play. It works with your device's internal camera or can be hooked up to supported dSLRs or flashguns using hardware available from the Triggertrap shop.

And if you'd rather watch a video, Triggertrap's made you one of those, too!

Pentax Optio RS1500 review

templatesRS1500

We do enjoy getting toys to play with here at the Small Aperture Mansion. The latest to pass through our grubby mitts has been Pentax’s Optio RS1500, the little point-and-shoot with the customisable front. The idea is that you can take off the lens ring and change the ‘skin’ on the front for anything ranging from candy-cane stripes to camouflage. Armed with its 14 megapixels, 4× optical zoom, 15 picture modes, smile detection, and nine filters, we set about finding out what we thought of it.

Build and design

It’s a small, light-weight camera. Even in my tiny hands, it felt little and I dread to think what sort of damage you might do to it if you drop it. Without any of the fun skins that you can slot beneath the front cover to turn it into a zebra or a Green Lantern superhero special, it’s a plain looking beast. The front’s silver and the back’s matt black. I don’t have any problem with that, but half of the appeal of this camera is its chameleon appearance.

Features and controls

The on-off switch and the shutter release are the only buttons on the top of the camera. Everything else – zoom rocker, play back, smile detection, and menu buttons, customisable ‘green button’, together with the four-way controller – is positioned to the right of the LCD screen. I found the menu system quite fiddly to use, and when I tried to put the camera in Program mode – which is as manual as it gets – trying to adjust the ISO wasn’t as intuitive or as quick to access as it should have been.

Afro Ken does the boudoir look

Its fifteen different shooting modes range from auto to portrait via candlelight and blue sky. They’re accessed from the four-way controller, together with the flash, focus control, and self-timer. You can set the green button, which doubles as the delete button, to access the video mode, EV compensation, or ISO. This will help to alleviate the fiddly-ness factor for one of those settings, but not the others. But then, I’m not sure how bothered someone using this camera will be by EV compensation. So it probably doesn’t matter all that much.

Performance

Roasted tomatoes in auto mode

In daylight, this camera produces some decent images and I really couldn’t complain about them too much. Okay, yes, maybe reds and oranges were a touch over-saturated. But honestly, it was fine.

Roasted tomatoes in food mode. Any different?

With fifteen different modes to choose from, it was almost overwhelming, and honestly, I preferred the photo of some roasted tomatoes taken in auto mode rather than taken in food mode.

It’s in lower light situations where the problems begin to creep in. The auto-focus struggled badly and sometimes couldn’t latch on to anything at all. This was hugely frustrating and resulted in pictures that were mushy and had to be binned. Pictures were pretty noisy, too. And Gareth and I both commented that we found the flash glarey.

Gareth also pointed out that the filters were quite poor. It’s as if they’ve been tacked on because every camera needs to have a toy camera and sepia effect now. As for the screen, Haje commented that its quality isn’t great, but it is quite large.

Verdict?

You get what you pay for with a £70 camera. In daylight, it takes some pretty decent photos. Anything approaching low-light, however, presents its auto-focus with some serious problems and the noise in the images that it does manage to produce is quite unpleasant. With its interchangeable skins, it’s a fun, small, light-weight camera. You could do better, and you could do worse.

Portraits in daylight are just fine

Making a time-lapse

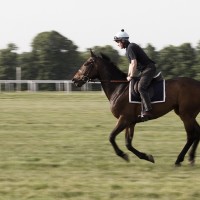
Canter

Every photographer experiences a creative block at some time or another. So what do you do when this happens? I personally fall into a foetal position on the floor, kick my legs, and spin around in circles while crying like a six-year old. But what do YOU do? Well, here’s a thought. How about a time-lapse? If you have a dSLR and a sturdy tripod, then you already have most of the ingredients for this magnificent recipe. So let’s get started!

Equipment

While many dSLRs have an “interval shooting” feature built in already, some don’t, so you’ll also need a way to time and trigger your shutter release. There are several pieces of hardware available, but I like to use a Hähnel Giga T Pro. It’s the only one I’ve ever used, but it seems to work perfectly fine and is easy enough to figure out. Whatever you decide to go with, make sure it has an interval timer function and an exposure count control. Without these two features, you won’t be able to create your time-lapse.

Essential kit, if your camera doesn't have an 'interval shooting' function

For this tutorial, you’ll also need QuickTime software, which you can download here. (If you own a Mac and you’re running Snow Leopard, then you’ll notice that you have QuickTime X and can’t install QuickTime 7. Read this post by Apple to get around this problem.)

The location

You can shoot a time-lapse of just about anything you want. Obviously, it makes more sense to shoot a scene that has a lot of motion in it, such as fast-moving clouds, a busy city square, or a train station. Once you determine your scene, it’s time to get set up. Keep in mind that you’ll need to dedicate some time to this project, so bring along a book or something to keep you occupied while you shoot. ‘How long should I shoot,’ you ask? Well, that depends. And in order to figure that out, you’ll need to do some basic number crunching.

The maths

To determine the time required to shoot your time-lapse, you’ll have to work backwards. For simplicity’s sake, let’s say that we want our final video to be one minute in length. A normal time-lapse video will consist of 15 frames per second. So 15 frames times 60 seconds is 900 frames.

How smooth or choppy you want those 900 frames to flow is up to you. If you’re shooting clouds, then you’ll probably want a smoother effect, so you’ll want to shoot in shorter intervals, say every five seconds. So 900 frames taken every five seconds is 4500 seconds, divided by 60 seconds per minute, which comes out to 75 minutes, or an hour and 15 minutes worth of shooting. Phew!

So now that you have your location picked and how long you’ll be shooting for, let’s get set up.

The set-up

Place your tripod where you want and frame your shot. Make sure your tripod is as stable as you can get it. Any movement during your 900 shots will be very visible once you combine everything together in your final video. If you brought your camera bag with extra gear in it, the added weight could help with stabilisation, so try hooking it onto your tripod.

Get comfy whilst your time-lapse is shooting

Now check your camera for settings. Because you’re taking 900 frames, you’ll want to shoot in JPG to make sure they all fit on your memory card. Also, since your video will likely be used for web-friendly applications like Youtube or Vimeo, you don’t really need to have extra-large high resolution photos.

Make sure you focus your shot and then disable your auto-focus to ensure consistency across all of your frames. You’ll also want to shoot in either manual or aperture-priority mode. If you’re out in an open field during high noon with a lot of clouds in the sky, you’re bound to be in bright sunlight during some shots and darker shade during others, so aperture-priority will help ensure proper exposures throughout your time-lapse.

Once you’re all set up, program your interval timer to the correct settings and start shooting. Grab your book and get comfortable. You’ll be there for the next 75 minutes.

Creating Your Video

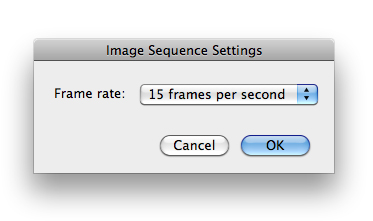
Once you’ve downloaded your photos to a folder on your computer, it’s time to put everything together. Open up QuickTime and click Open Image Sequence under the File menu. Select only the first image in your sequence and click Open. Next, you’ll want to select your frame rate. For our example, we’ll go with 15 frames per second. Click OK and QuickTime will do the rest for you.

You now have your master time-lapse video. Make sure to save it as is. You can then go back to the File menu and choose Export for Web to save the video as a more web-friendly version, ready for Youtubing.

Congratulations, you now have your first time-lapse video!

Extra Steps

While this tutorial simply covers the basics of time-lapse photography, there are plenty of other methods available to play with, so once you get some practice down, you can start experimenting a bit. For example, you may want to batch-edit your photos in Photoshop to create a more unusual time-lapse, such as one in monochrome.

If you’re shooting a busy street at night, you might want to use a slow shutter speed to make the car headlights streak throughout your video. Or you may want your time-lapse to pan across a large scene, a bit like this one, to give your video a wow factor. The options are endless.

Time-lapses can be a great way to create a fun and unique project on a lazy Sunday afternoon. Maybe you have things to do around the house, so you set up your gear in your backyard and shoot while you do your chores. Or maybe you’re at a cafe in a busy city square. Why not shoot a time-lapse of the buzz around you while you sip on a cappuccino and read a book? It’s simple to do and I’m sure you’ll be pleased with your results.

And just so that you know, this is my favourite time-lapse out there:

Hayaku: A Time Lapse Journey Through Japan from Brad Kremer on Vimeo.

Apple ventures into the bright new world of HDR

iPhone

Well whaddya know, the first topic that Steve Jobs discussed at Apple’s Special Event yesterday, when it came to the iPhone, was HDR photos. With the release of Apple’s iOS update (iOS 4.1) next week comes a new feature for the iPhone camera: HDR.

When you activate the phone’s camera, you’ll see a button on the top of the screen that says ‘HDR’. If you select this feature, the camera will take a normal ‘raw’ photo as well as an HDR image. Both will be saved to the iPhone’s camera roll.

According to Jobs, the camera will take three exposures in rapid succession: one underexposed, one exposed properly, and one overexposed. Some ‘complex algorithms’ (got to love that phrase) will then merge the three images together, creating one HDR photo. However, it’s more likely that the iPhone software automatically processes two extra images from the original rather than actually taking three separate photographs.

The slow speed of the phone’s shutter release would cause all sorts of camera shake problems, therefore making ‘real’ HDR photos difficult to achieve. While this may disappoint true HDR enthusiasts, the new native feature is a big step forward for smartphone photography and should help propel HDR photography into the global mainstream.

HDR: it’s where all the cool kids seem to be playing.

Friday 2 September 2010, Update: Seems as if it’ll only be available for iPhone 4. Oh Apple, why do you taunt 3G and 3GS users so?

Buying the right camera

eos.jpg

eos.jpgIn a completely unrelated post, I received a rather lengthy comment today. I suspect the main purpose of the post was to get a link to his site, but of course, Photocritic uses REL=NOFOLLOW (read why) on all the user-contributed links, so the spamming activity went without any particular merit.

What was insteresting, however, was that this person actually raised an interesting issue and an fascinating question. He says that 75% of people buy the wrong camera for his photography courses… 

I am a photography teacher.

I find that 75% of people buy the wrong camera. So just how do they end up in one of my classes with the wrong camera. The short answer is that they bought the most fashionable looking camera without really knowing what to look for in a digital camera.

The questions you should ask the sales person is: how long does the camera take to turn on? How long does the camera take to focus on the subject? And how long does it take to actually take the photo? Turning on the camera can take between 1-5 seconds, focus can take from 0-2 seconds and shutter lag can take up to 1 second.

Why is this important, well try taking a photo of a child blowing out the candles with a camera that takes 2 seconds to focus and 1 second to take the photo and all you will be left with is a child looking away and smouldering candles. This is where the new D70s rise above all the other cameras in its class with instant turn on focus and shutter release.

We highly recommend the D70 to someone who wants a camera to last him or her for many years without the frustration of a slow camera. We are so happy with our D70s we bought four more we highly recommend them to anyone who loves photography and does not want to have to upgrade when they learn more about photography!


Why 75%? Surely, everybody who buys an D-SLR has a camera good enough? Why are you talking about shutter lag and camera turn-on-lag? It’s a long time ago that this was a big issue for digital compact cameras. Sure, there are still crummy cameras out there, but the vast majority of digital compact cameras are not struggling with the problems mentioned here. Granted, most of them aren’t good for a photography course because you don’t have aperture and shutter speed settings, but still…

And finally – Why recommend the Nikon D70 specifically? Do you work for Nikon? I would argue that any digital SLR (even the ages-old Canon EOS 30D, if you can pick it up for cheap off eBay) is more than good enough to use for learning photography. Hell, according to Froogle, you can pick up a digital SLR for about $650 (£350, approx). Furthermore, there isn’t that much difference between the D-SLRs anymore. Of course, the better cameras have more features and are more sturdy, but image quality wise, a 8mpx camera is as good as most other 8mpx cameras – especially in the DSLR world, where you supply your own glass anyway.

So folks, ignore all previous advice, and buy any DSLR (preferably Canon or Nikon, I don’t quite trust the others yet) you want.

… And just because this guy with his spamming managed to raise an interesting issue, I’m going to thank him by linking to his website anyway. Although, strictly speaking, I probably wouldn’t bother with going to any of the courses. If his Photocritic commenting skillz are anything to go by…


Do you enjoy a smattering of random photography links? Well, squire, I welcome thee to join me on Twitter -

© Kamps Consulting Ltd. This article is licenced for use on Pixiq only. Please do not reproduce wholly or in part without a license. More info.