shutter button

An auto-focusing modes primer

Autofocus is such a wonder-tool in our cameras that I'm sure quite a few of us have no idea how we ever managed to take tack-sharp photos without it. But how many of us actually use it to its full potential? There's a bit more to auto-focus than the single or one shot default. Without further ado, here's a quick primer into the different auto-focusing modes you're likely to find on your camera, and when best to make use of them.

One or Single shot

This is probably what you think of as 'auto-focus'. You point your camera at your subject, you line up your auto-focusing points over it, you half-depress the shutter button, and the camera attempts to focus on the subject. When it finds focus, it 'locks' onto it until you complete the depression of the shutter button or release it and re-focus your shot. This mode is great for most subjects that don’t move a lot.

The apples weren't going anywhere; one shot was just fine

Canon calls this mode 'One shot'; you'll see it marked as 'AF-S' on Nikon, Fujifilm, and Sony cameras; Olympus refers to it as S-AF and Pentax as AF.S.

Continuous or Servo mode

When you're shooting fast-moving subjects and want to keep them in focus, try using continuous or servo mode. While you half-depress the shutter release button, the camera will repeat the auto-focusing operation in order to keep your subject sharp as it moves across the frame.

Tracking something fast moving? Try AI Servo or AF-C mode.

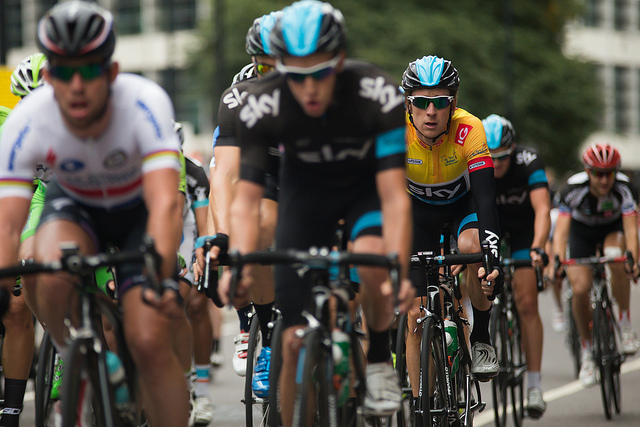
Canon reckons its servo mode can track subjects approaching or receding at upto 50 kilometres per hour, making it good for capturing plenty of sports.

Nikon, Fujifilm, and Sony refer to this mode as AF-C; it's marked as AI Servo on Canon cameras; on a Pentax you'll see it as AF.C; and it's C-AF on an Olympus camera.

Intelligent or Automatic auto-focus

'Intelligent' focus is a half-way house between single shot and continuous auto-focus. When you half-depress the shutter button, the camera is set to recognise movement in the subject. For subjects that don't move, the camera will use one shot auto-focusing. Should it detect movement from the subject, it will automatically switch to continuous auto-focus and start to track the subject.

Animals (and children) often favour AF-A mode

While this mode might seem like the best of both worlds, and it can be very handy particularly if you're photographing children or animals, it can sometimes be a bit of a let-down and isn't quite fast enough to deliver the results you want.

Canon calls this mode AI Focus AF. It's AF-A on Nikon and Sony cameras, while Pentax refers to it as AF.A.

Manual focus

It was learning to align the focusing markers in an SLR that first got me hooked on photography, almost 30 years ago. Back in the early 80s, auto-focus was only just beginning to make its way into cameras. Now we often wonder how we cope without it. But still, there are times when auto-focus simply won't do and you need to switch to manual focus, maybe for macro shots or some landscapes. If there's no obvious manual focus option on your camera, try looking on your lens: there's likely a switch to be flicked there.

Macro shots can benefit from manual focus (Image by Haje)

Often, but not always, your camera will help you by beeping or flashing when it thinks that you might have achieved focus on your subject. If you're using live view rather than through the lens, try using the manual focus assist option that lots of cameras have now. Rather than displaying the full frame, it zooms in on the area where you've focused, making it easier to hone in with precision on your subject. It's a useful tool to demonstrate just how big a difference a small adjustment can make to your focusing, too.

Exploiting your camera's capabilities

Your camera is gifted with heaps of different tools to help you get the shots that you envisage; there's more to it than exposure and metering. Don't forget to make use of them - that's why they're there!

The Pre-Photography Checklist


So, you're ready to do a photo shoot? No, seriously, are you really ready for your shoot?

A while ago, I was challenged with creating a pre-shoot checklist for photographers - I figured it'd be rude not to, so I gave it a whirl.

Before you press the shutter button...

  • Check your settings – Is your camera set to the mode you planned to use? Is the ISO set to a useful setting?
  • Fill the frame – Does your subject fill the frame? If not, get in closer, either by walking closer, or by zooming in.
  • Pre-focus – When you press your shutter button half-way, your camera will focus and measure the light. Use that functionality every time
  • Check your focus! – If you’re taking a photo of something with eyes, make sure you have the eyes in focus. If not – well, try to get the important bits in focus.
  • Compose – Keep the shutter button pressed half-way, and re-compose your image so everything you want in your photo shows up the way you want it.
  • Check your edges – Before you press the shutter all the way down, run your eyes along the edges of the frame. Is there anything along the edges that shouldn’t be there? If so – re-compose your shot and try again!
  • Check the background – New photographers are so focused on what’s happening in the foreground, that they fail to notice the huge dog taking a poo in the background. You laugh, but I’ve seen it happen
  • Deep breath – Hold your breath whilst you very slowly press the shutter button all the way down. This helps eliminate camera shake when you are taking the photo.

Best of all, if you want a handy, keep-in-your-pocket version of this checklist, it's printed on the back of my super-handy Photocritic Grey Cards. Spiffing. 


Did you know: Bulb Mode!

I've been doing a lot of talking about Bulb Mode with people recently - as this is relevant to how the Triggertrap Mobile App does stuff like HDR and Star Trail photography modes - but it only recently occurred to me that not a lot of people know what 'Bulb' mode on your camera means. Contrary to popular belief, 'Bulb' mode has nothing to do with light bulbs; it is a remnant from something that most photographers today haven't even heard of: An Air Bulb Remote. If you have an old (or retro-styled) camera, you may have spotted a small hole with a screw thread in your shutter button. It's possible to screw in a mechanical remote control here, which physically 'presses the button' on your camera when it is activated.

This is a Bulb Remote: Squeeze the bulb to take a photo. (Photo cc Denkhenk)

There are two ways these remote controls work: They either have a cable running inside a sleeve (much like the brake system on your bicycle), or a system working on pneumatic pressure. In the case of the latter, you'll have a air hose with a small piston at the end. When the pressure is increased in the air hose, the piston extends, and the shutter button is pressed.

Traditionally, the pneumatic systems had a small 'bulb' at the end, so when you squeeze the bulb, the piston extends, and the picture is taken. This is the bulb that camera manufacturers refer to when they say 'Bulb' mode.

So now you know! What's your favourite depreciated bit of photography jargon?

Best thing about iOS 7? The camera is bloody fast.

We already took a quick peek at the new camera app in iOS 7, but then I was able to borrow an iPhone 5 running iOS 7 off a friend, to see what changes Apple may have been making to the camera. There are lots of little improvements, but the #1 thing that strikes me about it is how incredibly, incredibly fast it is. The camera in general was one of the things I disliked the most about iOS 6, but in the newest version of the operating system, Apple have completely knocked it out of the ballpark.

Gone is the skeuomorphic "shutter closing" animation that made the camera feel horribly laggy. In the new camera app, you can take photos as quickly as you can press the shutter button. No, seriously - if your subject is bright enough, and your thumb is fast enough, you can practically record video, that's how incredibly fast it is.

It's not just really quick at taking pictures, either - you can swipe from the lock screen to launch the camera, and the code boffins at Apple must have done some serious re-coding of the camera app: It launches in fractions of a second, and and you're immediately ready to take photos.

Let's take a closer look.

At the beginning of the video below, I'm just showing how easy it is to go straight to the camera (Drag from the bottom right of the screen). Then, I'm launching the camera, then going straight into taking a load of photos in rapid succession, followed by showing off the pictures I've just taken in the camera roll:

Really impressive stuff - and that doesn't even touch on any of the other improvements on the photography side of things.

Suffice to say that I think Apple have finally created some software that's worthy of the extremely capable cameras that are finding their ways into the iPhone 5 and new iPod Touch devices. Way to go, guys, and keep up the great work for photographers!