


With cameras and photos everywhere, it's hardly surprising that children–who are naturally inquisitive–might want to have a go at taking photos themselves. It's not that hard to give them a helping hand!

When you hear the term 'high-res' thrown about with such abandon when it comes to images for web use, have you ever stopped to think just how big or how high quality and image meant for the web needs to be?
There's an assumption that high-contrast images are more dynamic, more compelling, more inviting. Have a go at some low-contrast photography. You might surprise yourself with the results.
Balance doesn't mean symmetry; it means an internal consistency and tension within your photos. And it's a vital element of composition.
Great photos might be down to a little bit of luck, but most of that 'luck' you make yourself. Don't believe us? Read on...

Taken with an iPhone 4
Forgive me for stating the obvious: You get much better photos with a camera than without one. So, whilst I would much rather always be taking photos with SLR body with a sharp Prime lens, the truth of the matter is that you'll sometimes come across moments where you're just bursting to take a photo - and you may not have a 'real' camera handy.
If you're a hard-core photographer, you'll probably have a reasonably recent smart-phone. Great news: The phone comes with a surprisingly capable camera built-in.
It's not without limitations, of course, but here's eight tips to get the most out of your mobile phone snaps...
Mobile phones are usually subjected to all sorts of abuse. Mine lives in my hand and my pocket; neither of which is the greatest environment for a clean lens.
Fingerprints, grease, or pocket fluff are the #1 reason for rubbish smart-phone photos, so check it, and clean it before shooting!
Modern mobile phones often come with impressive ISO ranges so you can take photos even in low light; but that doesn't mean you should: The small sensor size introduces a lot of noise, which isn't very nice, and certainly isn't conducive to awesome snaps.
Turn up the lights in the room, or go outside in daylight for the best photos.
If your camera has several settings, use 'em! As a general rule, the higher the resolution of your mobile camera, the clearer your photographs will be.
Bear in mind, though, that the higher the resolution of your photo, the larger its file size will be, so if you're e-mailing them, try to make them smaller before you kill your grandma's 28.8 kbit/s modem.
Using digital zoom to zero in on your subject is fun if you want to use your mobile phone instead of binoculars, but it ain't much good if you're wanting to take photos. For photography, keep it zoomed all the way out, and crop the images later instead.
When taking photographs, the more steady your camera is, the clearer your picture will be. Simples. If you can, lean your elbows on a sturdy surface, or place the phone against a lamp-post or similar for extra crispness.
If your mobile phone has the option of adjusting the camera using white balance, go ahead and experiment how the different settings impact on your photographs.
To avoid having to zoom in or crop your shots later, ensure that your subject fills your viewfinder.
Even though your phone may have built-in editing features out of the box, consider editing them with a separate app instead.
For the iPhone, my favourite editing apps are Snapseed and Photoshop Express - Try 'em out, and use the filters and editing tools to add a bit of sizzle.
Got that? Great. Now go snap some photos you're proud of. Oh, and post them in the comments, I'd love to see what you guys come up with!
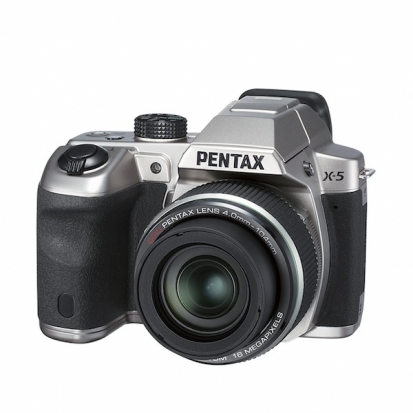
I spent a few weeks with a Pentax X-5. I used it whilst my brother's girlfriend was decorating the Christmas tree, I took it down to my father's allotment, and I conducted the requisite 'general fiddling' too.
The X-5 has 26× optical zoom capability (22.3 to 580mm, extendable to 4174mm with Digital Intelligent Zoom in 35mm equivalent) with a dual shake-reduction system and 1cm minimum focusing distance in macro mode. The 16 megapixel back-illuminated CMOS sensor has a maximum sensitvity of ISO 6,400. It can shoot upto 10 frames per second, capture HD video, and comes with a range of filters and in-camera tools.
It is powered by four AA batteries and can be picked up for around £180 or $245.
The X-5 feels very much like a scaled-down dSLR in the hands, with a chunky grip and protruding lens. It was comfortable to hold and the button layout was sensible. Would I have preferred to be able to switch on the camera without having to remove the lenscap? Yes. Is it going to change my life any? No.
The X-5 offers you M, P, full auto, and a range of other preset shooting modes. No, there's no Aperture Priority or Shutter Priority modes. After spending far too long messing about with the controls in an attempt to secure a decent exposure in manual mode and getting highly frustrated by the auto-focus with a mind of its own in fully automatic mode, I shot predominantly in Program mode. The ISO settings are squirreled away in a menu, but it was far less problematic to change the sensitivity than it was to deal with auto-of-focus pictures or to refer to the camera's idiosyncratic exposure meter and functionality. (I disliked the meter's display on the LCD and found it unintuitve.)
I wasn't at all comfortable using the electronic viewfinder. It looked far too much as if I should have been playing a video game than taking photos. As a consequence, I used the LCD screen exclusively and enjoyed its tilting ability, especially when I put the camera on a low-set tripod.
Powered by AA batteries, you are supposed to be able to get 330 shots from a fresh set of four. I'm sorry to say that I didn't come anywhere close to that number of images. Maybe 150?
Once I'd freed myself of the tyranny of the self-selecting auto-focus and switched to Program mode, I quite liked using the X-5. It has a great zoom range, the image quality is absolutely fine for web reproduction, and it's generally simple to achieve what you want (within its capabilities, of course).
The ISO tests showed that it was fine up to ISO 400, but after then, quality began to degrade significantly. Colour reproduction in daylight was good, but I found that the auto white balance tended towards too yellow in incandescent lighting. Set the white balance to incandescent, however, and the colour reproduction was far more accurate. I was pleasantly surprised by the impact of the pop-up flash indoors. It wasn't too harsh.I had pretty good results with the macro mode, too.
I don't have any particular love for in-camera filters, but the X-5's range of 12 were easy to use and could be applied non-destructively to the original image. In addition to those filters, you can play around stretching your images, giving people small faces, and creating collages. You can resize and crop in-camera, as well as edit video, too. There's also the ability to shoot direct to the camera's memory and then transfer the images to an SD card.
You get a lot of camera for your money with the X-5. But, it doesn't offer you anything outstanding and I found some of its features so frustrating to use that, from my perspective, they might not even have been included. Furthermore, I'm just not convinced by the bridge camera concept; they seem to sit in a photographic no-man's-land.
Would I buy it? No. Between my dSLR and a highly specced compact, my needs are met and the X-5 comes in no way close to fulfilling them.
Would I recommend it? If you really want a bridge camera, it offers such great value for money that I don't think you can ignore it.
More images on Flickr.

Green and red! (Picture by Haje)
Okey-dokey! It's July. We've been wracking our brains for a competition theme that'll get you thinking and taking photos. So after a bit of this and a bit of that, we decided that two-tone was the way to go. We want photos that feature two colours. Red and green, blue and orange, yellow and purple... Any shades, any tints, but two hues. (And black and white don't count.)
The competition runs from today, Thursday 5 July, until Thursday 26 July. As ever, it's one entry per person, and the person whose image captivates us the most will win for her or himself a gorgeous 12 inch Fracture.
All your beautiful pictures need to be placed in the Small Aperture Flickr pool. I'm always happy to answer any questions, ping me an email (it's over there →) or leave a comment. Otherwise, good luck! (And justincase, The Rules have been reproduced for you.)
The Rules
If you've any questions, please just ask!

This (admittedly not very interesting) pic of me was taken with my Triggertrap when someone joined the Triggertrap newsletter.
Today's post is brought to you by the how-bloody-meta-is-this department...
So, I've been playing with different concepts of automating the taking of photos, by using the Triggertrap universal camera trigger I invented.
As part of the upcoming Triggertrap website (it's launching on Monday!), I was working on the updated Newsletter sign-ups, and I had an idea: Wouldn't it be cool if someone signing up for a newsletter triggered the camera?
So that's what I did - Now, whenever someone signs up for the Triggertrap newsletter, it automatically takes a photo of me, sitting at my desk, slaving away. Okay, so it isn't a very interesting photograph, but that isn't the point - it's kind of awesome that my camera is taking photos whenever someone else does something.
If you want to find out how it's done (and if you, too, want to take a photo of me)... Sign up for the newsletter; the explanation is on the sign-up confirmation page. (Pretty sneaky, eh?)
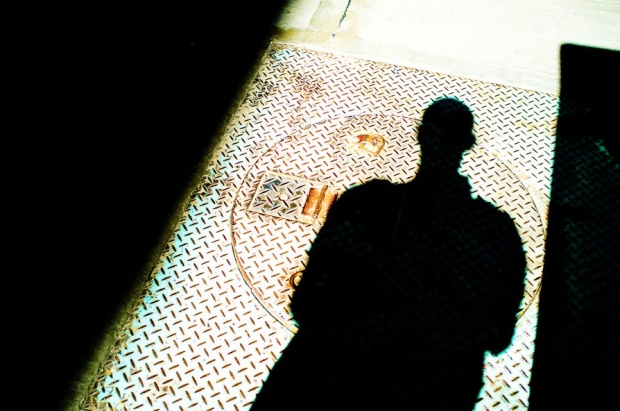
Think outside the, er, manhole cover.
One of my favourite things about photography is that it's so accessible as an artform. To create a painting, you can't expect to be able to deliver anything if you go and buy some canvases, brushes, and some paint without any training or idea what you're trying to do (although, to be fair, some modern art does give that impression)... In photography, you can take your very first photo, and it'll come out well-exposed, and it'll be of roughly whatever you pointed your camera at. Cool beans, now let's take a look at how we can get better...
The photographer makes the photo, not the camera, but there's nothing wrong with considering some new equipment every now and again. For some people, upgrading to the latest and greatest is all the inspiration they need to get out there and take better snaps. You don't have to buy a fancy DSLR, but really research your next camera and find one that truly fits your needs.
Nowadays there are hundreds of different types of cameras that you can choose from, so really put some thought into what you will be using your camera for before you invest in one.
Another great tip is to read your camera's manual. Reading the manual will give you the edge; it will allow you to know your camera inside and out and in turn you'll understand the mechanics of a camera.
After reading the manual, play with it; try taking photos in every photography modes, and try setting youself little challenges - like "only taking photos at ISO 1,000 today" or "this week, I'm using manual focus only" or similar. Your photos may not necessarily come out better, but inventing games to help you understand your camera better is a huge step forward. Want some more fun exercises? Try 10 ways to break photographer's block
Community colleges or community centers often offer fairly inexpensive photography classes. It could be to your advantage to take one of these courses and learn a few tips and tricks from your fellow classmates and from your teacher about the technical aspects of photography. Alternatively, there's plenty of books out there that could help you along - perhaps one of mine? ;-)
Don't be afraid to try something new in your photos. For example, if you normally take photos of your family and friends, then you can try out new lighting, or new settings on your camera. You could also try shooting at different times of the day. Night photography is a whole new world compared to day time photography, so don't be afraid to try something new and experimental in your photos.
Find what you like to take photos of the most, and specifically work on that aspect of photography. Many people gravitate towards portrait photography, but give other branches of photography a chance as well. You never know, you could fall in love with architectural photography or pet photography.
Whatever you find you like best, try to become really really good at it - it won't be easy, and it'll be a lot of hard work - after all, if you love doing it already, it won't feel like work!
Always carry your camera! You never know when the perfect photo-op will arise, so it is a good idea to always have your camera close. Also, if you keep your camera with you, then you will be able to practice your photography more and more each day.
Be adventurous in your photos. You can travel with your camera and go on many adventures with your camera in order to learn more about photography.
Going on adventures are fun, normally inexpensive, and can be fun getaways from the stresses of everyday life; they also make great photo memories. So, grab your family and go on a mini adventure one weekend. Whatever you do, don't forget your camera!
Online photography communities are abundant and are super supportive. Photography communities are home to photographers who are beginners all the way to professional photographers. Joining a community can help you get the feedback you need to take your photos to the next level.
Researching photo techniques is a great way to create higher quality photos, and there is no better way to do so than to look through magazines and photography books. By looking at the photos in these publications, you can learn all about certain qualities of photography such as point of view, framing and color balance.
Lacking inspiration? Try my lust of 50 must-read photography books!
The best advice for taking better photos in 2012 is to have fun! If you aren't having fun with your photography, then it will show in your photos. Photography is a fun form of art, so don't be shy and have as much fun as you can with your camera.

Seeing someone’s reaction when they look at a potrait of her or himself is always so cool, especially if she or he isn’t that confident being photographed. There’s this kind of rush you get from making them feel good about themselves. I reckon that doing that for someone who could really do with that sort of confidence boost, or someone showing an interest in them, or spending time with them, would be pretty fantastic, which makes me think that Help Portrait is one awesome idea.
People with cameras, whether they’re pros or not and wherever they are, spend a day taking photos of people who are in some way in need. This year that day is 10 December. Reckon you could help?
Help Portrait is now in its third year. It was founded by Jeremy Cowart and it’s probably best if you hear what he has to say about it in his own words.
If you want to find out even more, like how to get involved, wander over to the Help Portrait website and see what you can do.
It’d be far too easy for me to slip into some sort of polemic about the current rioting in London; I live in this city and love it. I’m just a few minutes’ cycle from where there were fires and looting in Walthamstow last night and the circling of the police helicopters has been keeping us awake. One of the streets that I use when I cycle home from the City is currently closed. But this is a photography news site, and there are a couple of photography-type things relative to these riots to report.
If you’re in London or close by and are tempted to go down and photograph what is going on, please bear in mind that the police are at liberty to seize your camera – not just your memory card – if they believe that you have evidence within your photographs that could be valuable to them. It’s not about trying to prevent you from taking photos, it’s about trying to catch criminals. If you’re press, it is much harder for them to do this as it runs contrary to having a free and fair press, but even this has recently been overruled in the courts in certain circumstances.
As for why they want your camera, not just the memory card, it’s to do with sequencing the images and verifying the dates and times they were taken, otherwise they would be useless as evidence. Haje explains it in more depth here.
And it should go without saying that you must be careful. This isn’t just a few people having a bit of a barney. This is a violent and angry mob. The police are in riot gear and the police horses are out in force.
Reporters from the Mail on Sunday were beaten and had their gear stolen yesterday. On Saturday, reporters from the BBC and Sky News were forced to withdraw after they came under attack.
Me? I’m staying at home and painting my toe nails.
It always amazes me how often people just leave their flashes turned on all the time – or, more accurately, how great people’s faith is in the camera’s ‘automatic’ setting. To wit: I recently had the pleasure of dragging myself out at bed before dawn to photograph the sunrise at the legendary Angkor Wat temple in Cambodia. Now, this temple is famous for being beautiful and facing west, which makes it great for sunrises. Multiply that with the fact that Angkor Wat is a tourist trap of epic proportions at the quietest of days, and you might imagine that the place attracts a fair few people.

I got to the location by the light of my flashlight – and slowly the sky started changing colors, as the sun was climbing its slow ascent past the horizon. Unsurprisingly, lots of my fellow tourists were taking photos of the sunset. Surprisingly, a huge proportion of them were taking photos with a flash.
All flashes have a ‘guide number’. This is a number given in feet and meters, and gives a good indication for how far away you can expect the flash to reach. Typically, for a compact camera, the flash range will be 5-7 meters (16-23 ft). The pop-up flash built into an SLR camera can have a range of 10-15 meters (32-49 ft) at the most, and EVIL cameras tend to fall in between the compact cameras.

A flash having to be fully charged and fired at full power isn’t great for your camera’s battery life, and it takes a relatively long time to cycle the power (i.e. from taking a photo, until your camera is ready to take another shot), which isn’t all that helpful when you’re standing around waiting for your camera so you can take another picture.
In general, it’s recommended to try to keep your flash at around 50-70% of its output – this tends to be a nice balance between flash charge time, and battery usage. This means that on a compact camera, you should only expect about 3 meters (10 ft) of useable flash range. That’s perfect for indoor snapshot portraits when it’s dark, and not for a lot else.
If you want a flash that charges faster and has significantly more power, start looking for an accessory flash.
 of a built-in flash, you get a 50 meter (160 ft) range instead.")
The built-in flash isn’t very powerful – so unless you are taking a photo of someone that’s close enough that you can throw a stuffed animal at them, turn off your flash.
Whatever you do, don’t be one of the hundreds and hundreds people at a famous landmark after sunset, taking photos with your compact camera with the built-in flash turned on: There’s no way your flash is going to reach that building 600 yards away, so you may as well save your battery…
Do you enjoy a smattering of random photography links? Well, squire, I welcome thee to join me on Twitter - Follow @Photocritic
© Kamps Consulting Ltd. This article is licenced for use on Pixiq only. Please do not reproduce wholly or in part without a license. More info.
You may not be aware, but your camera probably embeds its serial number in every one of your photos – so if someone is taking photos with your stolen camera, you can track them down.
Now if only there was a way of doing that… Enter Stolen Camera Finder, a brand new website designed to help you get re-united with your camera.
How very nifty.
 What is this? - In our NewsFlash section, we share interesting tidbits of news. Think of it as our extended twitter feed: When we find something that get our little hearts racing, we'll share it with you right here! Loving it? Great, we've got lots more News Flash articles - and, of course, we're still on Twitter as well, for even shorter news tidbits.

If you’re thinking of investing a little bit of time and some money in you and your photography this year – after all, you are the most important factor when it comes to taking photos, not your lenses or your camera – and in particular if you want to concentrate on portraits, you might be interested in the series of seminars and workshops that portrait photographer-extraordinaire Annabel Williams will be running this summer.
An evening seminar and a two-day workshop will each hit London, Birmingham, and Leeds in May, June, and July this year. Annabel, whose photography has won enough awards to sink a battleship, will be leading the evening seminars. She’ll concentrate on what it takes to become a successful photographer right now: how you work and what clients expect. The idea is to give you the confidence to make photography work for you.

Charlie, by Annabel Williams
The workshops are more practical. (Well, they are workshops.) One day you’ll get to work with Annabel, looking at how to design a shoot, how to cope with the weather and get the best out of the lighting, how to handle your models, and how to develop your own style. The other day you’ll be working with Marko Nurminem, who’s something of a digital imaging guru. Need some Photoshop and Lightroom guidance? He’ll help. How about advice on managing your workflow? Yep, he’s got that, too.
Really importantly, though, these courses have been designed no matter your level of experience. Whatever you do – or don’t know – it’s about getting the most out of you and your photos.
Jared, by Annabel Williams
Evening seminars cost £95+ VAT and have a maximum capacity of 100 attendees; the two-day workshops are £495+ VAT and are limited to 28 participants. You’ll get plenty of attention, then!
Interested?
Want even more details? Head to the roadshow’s website.

This is just a quick reminder to anyone going to see their child, grandchild, niece, nephew, or house elf perform in the school nativity play or concert: the Data Protection Act does not prohibit you from taking photos or making a video of the performance for your own personal use.
Obviously you wouldn’t be able to sell your video of Class 3B singing ‘Oh Little Town of Bethlehem’ to the Israeli or the West Bank Tourist Boards, but if my school productions were anything to go by, you wouldn’t want to, anyway. Still, no one can stop you from snapping away for the family album, so says Christopher Graham. He’s the Information Commissioner, he knows about these things.
If you need to point anyone in the direction of the specific guidance issued by the Information Commissioner’s Office, you can find it here.
Anyone for a quick rendition of ‘Hark the Herald Angels Sing’?
(Thanks to Amateur Photographer for the reminder.)
The last week feels as if it has been a bit of mixed bag when it comes to photographers’ rights. The Home Secretary, Theresa May, has acknowledged that the Association of Chief Police Officers must play a greater role in ensuring that police officers treat photographers appropriately. The Information Commissioner’s Office (ICO) is planning to release guidelines covering online privacy related specifically to images. Meanwhile, I was involved in a run-in with an aggressive security guard.
There’s very clear guidance out there for police officers, informing them what photographers’ rights are. Unfortunately, there have been numerous incidents where it is painfully obvious that some of them just aren’t aware of, or understand it. Let’s hope that the Home Secretary’s clout has a positive impact here.
What the guidelines produced by the ICO regarding the privacy of online images, and in particular those taken in public places, is anyone’s guess. In the past, the ICO has requested that photographers’ adopt a ‘common sense’ approach when placing images online. Let’s hope that they adopt a similarly ‘common sense’ approach.
As for my own experience, you might have noticed that very late on Thursday night I mentioned on Twitter that I had just seen a security guard threaten to toss a photographer’s camera into the Thames. How I ended up on the Thames Path with a group of people, some of whom were taking photos, and being intimidated by security guards is a bit of a long story, but key element here is that we were on a public footpath and the photographer was well within his rights.
This security guard was a singularly unpleasant bully, but he did have a bit a shock when the 5’1″ woman was insistent that no, we were allowed to take photos, really. I’m not sure how much the general public’s ignorance of what can and cannot be done with a photograph and the police’s lack of confidence when it comes to dealing with photographers feeds off of each other, so perhaps both the guidelines from the ICO and increased responsibility laid on police chiefs to keep their officers’ behaviour in check will help.
At the moment, I feel as if we’re taking one step forward and then another backwards when it comes to our rights to be able to take photos. The best solution that I can think of is to just keep on taking them.
(Thanks to Amateur Photographer for some news updates.)

You’ve probably noticed that the Small Aperture crew is pretty passionate about photographers’ rights. Whether we’re promoting your ability to be able to photographs in public places, ranting about peculiar photographic restrictions, or explaining what sort of authority you can exert over your own images, we’re pretty vocal about things. That’s hardly surprising: we love to take photos. And I doubt we’ll keep quiet until other people, from the police to shopping mall security guards to the general public, really begin to grasp what photographers can and can’t do.
The good news is, though, that over the past week two separate incidents have occurred, albeit over 3,000 miles apart, which have helped to promote photographers’ rights that little bit more.
Last week, in Edinburgh, photographer Stefan Karpa was harassed by security officers while taking photos at the Multrees Walk shopping district. Security had been beefed up recently as a result of several “ram-raiding” robberies. And while Multrees Walk is a privately-owned street, Karpa was photographing from the public highway, which is completely within his rights to do.
Karpa then posted a video of the confrontation to YouTube, and after making its rounds on Twitter, the response was huge. A few days later, a small group of photographers decided to organise a flashmob at Multrees Walk to protest the incident. Police arrived and watched carefully, but the protest carried on peacefully.
Here’s the video to show you:
Photo Flash Mob on Edinburgh’s Multrees Walk from Tom Allan on Vimeo.
Later, Multrees Walk spokesman Stephen Spray stated that their blanket ban on photography would be reviewed. While not necessarily a legally-successful story, the fact that twenty photographers showed up to protest and photographed the store fronts on private property without being harassed by police and security shows that management is listening and perhaps willing to compromise with photographers.
Meanwhile, across the Atlantic, photographer Antonio Musumeci reached a settlement with the U.S. Department of Homeland Security in regards to a lawsuit filed on his behalf. In 2009, Musumeci was arrested while filming another arrest of a protestor outside a New York City federal courthouse. The settlement states that members of the public have the “general right to photograph the exterior of federal courthouses from publicly accessible spaces.”
His primary camera had been confiscated at the time of his arrest, but a secondary camera captured the entire incident. Unlike many protesting photographers, Musumeci kept his cool the whole time, which I’m sure didn’t hurt his case.
While this is a more significant win for photographers than the Edinburgh case, both are equally important during this on-going clash for the right to shoot in public places. As more and more of these types of incidents end with favourable results, it’s only a matter of time before a compromise can be reached and photographers can continue to comfortably do what they do best… shoot pictures.

In July, I got a bit excited about the Royal Horticultural Society Young Photographer of the Year competition. I thought that it offered a great incentive to get young people taking photos, and to get them out in gardens and parks and looking at the world around them. But enough waffle. The results have just been released. And these kids can put to shame quite a few far more experienced photographers.
Young Photographer of the Year (under 18) went to Sam Kaye

Children’s Photographer (under 11) went to Anastasia Kapkin

To see the runners up and commended entries, mosey on over to the RHS site.

So taking photos should be fun, right? Right! And sometimes we want to have a bit of fun with our photos themselves, right? Right! So, ehm, what can we do with our photos to play around with them a bit more? Well, we’ve been pooling braincells over here at the Small Aperture mansion, and just before they expired from over-use, we came up with the following.
First of all, you could go out and buy yourself a toy camera. But maybe you don’t really want to. Perhaps you’d rather fiddle with photos you’ve already taken with your top-of-the-range dSLR. In which case, Photocritic has the perfect tutorial for creating your own post-processing pre-sets in Lightroom.

Or perhaps you’d prefer to go the vintage route? Take a look at Photojojo’s four ways to vintage-ify your pics. This one covers all sorts, from post-processing ideas to tips such as vaseline on the lens or shooting through an old stocking.
Over at befunky.com they’ve what feel like hundreds of different effects that you can apply to your pictures. My personal favourite would be the speech bubbles, though.
And Gareth, a member of the Small Aperture Scriptorium, has this easy method to cartoon-ify your pictures. Begin by selecting an image. How about this one?

And then:

Tad-dah!
I’m off to do silly things with photos now.

The main problem of taking photos free-hand is that your hands aren’t particularly sturdy. Myself, I find using a heavier camera makes it a lot easier (the inertia of the camera means it is reluctant to move, so up to a point, a heavy camera is easier to hold still for the duration of a photographic exposure than a very light camera), but what about lighter cameras?
The obvious answer is a tripod or a monopod, but these devices can be terribly heavy, and they are not particularly portable. One solution is to hold the camera against a surface (a tree, a building, or a signpost), but that doesn’t always work either, and none of these items offer an awful lot of flexibility.
How do you stabilise your camera most often?
How?
I often find myself thinking 'Damn, if there was only a way to anchor the camera to the ground…', and I recently found a solution that works: A String Tripod (also known as a Chainpod)!
It is a laughably simple device: You get a wing nut bolt (or anything that screws in) that fits into the tripod hole of your camera (you are looking for a bolt with 3.5×8″ threads), and drill a small hole into the bolt. Then, you attach a length of string to it, with a loop at the end. If you use the shearing lines available for tents, you can vary the length of the loop, and, as such, the height of the camera.
To use one of these string tripods, put your foot (or feet) through the loop, and pull the string taut against your foot. Now, out of nowhere, your camera will be a lot more stable, as it has an axis against which it cannot move (up/down). This means that you can hold the camera a lot calmer – you would be surprised how much of a difference this can make!
But… But…
Sure, it will never replace a proper tripod or monopod, but I wouldn’t be surprised if you gain a couple of stops on your shutter time by using this system. And the best thing? Making one of these is going to cost you less than a bottle of milk and a loaf of bread!
I’ve spent a lot of time looking at portraits over the last couple of days for various reasons I shan’t get into in details, but there’s one pet peeve I’m afraid I’m going to have to share with you…
Why are people always so damn serious when they are being taken photos of? Does nobody understand the art of portraiture anymore?
 To me, a portrait doesn’t have to be a flat-on head-and-shoulders photo. Hell, I’ve seen excellent portraits that don’t even have faces in them. The point I’m trying to make is that there are too many people why are just straight-up trying too hard with their portraiture.
It all depends on what you are trying to do with your photos of course, but are you really the dude who wants to get known for taking plain, boring heads-and-shoulders shots? Granted, I do believe that all good photographers should have a go at classic portraiture, but ultimately, what is portraiture all about?
To me, portraiture is about capturing something that is typical about somebody, in such a way that people who know the subject instantly recognise them, and in a way that people who don’t know them get enough data to make up some sort of opinion about them.
This style of portraiture presupposes that you aren’t taking photos in a lame-ass conveyor-belt-style (yes, Venture, I’m looking at you), but actually have the time to get to know your subjects, and it might just work best with people you know quite well to begin with.
But… Isn’t experimentation and an attempt at capturing the unique what photography is all about? So why aren’t people playing around more?
If you’ve got some stunning portraits that break the rules – why not post a link in the comments? I’d love to see some photos that defy the monotony, before I go spare and lose all faith in the photographers of the world…
Do you enjoy a smattering of random photography links? Well, squire, I welcome thee to join me on Twitter - Follow @Photocritic
© Kamps Consulting Ltd. This article is licenced for use on Pixiq only. Please do not reproduce wholly or in part without a license. More info.

My entry into Photography was a very gentle and gradual one. As such, I don’t actually remember much of how it all came about, nor do I remember the specific steps I took, nor in what order I learned the lessons, or why.
Handy, then, that there are people out there who are just coming to terms with their disease, errr, affliction, errr, passion that is photography. In this case, my dear friend Anna went on a rant-a-licious rampage, which might help some budding photographers gain some self-esteem and follow a new-ish photographer in her first footsteps towards what’s promising to become a life-long obsession: Taking good portrait photos.
Without further ado, I’ll hand you over to Anna!
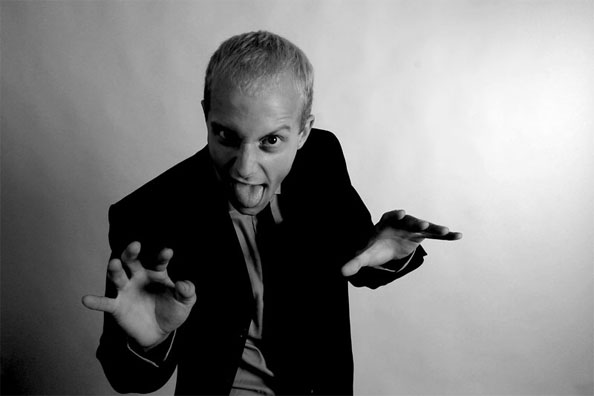
This last year I’ve become very interested in taking photos of people. There are several reasons for this; firstly I actually have some friends now and want to take photos of them that they genuinely like and secondly, because it’s a damn difficult thing to do and I like a proper challenge. I don’t do conventional portraits (you know the ones; sit up straight, smile for the camera etc.). You can look at those once, put them in a drawer or on your grandma’s wall and they don’t tell you anything at all about the person. When I take a photo of someone, I want it to convey something about their character and in some cases, when it’s someone I know and care about, I want it to reflect that as well.
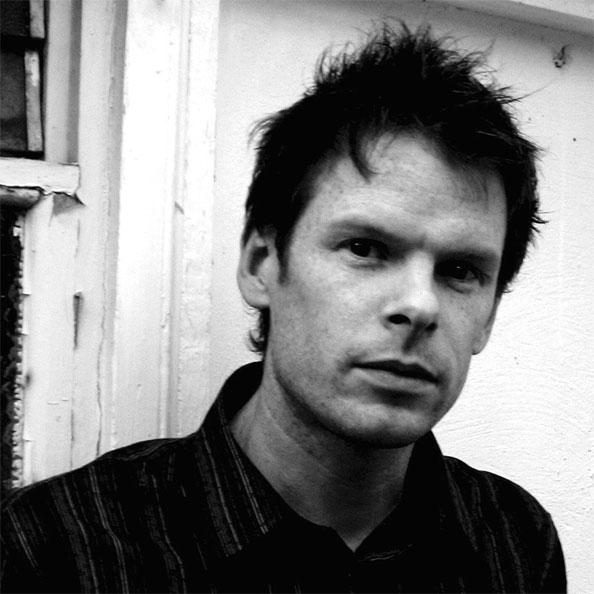
Photo by Anna Badley
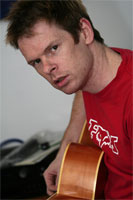 The first proper portrait I did was April this year. The friend in question was highly suspicious of my abilities, hugely hungover and rather lined and crumpled (he used to smoke 20 a day and had recently given up). I only had a compact digital camera with me at the time and the light was fading rapidly. I put it into sepia and made it look old fashioned because he’d insisted he didn’t want to look ginger on it, the awkward bastard. He was actually quite chuffed with his portrait and has merrily posted it on websites to show people. More importantly though, it stands as a record of how crumpled he actually was, and now, 9 months on, I’ve taken some more photos where he looks a lot less crumpled and he’s pretty pleased about this. This is what giving up smoking does for you.
Since then I’ve taken a lot of photos of people. Most of them have been fairly reluctant to let me point a camera at them but glad they did when I show them the results. I’ve found that women are more difficult to photograph than men because they are more worried they will look awful which is a bit of a self-fulfilling prophecy really. If you are anxious about being photoed, the photo will inevitably look crap. This has proved to be the case with my mother. She has the ability to grin inanely in an alarming way that she only ever does when someone points a camera at her. I even managed to capture the stages of facial contortion that lead to the inane grin by taking four photos over the course of a second – normal, anxious having noticed the camera, attempting to form grin, GRINNING ANXIOUSLY.
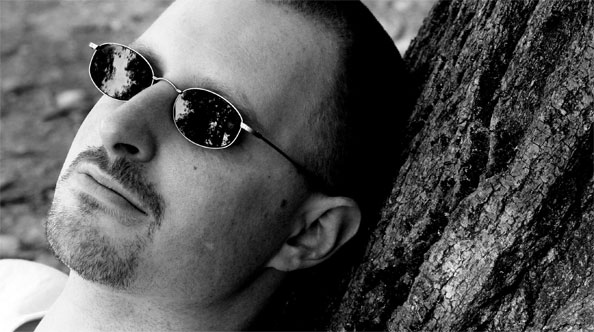
Photo by Anna Badley
I suspect this anxiety people instantly develop when a camera is pointed at them is because of too many bad pictures taken in the past – rabbit-in-headlights, blinded by flash, cheesy grinning forced posing type shots that never see the light of day again. Let’s face it, there’s nothing like a crap portrait to knock your confidence about how attractive you are and photos can be horribly unkind because they catch you for the tiniest split second where you might be laughing and thus showing off your crooked teeth.
 There was a point to this post (I’ll get there in the end, honestly) and it was that as Christmas has just been and gone there are a lot of people out there who have been let loose with new cameras, or new lenses for old cameras. Basically, the world is not a safe place right now if you’re nervous about having your photo taken. However, for all those new camera owners, you might get a photo worth sticking on your wall if you try out these five things:
1. Try and shoot in daylight rather than indoors. This will stop the flash going off and giving people red eye. Red eye makes people look mental. Of course, if this is the aspect of their character you are trying to capture, then that’s fine.
2. Photograph one or two people at a time instead of trying to get large groups together; you’ll never get everyone smiling nicely at once and also big group photos rarely look good when printed because you have to stand further back to take them so everyone looks smaller and blurrier.
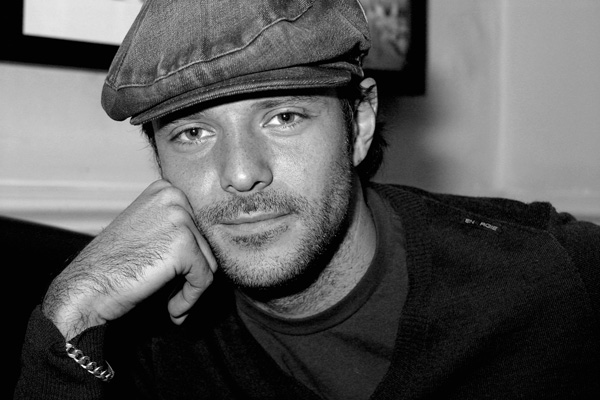
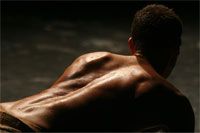
Photo by Haje Jan Kamps
3. Never ask anyone to smile. It never works because it makes them think about what their mouth is doing – disastrous. Tell them a joke or pull faces at them if you must, or take a non-smiling photo for a change. In fact, if you can catch them when they’re not aware you’re taking a photo that’s even better; for example if they are engrossed in doing something they enjoy doing. You could even take a photo of them from an unusual angle – from the back, perhaps? For the truly camera-shy, there is always the option of snapping them whilst they sleep. This is probably a bit ethically dubious, however, and you might want to show them the photos when they wake up and check they’re okay about it.
4. Timing. With a digital camera you can afford to get a bit carried away and blast off fifteen or so shots of one person on the off-chance one will come out right – a great way to learn what works and what doesn’t. There is no shame in this; even the professionals get a bit trigger-happy sometimes. You can also check the photos you’ve just taken to see if people have their eyes closed etc. which is a major bonus. However, whether you’re working with digital or film, it’s still worth watching and waiting for a potentially good shot and not just panicking and pressing the shutter button the moment you’ve got your victim (er…I mean model) where you want them. Talk to them a bit. Give them time to relax. Ply them with drink. Chloroform them if needs be (only kidding).
5. Failing all else, you can hide all sorts of atrocious things by changing your photos to black and white or sepia. This is very easy in digital – quite a lot of digital cameras actually have these options on the camera itself – sometimes under the manual settings. This means you can actually go all arty and shoot in black and white or sepia if the mood takes you. Not so easy in film of course – you have the options of starting off with a black and white film in the first place, or scanning your photos and adjusting them in an art package. Black and white is a wonderful way of hiding spots, disguising drink-related red faces…and getting rid of purple and pink anoraks.
Good lord I went on a bit there. Sorry about that. I’ll shut up now.
Some of the pictures in this article were taken by Haje, because Anna didn’t send me any before she vanished for her Christmas break. If you like her photos, why not check out Anna’s DeviantArt page or her Flickr stream?
Do you enjoy a smattering of random photography links? Well, squire, I welcome thee to join me on Twitter - Follow @Photocritic
© Kamps Consulting Ltd. This article is licenced for use on Pixiq only. Please do not reproduce wholly or in part without a license. More info.