post processing

Top 3 edits you should make to every photograph

Earlier this week an infographic design agency, NeoMam Studios, sent us an infographic about 'smoasting' which they'd produced on behalf of print company Photobox. Once I'd got over the shock of awful elision of 'social media' and 'boast' to form the ghastly portmanteau word 'smoast', there was one particular statistic that caught my eye. Take a look at the infographic and guess which it was.

Despite the prevalence of Instagram, the host of editing features that are built into apps such as EyeEm, Facebook, and Twitter, and the plethora of free-to-download editing programmes, only 28% of photos are cropped or styled in some way? Wow! I am surprised. And it's something I think deserves remedying.

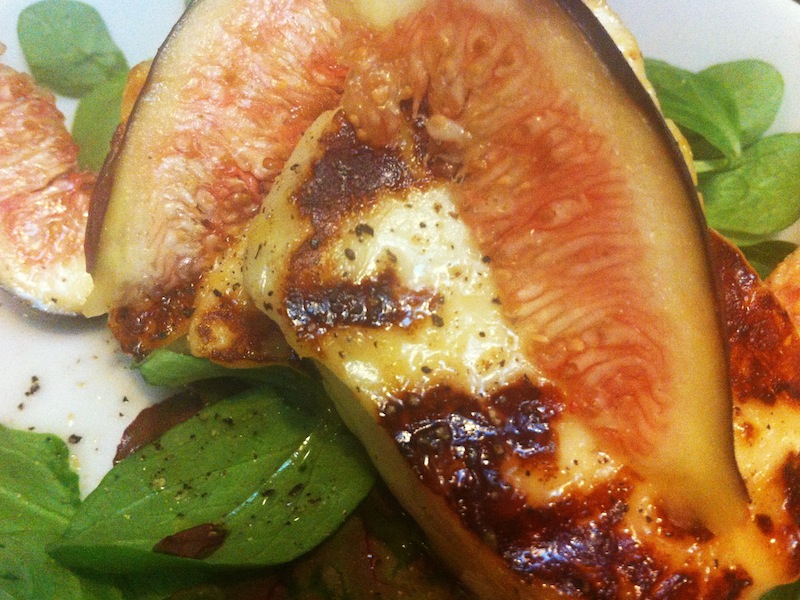
While Team Photocritic advocates getting as much right in-camera as possible—you'll certainly not be able to turn a sow's ear into a silk purse—we're not beyond a little post-processing, either. If it's good enough for Cecil Beaton and Horst, it's good enough for us, too. A snip here and a swipe there can elevate an ordinary image into something a bit more special.

This isn't about air-brushing away half of someone's thigh, but about making minor adjustments to three specific areas: the crop, the colour, and the contrast. Here at Photocritic we call them The Three Cs. They're not complicated and they'll make a world of difference.

Crop

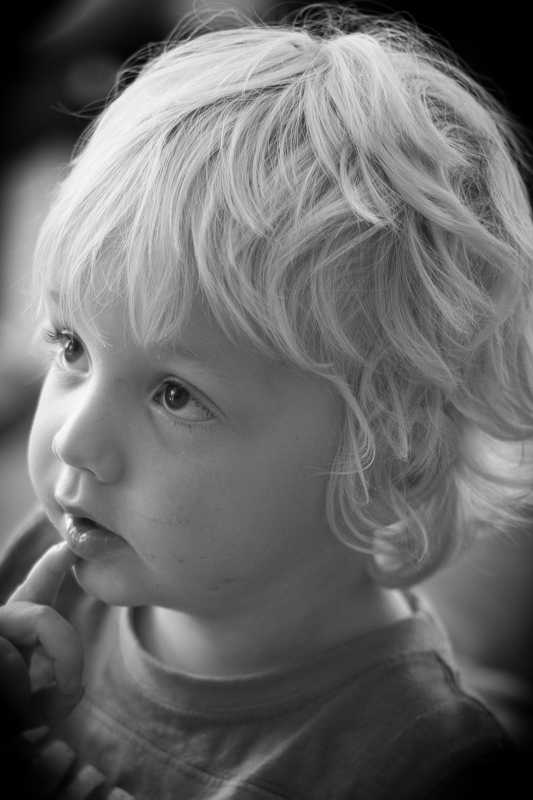
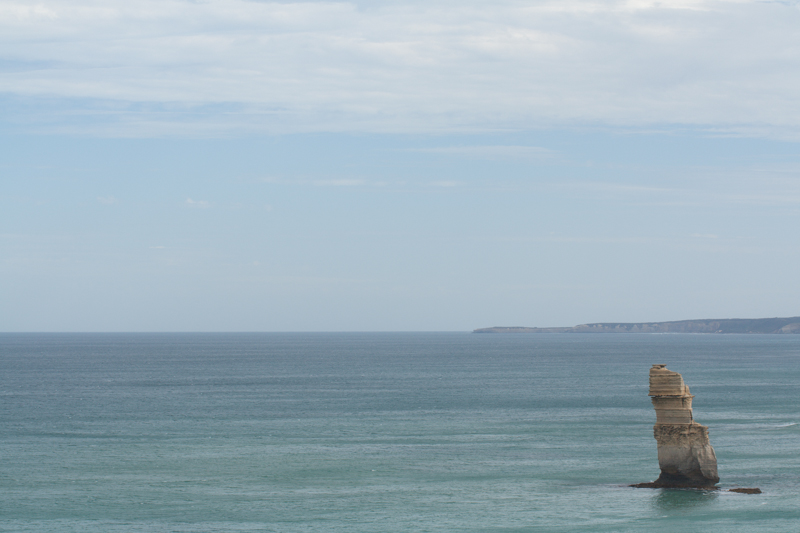
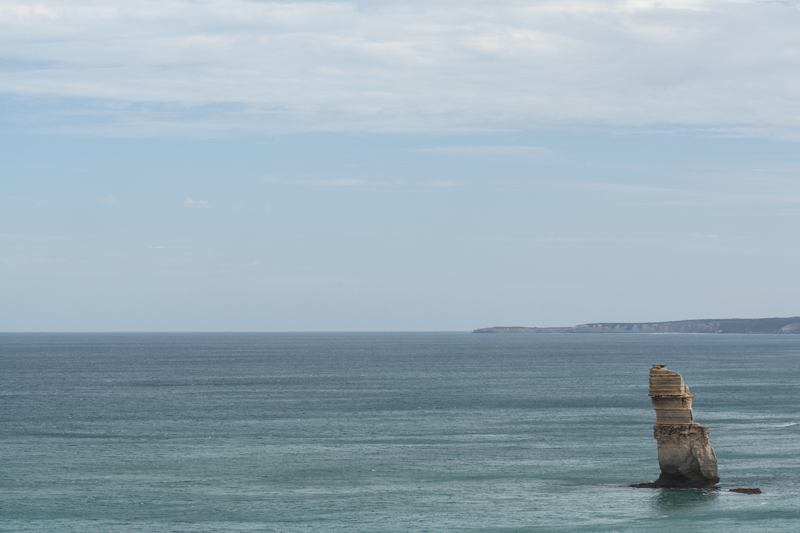
However well composed you think your image is, it will almost certainly benefit from having a few pixels shaved off it. It might be a case of reinforcing the rule of thirds, removing a bit of unwanted background that crept into the frame, or getting a bit closer to your subject.

The original isn't that bad

Being a purist, I tend to stick to traditional 4:3 or 3:2 ratios, but don’t feel limited by my prejudices. Select from any of the standard crops, from square to 16:9, or free-style it to adjust the crop any way you like.

But a crop does make it better

At the same time as cropping, make sure to straighten your image, too. Unless you are deliberately tilting the frame for creative reasons, uprights should be upright and horizons should be level. When lines that are expected to be upright or level are wonky, it has an unpleasant impact on our sense of balance. By correcting wonky lines, you'll produce a stronger image.
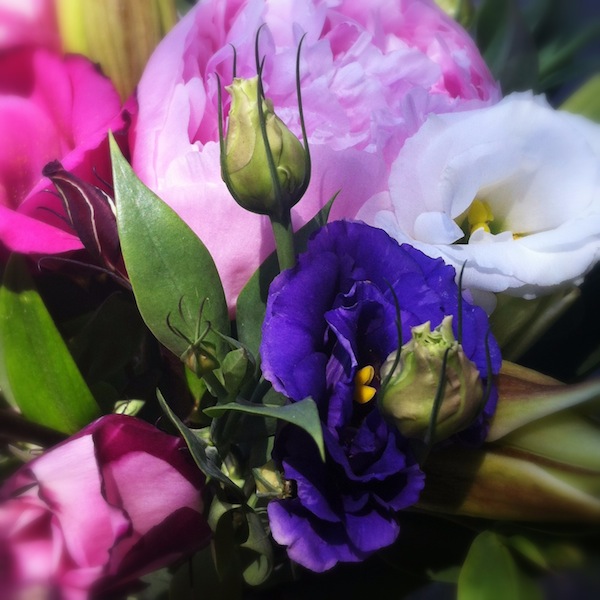
Colour

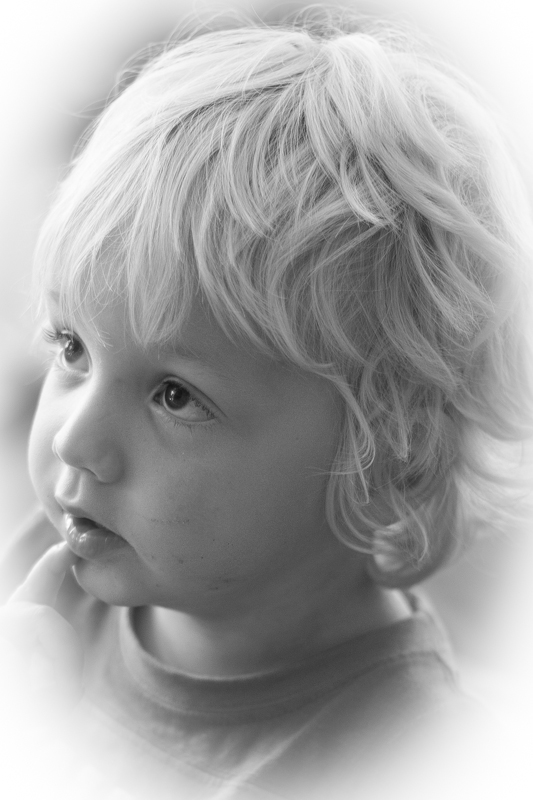
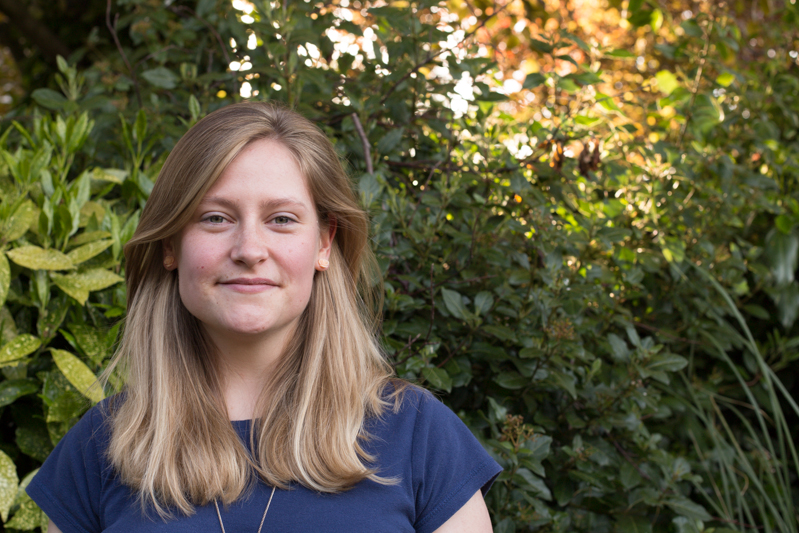
Light has a temperature, and depending on the source of the light, or the time of day if it’s the sun, that temperature will vary. When the temperature varies, so does the colour of the light. As a general rule, we don’t notice the variation because our eyes cleverly adjust to the changes. Our cameras on the other hand aren’t quite so clever.

Notice how the sheet and Cookie's white fur has a blue tinge?

Have you ever noticed how white objects in your photos can show up with blue or yellow casts? That’s because the white balance in your photo was off.

Corrected by nudging the white balance slider to the right

It's a relatively easy correction to make using the 'Warmth' or 'White Balance' function in an editing programme. If you think the whites are looking a bit too blue (or if an image looks a little 'cold' over all), nudge the slider to the right. If the whites are too reddish in tone, or the photo looks a bit warm, slide it to the right. It's a case of trial and error to make the right adjustment, but the more that you practise it, the better you'll understand the shortcomings of your camera and how it reacts to different types of light.

Now if you want to intensify or tone down your colours, you can do so using the saturation slider. I don't recommend bumping up the saturation too much; it can result in a cartoon effect rather than a photo!
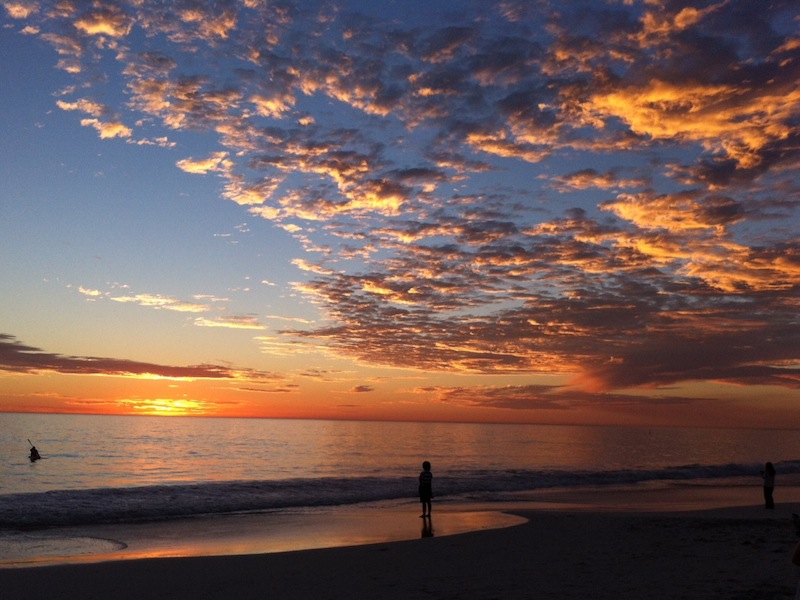
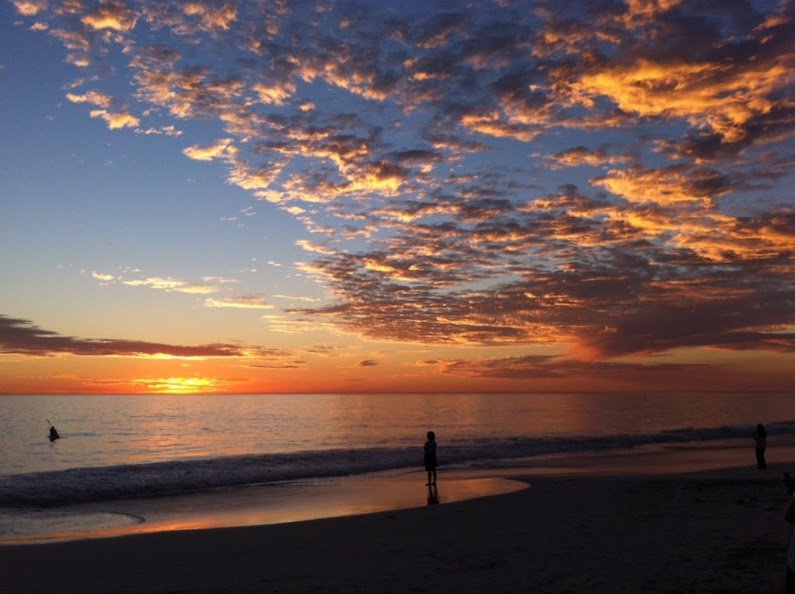
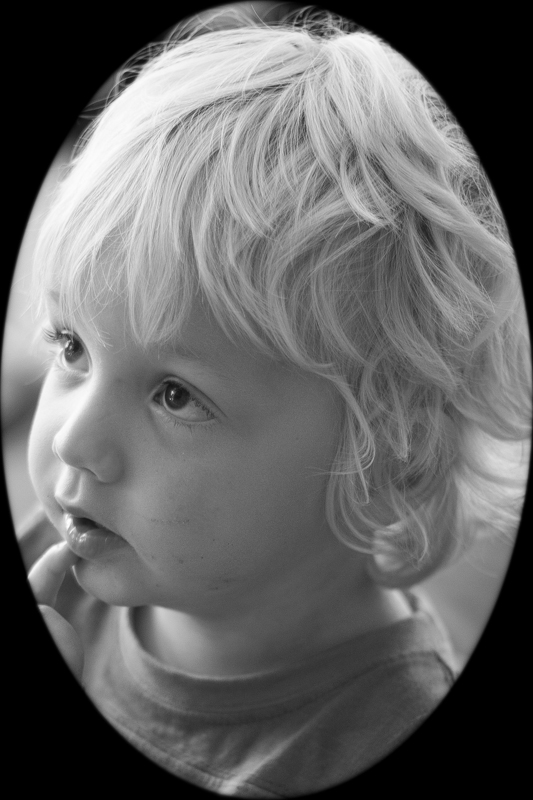
Contrast

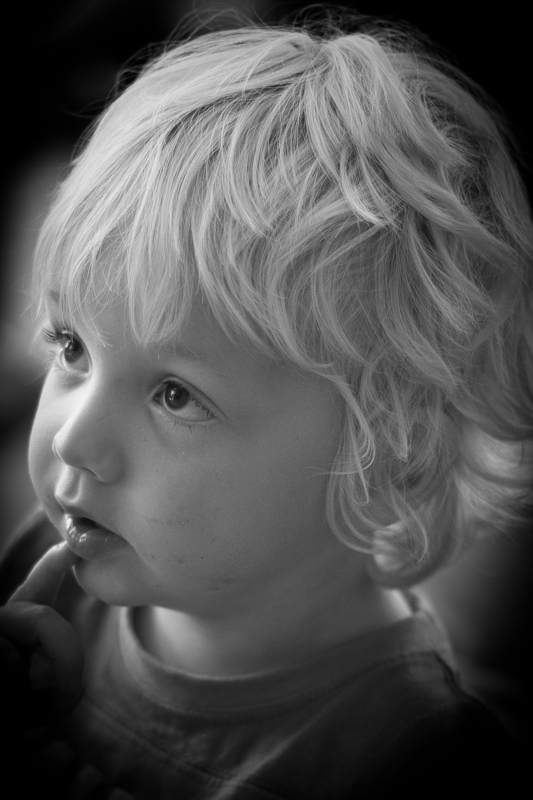
Contrast is the difference between the dark and light tones in your photos. Images shot on bright sunny days tend to have a lot of contrast, with dark shadows and bright highlights, but those taken in fog won’t have a great deal of tonal variation and will be low contrast. From time to time, you’ll want a low-contrast image, but, generally speaking, your photos can be improved by increasing the contrast a touch. It brings definition and depth to them.

The original looks good enough to eat

Don’t go overboard, though, as too much of a good thing can turn bad. You’ll find that if you over-cook the contrast you’ll lose too much detail and end up with an ugly image. Subtlety beats brickbats.

But increasing the contrast can bring some depth

If you use Snapseed to make your edits, it's worth getting to know the ambiance slider, too. I've often found that this is a preferable alternative to the contrast slider.

Anything else?

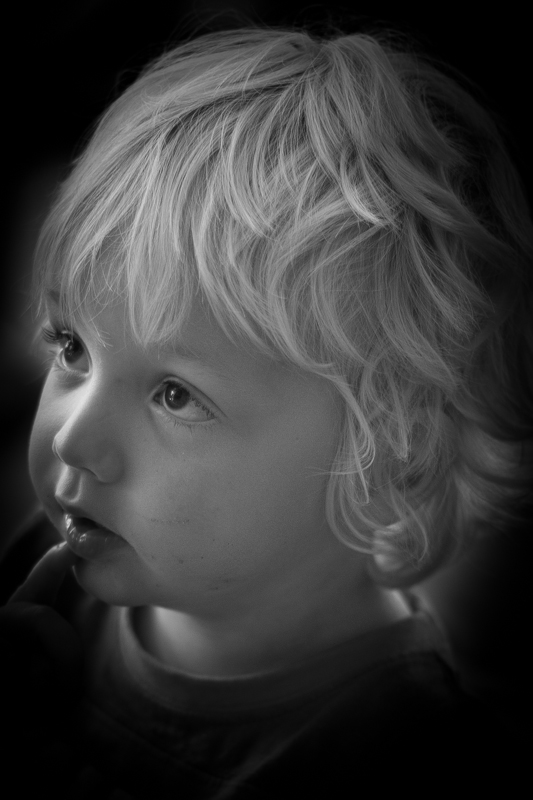
At this point, any other adjustments are gravy. I'm a fan of Snapseed's 'centre focus' options and often apply one of those. You might want to play with a tilt-shift effect. Or there's the waterfall of filters you can try in any programme, but you might find that you prefer your own edits to prefabricated filters, now.

Oh, and don't forget that it all starts with a decent photo, so check out our eight tips for better smartphone photos, too.

From light to dark: the Photocritic guide to vignettes

For literary types, a vignette can be either an anecdote or short story, or a illustration—often foliage-inspired—found on chapter headers. For photography types, a vignette is the gradual fall-off of light from the centre towards the edges of the frame of an image. If you enjoy Instagram or play around with Snapseed, you might know a vignette as a cool effect that you can add at will. They are, however, far more than just an effect. Thus we present to you the self-contained, but not necessarily short, Photocritic guide to vignettes, without any vines.

Types of vignette

Photographic vignettes occur because of natural, optical, mechanical, and technical reasons and can appear whether you prefer analogue or digital technology. While we might associate vignetting with vintage, it's hardly stuck in the past. Digital sensors managed to introduce their own form of vignetting, and a great deal of it is down to lenses. What are we looking at, then?

Natural vignetting

You are most likely to see natural vignetting when you use a wide-angle lens. It's a gradual darkening of the image that happens because light reaches the sensor (or film) at different angles. As the photons need to travel further to reach the edges of the sensor, they lose their strength, hence the darkening.

Optical vignetting

Lens design is primarily responsible for optical vignetting; the lens' barrel prevents light reaching the sensor evenly, and the lens elements stacked up on top of each other can have an impact, too. Optical vignetting is more pronounced when shooting at wider apertures; stop-down a bit and you can reduce its prevalence.

Mechanical vignetting

If anything physical blocks the passage of light to the sensor, for example a lens hood or a filter, it can cause a vignette. This is the easiest vignette to correct: check all of your accessories are properly attached.

Pixel vignetting

The pixels towards the edges of a sensor aren't always able to record light at the same intensity as those closer to its centre, mostly because of the angle at which the light hits them. This can lead to a darkening of the image towards its edges. Sensor manufacturers have caught onto this phenomenon, however, and have introduced compensations to rectify it.

Why add a vignette?

If a vignette is regarded as an aberration, why would you want to add one deliberately to an image? When used reservedly, they can bring focus to your subject and draw your eye into the frame, particularly in portraits. First because they allow for fewer distractions at the edges of the frame, but also because they mimic the natural effect of the eye. We don't see sharply all the way to the edges of our vision, and a vignette's fall-off has a similar impact on our photos. They reproduce a degree of 'normality' that we can find pleasing. The essential factor in applying them is to be subtle, therefore.

Adding a vignette

Lightroom allows you both to add artificial vignettes and to correct those produced as the result of optical or mechanical aberrations. If you need to correct a vignette, reveal the Lens Corrections panel, where you can also adjust various types of lens distortion, and nudge the Lens Vignetting sliders until your photo looks 'right'. (They sit beneath the Manual tab.) Easy!

Correct unwanted vignettes in the Lens Corrections panel (or use it to add easy vignettes to uncropped images)

This is also an easy means of adding a subtle vignette to a largely uncropped photo, too. It doesn't let you over-do it, which is the cardinal sin of adding vignettes, and there aren't too many factors to consider. It's sneaky, but if you're working with a cropped photo, not helpful. For a cropped photo, you need to head to the Post-Crop Vignetting options in the Effects panel.

Here, you have far more control over the vignette that you add to your image.

Gently does it with the Post-crop Vignetting options

With three drop-down options and five sliders, it might appear as if adding a vignette is more trouble than it's worth, but it's relatively straightforward. We'll deal with those drop-down options first.

Highlight Priority, Colour Priority, or Paint Overlay?

Highlight Priority, Colour Priority, or Paint Overlay? Highlight Priority allows for highlight corrections and recovery, so is good with images that have specular highlights, but it might have an adverse impact on the colours in the darker areas of your image. If you're working in black and white, colour shifts won't be an issue, so it's an easy choice.

Colour Priority won't produce such a pronounced shift the colours in the darker areas, but it won't let you recover highlights, either. Julieanne Kost, who works for Adobe, reckons it's a more subtle effect. You might want to consider this if your photo is in colour.

As for Paint Overlay, it is supposed to mimic the effects of overlaying your photo with either black or white paint.

To walk through the sliders, I'm using a photo of my nephew Wil for demonstration purposes. It's been cropped, converted to black and white, and had all of its other adjustments made. The last thing on the list is the vignette. That's how you should apply one, too.

Wil, ready for his final curtain vignette

Amount

The Amount slider is the crucial slider when adding a vignette. It determines how strong the darkening or lightening of the edges of the frame will be. Set it at -100 and you'll have deep black edges; conversely, +100 will leave you with bright white edges. Without adjusting this slider, none of the other Post-Crop Vignetting sliders will have any impact on your image.

A bright white vignette with the Amount set to +100

From now on, we'll look at all the other sliders having an effect with the Amount set to -100. It offers the clearest demonstration of their impact.

Amount at -100

Mid-point

The Mid-point slider controls the size of the vignette from the centre of the frame. It naturally sits at 50 points; reduce it to 0 and you'll produce a vignette that encroaches far into the frame.

Amount -100; Mid-point 25

Set it at 100 points and it'll sit closer to the edges of the frame.

Amount -100; Mid-point 75

Roundness

The Roundness slider controls the shape of the vignette. At 50 points, it's elliptical in shape. Push it to 100 points and you'll have a circular vignette. At 0, it's a rectangle with rounded corners. (By pushing all of the Post-crop Vignetting sliders completely to the left, you'll create a rounded-corner rectangular frame effect for your photo.)

Feather

To control the strength of the transition between the vignette and the centre of the image, adjust the Feather slider. 100 points ensures a very subtle transition; 0 points is a sharp transition with a hard edge. Its native position is 50 points; I don't often vary far from there.

Amount -100; Feather 0

Amount -100; Feather 100

Highlights

Finally, we're left with the Highlights slider that starts at 0. Why might you want to increase the highlights slider? It prevents the vignette being applied too heavily to highlights in the image and helps to keep them bright. There's no hard-and-fast rule for this slider; it needs to be adjusted on the merits of each image.

Amount -100; Highlights 100

It's important to note that the Post-crop Vignetting panel applies the vignette centred according to the crop. If you want to introduce a vignette that works around an off-centred subject, you'll need to do that using Radial Blur. That's a whole different article, however.

Other vignette options

If you don't use Lightroom, you can add a vignette using plenty of other editing suites. Photoshop, of course. And Pixelmator. Or Pixlr. Under the 'Centre Focus' tab if you're in Google+. In Apple's Aperture.

The end product

Butter wouldn't melt in his mouth

This is my final version of Wil, with a vignette Amount of -15 and a Mid-point of 75. That was it. Remember: subtle is better!

What is the clarity slider? And why might you want to use it?

Your photography has been progressing and you've made the leap from shooting in JPEG to Raw. Along with this, you've plunged headlong into Lightroom and all of the editing marvels that it affords you. Plenty of the controls are familiar, after all you've been adjusting the white balance in your iPhone photos since you realised you could stop people looking corpse-blue with a simple slide to the right in Snapseed. A few of the others need a bit more thinking about, but they're essentially the same. And then there's the clarity slider. Clarity? What the blinking heck is that all about?

Defining clarity

Before we wade headlong into the ocean of clarity, we need to take a step back and have a quick re-cap of contrast. Contrast is the difference between light and dark in an image. Increase contrast and an image will seem bolder; decrease contrast and it'll have a more muted feel. Adjust the contrast and it has an effect across the entirety of the photo: highlights, shadows, and mid-tones. This is where clarity comes in.

Clarity's influence over contrast happens in the mid-tones of an image; by increasing clarity, you sharpen the edge detail and definition among these tones, leading to a punchier, sharper looking image. Conversely, decrease the clarity value and you'll soften edge detail and lose definition.

Ramping up the examples

The effect that the clarity slider has on your photos is likely as clear as mud until you see it in action. I have, therefore, reproduced the same image but with different clarity adjustments, to see how it looks.

My original photo of a lonely Apostle off of the Victorian coast. It's been adjusted for crop and white balance.

Same image but with the clarity slider pushed to +50. Note how much more defined the waves are, and how the strata in the Apostle are clear?

With the clarity slider moved to -50, everything becomes much softer.

Why, then, would you want to adjust the clarity in your photos? For a start, I've exaggerated the adjustments in my examples to show you precisely the impact it can have. With more subtlety, it can add definition to landscapes, or emphasise a misty, dreamy feel, and give portraits a gentler feel.

Subtler examples

These aren't especially thrilling portraits of my cousin, Emma, but they serve the purpose of exploring the clarity slider perfectly.

Nothing terrible (or exciting, either, to be fair) about the original here

There's nothing at all wrong with the original image (it's been cropped and white balanced); but look at how Emma's skin appears softer and more even with a -15 point adjustment to clarity. The background hasn't been affected too much, but she looks better for it.

But a slight adjustment to the clarity slider (-15), softens Emma's skin a touch.

If you'd like to get even more advanced, you can use Lightroom's adjustment brush to paint softer and more even skin with a negative nudge, but bring definition to a portrait subject's hair by selecting that and giving it a positive clarity adjustment. That's what I've done here.

Here, I've softened Emma's skin with negative clarity, but brought out the definition in her hair with a positive clarity brush.

A cautionary conclusion

As with most things, subtlety is the key to clarity. Too much of it in either direction can leave your photos looking more like cartoons or watercolours than you otherwise might want. And you're not going to want to fiddle with the clarity slider on every photo, either. But at least you can have a bit more confidence about what it does and how you can make it work for you now.

Is Adobe's Lightroom Mobile fully embracing the mobile experience?

Adobe: purveyor of world-recogned photo editing options: some for desktop, some for mobile, and some that enable cross-over between devices, such as Photoshop Touch and Photoshop, via the Creative Cloud. That was all well and good, but what about Lightroom? When would that be available on a tablet as well as a desktop, people were wondering. What was taking so long? As of today, that wait for a mobile version of Lightroom is over. But is the Lightroom that people were expecting? For a start, it's Lightroom for iPad. There's no alternative tablet offering. You need to be using at least an iPad 2 running iOS 7 to make use of it.

Second, it isn't so much Lightroom for iPad, but Lightroom for desktop with an iPad outpost. As Adobe puts it, it's a companion app. Whatever you do on your iPad will always come back to your desktop Lightroom catalogue via the Cloud. For the majority of Lightroom users who want mobile access (and are iOS-based) this is probably how they envisioned using Lightroom mobile, as something that works in tandem with their desktop version: a manoeuvrable dinghy tethered to much bigger-engined boat. However, anyone who might have been expecting a stand-alone app independent of the desktop, however hollowed-out that might have needed to be, will be disappointed.

I'm not sure that the full fire-power of Lightroom would function on a tablet without being scaled down and refined in some way (and indeed Lightroom Mobile is a limited version of Lightroom), and making those types of sacrifices to functionality is possibly not something that Adobe wishes to contemplate or existing users would accept without having full-scale back-up, hence this iteration. Are Lightroom users the mobile-only type? Yet, I do feel as if there's a degree of reluctance to embrace a truly mobile experience on Abobe's part. The Creative Cloud is there when Adobe wishes to take advantage of it and lock users into a subscription, but not necessarily to put users' interests first and give them a workable and truly mobile-only editing option in a world that's increasingly portable.

Amongst other things, Lightroom mobile will allow users to:

  • Sync mobile edits, metadata and collection changes back to the Lightroom catalogue on a Mac or Windows computer
  • Automatically import images captured on an iPad and sync back to a Lightroom catalogue on the desktop
  • Work on images, even when the iPad is offline, for a truly portable experience
  • Sync photos between Lightroom 5 and Lightroom mobile; synced photos can also be viewed from any Web browser

And finally, the synchronisation-based architecture means that the mobile version of Lightroom is only available if you subscribe to the Creative Cloud. That means if you want the option to edit on your iPad, you need to shell out either £8.78 ($9.99) for the monthly photography subscription, or whatever Creative Cloud package takes your fancy. There's no option for stand-alone Lightroom users.

I'm not an iPad-user so there's no decision for me to make here, but I would be interested to know if you think that this version of Lightroom Mobile fulfils your needs, or if you think that Adobe has missed a trick.

Quick and dirty infrared photography

We're accustomed to taking photos with what is somewhat uninspiringly referred to as 'visible light', or the part of the spectrum whose wavelengths measure roughly 400 nanometres (violet) to 750 nanometres (deep red). However, there's an awful lot more to light than just the wavelengths we're able to discern with the naked eye, and it's possible to take photos using that 'invisible light'. In particular we can make use of infrared light (IR), which picks up at 750 nanometres, where visible light drops off, and stretching to approximately 20,0000 nanometres. Lots of people think that IR photography is the preserve of specialist infrared adapted cameras, with 'normal' cameras being insensitive to IR light owing to the 'hot mirror' that sits just before the sensor. However, these hot mirrors aren't 100% effective, and with the help of an IR pass filter, you can capture images made with infrared light.

The most common filter is probably the Hoya R72, which is easy to pick up in a camera shop or over the Intergoogles. It won't allow you to capture IR waves at more than 1,300 nanometres, but that should be enough to start. You can always invest in an IR-adapted camera if you find that it really floats your boat.

R72 filter

Got your IR pass filter? Want to give it a shot? Off we go!

IR photography will present you with several hurdles: focusing, exposure, and post-processing. Overcoming all of them is more a case of trial-and-error than hard-and-fast rules and to be fair, that's half of the fun!

1. Choosing a scene

Okay, so you can pretty much photograph anything in IR, provided that there's some light around. However, the most stunning IR images tend to involve foliage, which comes out as bright white, and blue skies or water, which look deeply intense. But that's all after a bit of fiddling. More on that in a moment.

Achieved by adjusting the red hue and orange luminance sliders

Whatever you choose to photograph, it's not going to be a quick process, so you need to be somewhere that won't put you in people's way or get you into mischief. And it needs to be suitable for a tripod, too.

2. Focusing

The difficulty that you’ll encounter with focusing comes as a result of the IR filter; it blocks out the majority of visible light passing through the lens, leaving you with a dark viewfinder. You don’t have anything to work with when you’re focusing your lens. This means that you have to put your camera into manual focus and set up your shot before placing the IR filter over your lens.

Setting up your shot and then placing the filter over your lens is a bit of a faff, but seeing as you’ll be using a tripod anyway (more on that in a moment), it shouldn’t be too infuriating.

3. Exposure

As for exposure, you’re going to need to use a slow shutter speed, probably between ten and 30 seconds, to allow enough IR light to reach the sensor to expose it sufficiently. This is where your tripod comes in, obviously, as you’ll never manage to hold your camera steady for that length of time. Long exposures also have a tendency to noisiness, so use as low an ISO as you can manage, too.

4. False colour

Don’t be surprised if your infrared photos emerge from your camera with strong red or magenta casts; this is known as false colour. It’s normal and it’s a simple fix in Photoshop to produce a 'traditional' looking infrared photo. If there is such a thing. It involves shifting the white balance to 2000 Kelvin and then flipping the levels in the blue and red channels. In short: open the blue channel and slide 'Red' to 100% and 'Blue' to 0%; in the red channel, 'Blue' needs to be at 100% and 'Red' at 0%. You might want to adjust the contrast and brightness, but that's the basics.

IR images come out with strong 'false colour' casts

5. You don't have to use Photoshop

After playing with the white balance 
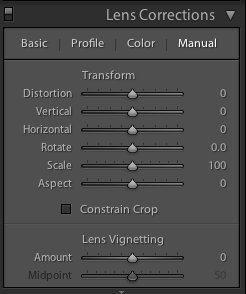
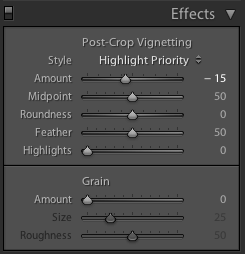
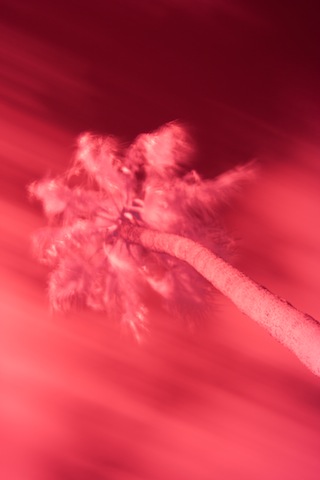
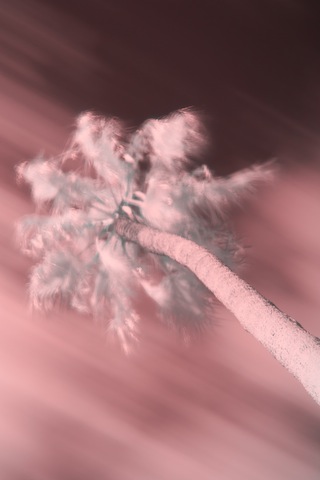
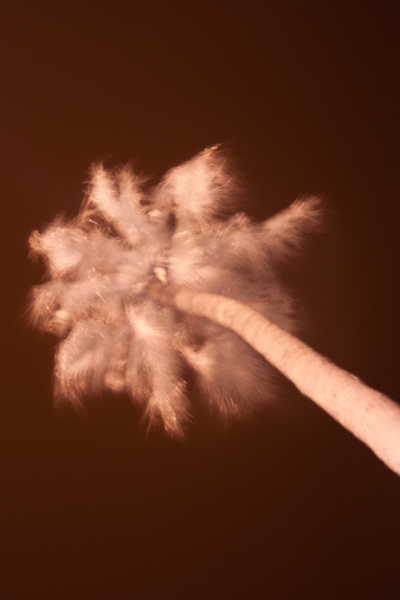
However, there's a lot of fun to be had by simply playing around with other editing packages to produce ethereal-looking images. With something like Lightroom you might want to try:

  • Fiddling with the white balance and tint sliders to produce subtle pink or flaming orange images, and everything in between
  • Playing with the hue and luminance sliders to alter the colour mix of the photo
  • Converting to black and white and using the black and white mix sliders to adjust the look of the image

Really, there's no right or wrong and the range of impact that you can have with an infrared image is enormous. It's a lot of fun.

6. Hotspots

Some lenses are prone to producing ‘hot spots’, or patches of much brighter exposure that are usually, and most inconveniently, in the centre of the image. There’s very little that you can do about this in camera except to try a different lens. Prime lenses seem to be less prone to hot spots, but there are no guarantees, and using a smaller aperture will reduce its size. It's possible to try to correct it in post-processing, too.

What are you waiting for?

Orange and red saturation adjustments

DIY Toy camera presets for Lightroom

A street photo from Oslo, Norway, took on a completely different flavour with my new toy camera filters

Given the popularity of the Holga, Lomo, and the other toy cameras out there, I suppose it was only a question of time before some enterprising soul would release Hipstamatic, the app which lets you take cool, toy-camera like photos on your iPhone.

There’s something about that app which jars quite viciously with me, however: Unlike the ‘real’ toy cameras, this app doesn’t actually alter the iPhone camera at all. And despite getting pretty awesome results (if you like that style of photography, of course), it’s all post-processing.

That got me thinking… It has to be possible to make my own post-processing presets for Lightroom, to turn my carefully lit, exquisitely sharp and ridiculously high-resolution camera RAW images into blurry, colourful, vastly attractive garbage. So I created a couple of presets for Lightroom 3 – and I’ll walk you through the thinking behind one of them and I’ll show you how to make your own. How’s that for a double whammy of awesome?  


Toy cameras tend to get their special look by being terrible cameras. Their light meters will be off by a quarter country mile (so we need to either over- or under-expose the images for a start). They are likely to have light leaks (so we ought to add streaks to the picture), and the hip and cool crowd is fond of cross-processing the film, so we need to make a couple of changes to the way the colours are being displayed.

Exposure and sharpness

So, I’m going to start messing about with the exposure in this photo. I’m being conservative by only over-exposing it by 0.75, but you can always change this later, if a photo suits a bigger mis-exposure. Next, I’m ramping up the blacks a little bit to get a feel of a smidge of extra contrast, and I’m whacking the contrast and brightness right up. Yes, this makes your photo look wrong. And no, there’s nothing wrong with that!

Finally on this screen, the clarity goes down a lot. This adds quite an appealing blur to the image, which is typical for the kind of Polaroid effect I’m going for here.

Colours

It’s surprisingly difficult to get a realistic cross-processing look, but since I’m messing about with a polaroid-alike photo here, I’m on safer ground: adding some highlight and shadow toning gives that deliciously ‘not quite right’ polaroid look. To find the settings that work, keep experimenting – it’s not always easy to come up with the look you want.

Crop

Set the crop tool to 1:1 (that’s square), and crop your image. Then, it’s time for a spot of Vignetting – these are meant to be toy cameras after all…

Light leaks

The light leak effects are typical for toy cameras - and my little preset wouldn't be complete without 'em!

To get the proper feel of a toy camera, you’re going to have to try to add some light leaks. This is pretty easy, actually: Simply add a Graduated Filter across your image, with some interesting characteristics.

Personally, I decided to just brighten and then re-darken the image. I created one thin graduated filter with the settings shown below … And then another one just underneath it which had the opposite settings (approximately – it’s not as if toy cameras are an exact science). This creates quite a realistic bar of light leakage across your image.

Of course, light leaks are meant to be unpredictable and a bit random, but the great advantage of doing them in Lightroom is that you can take some of the guesswork out of them. Use the opportunity to move the light leaks around, and highlight the bits of the photo you would like – or hide the bits of the photo you’re not too fond of. There are no rules – make your own!

Finally, I saved all the above settings to a preset called “broken Polaroid”, and now I can go ahead and drastically reduce the quality (and improve the interestingness) of my photos!

Okay, then, let’s see some examples

A couple of guys on a motorcycle in India were a prime candidate for toy camera tasticness

This was the image I used when I first created the Lightroom preset, and I think it works quite well

A street photo from Oslo, Norway, took on a completely different flavour with my new toy camera filters