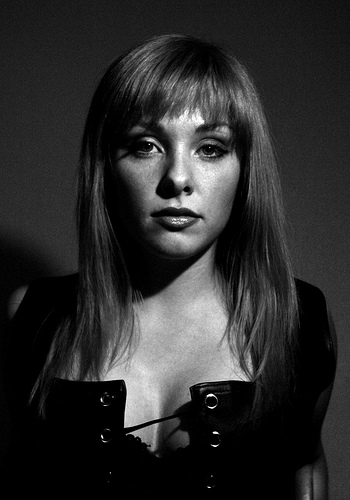
Techniques

Lightroom's Graduated Filter - not just for skies!

Lightroom-Thumb

When you’re accustomed to using something, it’s easy to forget that its capabilities might stretch beyond just that for which you usually use it. You get into some sort of rut don’t explore whatever it is that you’re using, whether it is your food processor, your mixing desk, or your copy of Lightroom.

Jamie Gladden got in touch with us to tell us about a rather nifty way of putting Lightroom’s Graduated Filter to better use than just applying it to skies. Jamie, it’s over to you…

I recently posted an article on my blog describing some simple portrait retouching techniques using Adobe Photoshop Lightroom. A friend of mine later commented to me that he wasn’t that familiar with some of the Lightroom tools that I’d mentioned, so he’d go off, find some tutorials, and play around with these new toys. Great! There are loads of cool tutorials out there, and he’ll definitely learn some useful techniques which will improve his photo retouching skills.

One of the tools I wrote about was Lightroom’s Graduated Filter, which was introduced in version 2 and is very handy. If you do a Google search for this, you’ll find lots of useful tutorials explaining how to use the tool to pep up your landscape shots, darkening a bright sky to add more detail and produce a more even exposure without changing the area of land beneath the sky. Cool! So that’s a new technique we’ve learned, the Graduated Filter is used to even up the overall exposure of your landscape shots by darkening the skies, just like using a Neutral Density Graduated filter in front of the lens on your camera.

What if you don’t shoot that many landscapes? You’ll never need to use that filter, right? Maybe, maybe not. It’s easy sometimes to get stuck with the idea that some of the features serve one purpose only, but with a little experimentation, you can find new and unexpected things to do with them.

In my own photography, I tend to photograph bands and people more than I do landscapes. If I’m working in a studio, then I’ll have full control over the lighting, and the light goes mainly where I want it to go – most of the time! Sometimes, I’ll need to make minor post-production tweaks here and there to compensate for areas which are a little brighter or darker than I’d like.

From the studio to the Lightroom

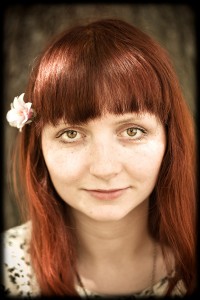
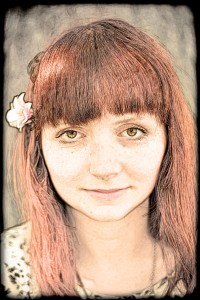
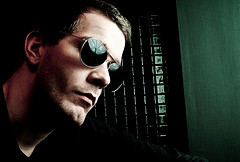
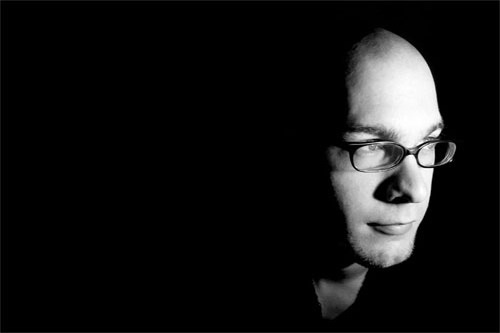
Take a look at these two photos.

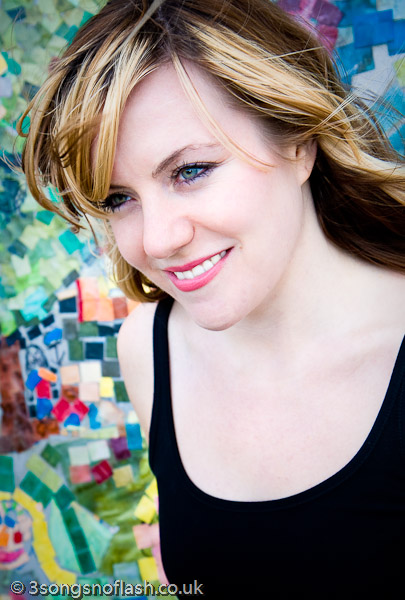
The top shot is complete up to the point at which I was happy with all the retouching and post-processing work I’d done, apart from one thing. I thought that the model was just a little too bright on the right side of her face and neck for my liking. The main light is coming in from camera right, and I had a fill light off to the left, and it’s the main light which is doing the damage.

I wanted to tone this down a little, but only on the slightly brighter area on the right side of her face. Decreasing the exposure or brightness isn’t really an option, because that would change the exposure/brightness of the whole shot, and that’s not what I wanted.

I could also have used the adjustment brush to paint over the too-bright areas, and then adjust the brightness level which would change only the area I’d painted over. That would certainly do the trick, and it does give you more control, but it can be a little fiddly sometimes, and would take more time.

But wait! What about the Graduated Filter? Couldn’t we use that to give us a subtle darkening of her skin on one side which is too bright without darkening the skin on the other side of her face? Definitely. The grad filter is perfect for that.

You can see the effect in the second photo. It’s quite a subtle difference, but for me it was necessary to fix it. After selecting the grad filter tool, I dragged the crosshair across the photo from right to left, stopping when I thought I’d arranged the markers in the correct position.
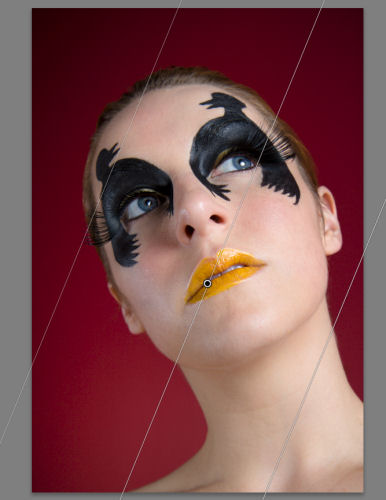
Then, I adjusted the grad tool’s exposure setting down to a level that evened up the lighting nicely, and I was happy.

Outdoors, but not about the sky

Here’s another example. This is Alice:
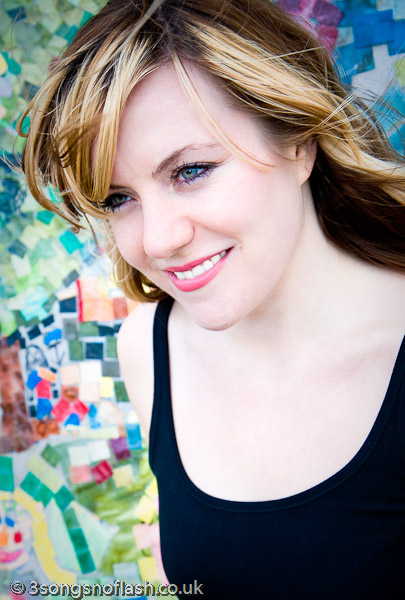
If you’re working outdoors with natural light, then it’s not so simple to move the light source to where you want it to be, so you have to work the light to your advantage, and maybe use a reflector or diffuser to shape the light how you want it. Again, there will usually be some tweaks needed in post-production.

In the first photo, the background in the bottom left is just a touch too bright for my taste, and I think it draws your eye away from her face. Just a quick application of the Graduated Filter, as before, and it was fixed. Simple and quick. Which leaves you more time to go out and take photos, rather than sitting at the computer.

And even for concert photography

For a final, and more dramatic example, here’s a shot of Benjamin Curtis from the band School of Seven Bells:
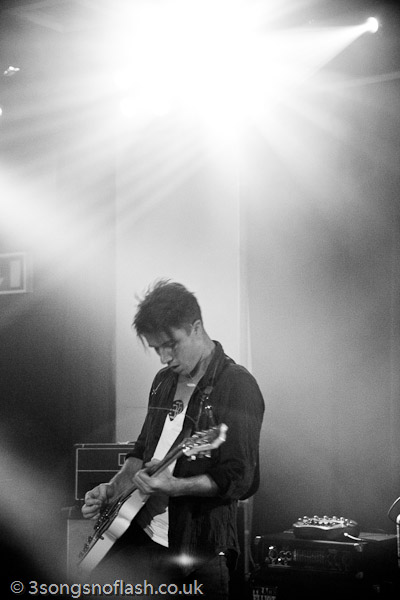
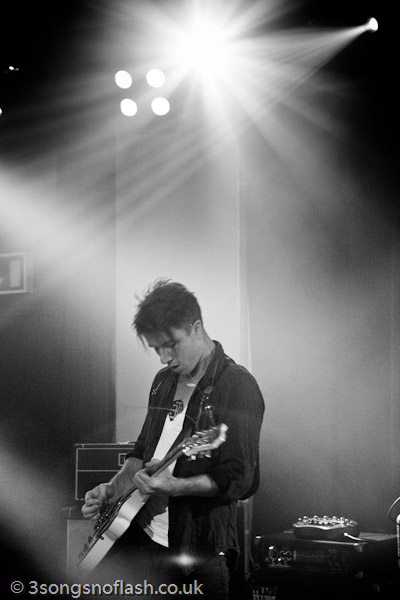
When you’re shooting bands on stage, you’re totally at the mercy of the stage lights, which often change quite rapidly. Often, I like to make the lights a feature of my shots, rather than using them solely to illuminate the artist.

In the first photo, the lights are quite overpowering, and they detract from the shot, but by just simply adding a grad filter straight down from the top of the picture, we’ve toned it down a lot, and produced a really cool and striking effect from the stage lights.

So, there are just three examples of using Lightroom’s Graduated Filter, and not a single sky has been prodded. One of the real selling points of Lightroom for me is that it’s easy to experiment like this, safe in the knowledge that if it doesn’t work out, it’s so simple to go back to your original RAW file and start again.

About the author

This article was written by Jamie Gladden. Jamie’s a freelance photographer based in London, UK, with interests in music, fashion and portrait photography. He’s passionate about music and loves discovering new bands and artists. He reckons that there’s nothing better than seeing a really talented unsigned band in a cramped room above a pub. He’s similarly passionate about photography, and there’s no greater pleasure for him than being able to combine the two. Check out his site; 3 songs no flash.


Do you enjoy a smattering of random photography links? Well, squire, I welcome thee to join me on Twitter -

© Kamps Consulting Ltd. This article is licenced for use on Pixiq only. Please do not reproduce wholly or in part without a license. More info.

Photographing in the dark

The Magic Numbers, by Gareth Dutton

Photographing in the dark can seem a daunting and difficult task when encountering it for the first time, but here at Small Aperture we have a few quick pointers to help you out. Hopefully this article will, wait for it, shed some light on the subject (I’m so, so sorry). So what can we do to combat low light photography? There are, thankfully, several options available to us.

Use a larger aperture

I shot this at f/2.8 at ISO 1600 - the shutter speed needed to remain high.

One option is to work with a larger aperture. What is aperture, you ask? Well I’m shocked and appalled, quite frankly, that you haven’t already read up on our article about it. The bigger your aperture, the more light you’re going to be letting in. Of course, sometimes, you can’t afford to / don’t want to lower your aperture. Whatever shall we do? Well, you could always…

Increase your ISO

Increasing your ISO will increase your sensor’s sensitivity to light, which will help make the most of what little light you’ve got to work with. What are you talking about Gareth? What are these kooky letters you’re putting together? As always, we have it covered – nip over to our guide to ISO and then come back to me when you’re up to speed.

All done? Good. So, increasing your ISO can help you capture those precious, delicious slivers of light skulking around in the darkness. But what about all this horrid noise? It’s spotty and grainy and yucky – this won’t do at all. Well, how about we only increase the ISO a tad and look at changing some other settings?

and this one required all three - ISO 1600, aperture of f/2.8 and a shutter speed of 1/100. Take THAT, low light!

Lower your shutter speed

Lowering your shutter speed can also help your camera gather more light for when there is little to play with. Guess what? We have this one covered, too – take a look here. The longer we have the shutter open for, the more time light has to get in. Too low a shutter speed can lead to image blur, however, and unless you’re going for that look, images that aren’t sharp are, well, unsharp. Image still too dark? Well, I’m afraid that’s all your options exhausted. Bummer. Or is it…?

Get yourself a tripod

Go on, do it now. Open a new window in your browser, go to Amazon, and get it ordered. Unlike other things in your kit, a decent, sturdy tripod doesn’t really ever need to be replaced for a newer model and should still be useful for years and years to come. This means you’ll have to give it a name, of course. Mine’s called Trev. Trev the Tripod. Trev has always been there for me when I’ve needed him. The best thing about Trev is, when I need to lower my shutter speed to a duration for which I couldn’t possibly hold my camera still, I pop it on Trev and he keeps it perfectly still for the whole exposure.

Good old Trev.

You’ll mostly find a tripod useful for grabbing yourself some lovely sunset / late evening landscapes, which will afford you to work with a very small aperture AND a low ISO setting in order to get some lovely, low light landscapes.

Let’s summarise, then.

To defeat the low-light menace, try a combination of these factors:

  • Use a larger aperture
  • Increase your ISO
  • Lower your shutter speed and, if it’s too low for a sharp image…
  • …Use a tripod!

Depending on what sort of image you’re after, you’ll be using a combination of these for one image and maybe just altering a single factor for another. There is no greater teacher than experience, so get out there armed with this new-found knowledge and experiment! Seeing as it’s Friday, if your friends invite you to the pub just tell them ‘Can’t make it tonight, I’m afraid; I’m spending the evening in a field with Trev.’

Introduction to kite photography

Caption

Go fly a kite. No, seriously. Do it. Then tie a camera to the kite, and get some of the awesomest photos you’ve ever taken.

Sounds scary, eh? Well, there appear to be plenty of people who have had a go. The idea is simple: You take a kite, attach a camera, and take photos with a birds-eye view. It’s actually not entirely unlike what the world-famous French photographer Yann Arthus-Bertrand is doing, sans the ridiculously high costs of having to rent (or buy!) a helicopter.  


Kite aerial photography

A great example of kite-assisted photo by goodmolecules on Flickr

Kite photography, Kite Aerial Photography, or KAP, as it is known among friends, has been with us for absolute yonks – the first famous image I have been able to find out about was taken by a George Lawrence in the early 1900s. His early pioneering work in the field became particularly famous when he took a photo of the 1906 San Francisco earthquake.

He wasn’t the first, however, as commenter David Hunt (of kaper.us fame) points out – Apparently, the first kite aerial photograph was taken in 1889 by Frenchman Arthur Batut. The first American to take an aerial photograph was William Eddy – photos done by the both of them are available online.

There are a lot of different ways of pulling this off, though – from using a very simple compact or disposable camera with some sort of a trigger, to using an elaborate mechanism that allows you to control the imaging device with great precision from the ground.

If you prefer to start off small (may be a good idea), it makes sense to start with David Hunt’s article, explaining how you can introduce yourself to the genre for under US$20 – a reasonable introduction price to any hobby, we’d say.

Triggers

Picture-4.jpg

The first – and trickiest problem, I’m sure you’ll agree – is to find out how you can actually set off the camera: Every idiot can tie a camera to a kite, but how do you take the photo?

There are three ways, essentially: A preset timer takes a photo, you can use a timer that takes photos on intervals, or a remote control that lets you choose when to take a photo. The first option is cheapest: one solution is to use a thread and a storm match. You light the storm match, and you’ll have 5-6 seconds to get the kite as high as possible, as described on this page, but it isn’t a very flexible solution, and you’d end up sending the kite up again and again and again. Very tedious.

The second solution – intervals – is easiest done with digital cameras. Some digicams have a time-lapse feature built in (I remember one of my first cameras, the Casio QV-8000SX had this functionality built-in), but it is actually surprisingly rare. Cameras that accept a remote control can usually be quite easily adapted to do time-lapse photography, by creating your own remote control that sends signals to take photos at the intervals you choose, but this requires some electronics skills. If you are going to go to those lengths, you may as well go for solution #3 – us a radio-remote with an electronic trigger!

Picture-3.jpgOne of the easiest ways to use a radio remote, apparently, is GentLED, an universal camera remote system that weighs only 3 grammes, and can be set to control a wide array of different stills cameras and camcorders. The system has been developed especially for kite photography, but can also be used for other applications, obviously. They start at €20.

If you are hell-bent on not using any pre-fabricated items, our friends over at Engadget threw themselves into the mix head-first, and actually hacked a digital camera to do time-lapse photography. The idea is that once you set it to take pictures every minute (or whatever), you can just concentrate on flying the kite, and see what your camera comes back with.

More advanced stuff – Cradles, remote controls & getting high-tech

None of this is nearly hardcore enough, of course – we want proper stuff! What happens when you go all the way?

Well, Roy Latham explains:

Picture-22.jpg

The rig includes a Sutton Flowform 16 stickless kite with a long nylon fabric tail and the camera platform.


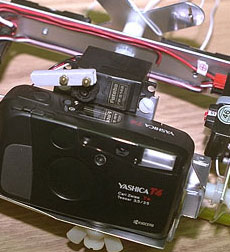
The camera platform uses a Yashica T4 camera and two Futaba servos. One servo controls pitch and the other actuates the shutter. Note that since we are mainly interested in straight down, there is no need for an azimuth servo.

We asked for an elevation control on the grounds that since we would have the kite aloft anyway, it would be irrestable to want to take some more conventional scenic pictures.

The Futaba radio control unit is a popular unit used for radio controlled model airplanes and the like. The framework for the camera platform was custom crafted of aluminum, with some nylon fittings.

Mounting a camera to a radio controllable cradle can help you aim the camera for each shot. There are many different cradle designs available, but Scott Haefner’s solutions seem to stand out as particularly elegant.

Other resources worth checking out:

Kaper.us, an Article on BBC about kite photography, Charles Benton’s KAP page, Scott Haefner’s KAP page, Peter Bults’ KAP encyclopedia and blog, 360° panoramas using KAP, KAPnet’s directory of KAP parts, Some of the best KAP photos on flickr… And finally, a fantastic article in Science News about the scientific application of kites and kite aerial photography.


Do you enjoy a smattering of random photography links? Well, squire, I welcome thee to join me on Twitter -

© Kamps Consulting Ltd. This article is licenced for use on Pixiq only. Please do not reproduce wholly or in part without a license. More info.

Making a time-lapse

Canter

Every photographer experiences a creative block at some time or another. So what do you do when this happens? I personally fall into a foetal position on the floor, kick my legs, and spin around in circles while crying like a six-year old. But what do YOU do? Well, here’s a thought. How about a time-lapse? If you have a dSLR and a sturdy tripod, then you already have most of the ingredients for this magnificent recipe. So let’s get started!

Equipment

While many dSLRs have an “interval shooting” feature built in already, some don’t, so you’ll also need a way to time and trigger your shutter release. There are several pieces of hardware available, but I like to use a Hähnel Giga T Pro. It’s the only one I’ve ever used, but it seems to work perfectly fine and is easy enough to figure out. Whatever you decide to go with, make sure it has an interval timer function and an exposure count control. Without these two features, you won’t be able to create your time-lapse.

Essential kit, if your camera doesn't have an 'interval shooting' function

For this tutorial, you’ll also need QuickTime software, which you can download here. (If you own a Mac and you’re running Snow Leopard, then you’ll notice that you have QuickTime X and can’t install QuickTime 7. Read this post by Apple to get around this problem.)

The location

You can shoot a time-lapse of just about anything you want. Obviously, it makes more sense to shoot a scene that has a lot of motion in it, such as fast-moving clouds, a busy city square, or a train station. Once you determine your scene, it’s time to get set up. Keep in mind that you’ll need to dedicate some time to this project, so bring along a book or something to keep you occupied while you shoot. ‘How long should I shoot,’ you ask? Well, that depends. And in order to figure that out, you’ll need to do some basic number crunching.

The maths

To determine the time required to shoot your time-lapse, you’ll have to work backwards. For simplicity’s sake, let’s say that we want our final video to be one minute in length. A normal time-lapse video will consist of 15 frames per second. So 15 frames times 60 seconds is 900 frames.

How smooth or choppy you want those 900 frames to flow is up to you. If you’re shooting clouds, then you’ll probably want a smoother effect, so you’ll want to shoot in shorter intervals, say every five seconds. So 900 frames taken every five seconds is 4500 seconds, divided by 60 seconds per minute, which comes out to 75 minutes, or an hour and 15 minutes worth of shooting. Phew!

So now that you have your location picked and how long you’ll be shooting for, let’s get set up.

The set-up

Place your tripod where you want and frame your shot. Make sure your tripod is as stable as you can get it. Any movement during your 900 shots will be very visible once you combine everything together in your final video. If you brought your camera bag with extra gear in it, the added weight could help with stabilisation, so try hooking it onto your tripod.

Get comfy whilst your time-lapse is shooting

Now check your camera for settings. Because you’re taking 900 frames, you’ll want to shoot in JPG to make sure they all fit on your memory card. Also, since your video will likely be used for web-friendly applications like Youtube or Vimeo, you don’t really need to have extra-large high resolution photos.

Make sure you focus your shot and then disable your auto-focus to ensure consistency across all of your frames. You’ll also want to shoot in either manual or aperture-priority mode. If you’re out in an open field during high noon with a lot of clouds in the sky, you’re bound to be in bright sunlight during some shots and darker shade during others, so aperture-priority will help ensure proper exposures throughout your time-lapse.

Once you’re all set up, program your interval timer to the correct settings and start shooting. Grab your book and get comfortable. You’ll be there for the next 75 minutes.

Creating Your Video

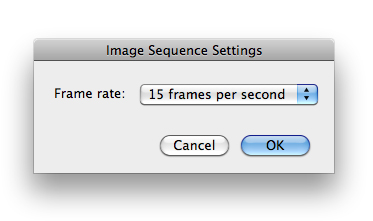
Once you’ve downloaded your photos to a folder on your computer, it’s time to put everything together. Open up QuickTime and click Open Image Sequence under the File menu. Select only the first image in your sequence and click Open. Next, you’ll want to select your frame rate. For our example, we’ll go with 15 frames per second. Click OK and QuickTime will do the rest for you.

You now have your master time-lapse video. Make sure to save it as is. You can then go back to the File menu and choose Export for Web to save the video as a more web-friendly version, ready for Youtubing.

Congratulations, you now have your first time-lapse video!

Extra Steps

While this tutorial simply covers the basics of time-lapse photography, there are plenty of other methods available to play with, so once you get some practice down, you can start experimenting a bit. For example, you may want to batch-edit your photos in Photoshop to create a more unusual time-lapse, such as one in monochrome.

If you’re shooting a busy street at night, you might want to use a slow shutter speed to make the car headlights streak throughout your video. Or you may want your time-lapse to pan across a large scene, a bit like this one, to give your video a wow factor. The options are endless.

Time-lapses can be a great way to create a fun and unique project on a lazy Sunday afternoon. Maybe you have things to do around the house, so you set up your gear in your backyard and shoot while you do your chores. Or maybe you’re at a cafe in a busy city square. Why not shoot a time-lapse of the buzz around you while you sip on a cappuccino and read a book? It’s simple to do and I’m sure you’ll be pleased with your results.

And just so that you know, this is my favourite time-lapse out there:

Hayaku: A Time Lapse Journey Through Japan from Brad Kremer on Vimeo.

Playing with your pictures

sketchafter

So taking photos should be fun, right? Right! And sometimes we want to have a bit of fun with our photos themselves, right? Right! So, ehm, what can we do with our photos to play around with them a bit more? Well, we’ve been pooling braincells over here at the Small Aperture mansion, and just before they expired from over-use, we came up with the following.

First of all, you could go out and buy yourself a toy camera. But maybe you don’t really want to. Perhaps you’d rather fiddle with photos you’ve already taken with your top-of-the-range dSLR. In which case, Photocritic has the perfect tutorial for creating your own post-processing pre-sets in Lightroom.

Or perhaps you’d prefer to go the vintage route? Take a look at Photojojo’s four ways to vintage-ify your pics. This one covers all sorts, from post-processing ideas to tips such as vaseline on the lens or shooting through an old stocking.

Over at befunky.com they’ve what feel like hundreds of different effects that you can apply to your pictures. My personal favourite would be the speech bubbles, though.

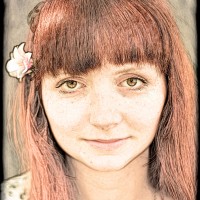
And Gareth, a member of the Small Aperture Scriptorium, has this easy method to cartoon-ify your pictures. Begin by selecting an image. How about this one?

And then:

  • Open said selected image in Photoshop
  • Create a duplicate layer
  • Turn that layer to black and white using desaturate (Image>Adjustments>Desaturate)
  • Duplicate the black and white layer and invert it (Image>Adjustments>Invert)
  • In the layers panel, set the blend mode to Colour Dodge
  • You should now have three layers. Select the top layer, the inverted one, and go to Filter>Other>Minimum to add the sketch effect. The higher the value of the pixel radius, the more pronounced the sketch effect.
  • If you want to re-add colour, duplicate the bottom layer (the non-black-and-white one) and add it to the top of the stack. Set the blend mode to Colour.

Tad-dah!

I’m off to do silly things with photos now.

Framing in portraiture

Well will you look at that, miss moneypenny! This time, I'm on the right of the picture! It's pure unadulterated magic. MAGIC, I TELL YOU!

I spend a lot of time giving feedback on photos. One of the comments that pops up again and again is that I’ll feel as if an image is framed awkwardly.

Some times, I’ll find that an image is nigh-on perfect, but it fails to make the mark because it’s difficult to understand the motivation of the photographer: What are they trying to achieve with this photo?

It’s true for all photography, of course, but it’s more complicated with portraiture, as it isn’t necessarily very intuitive. How, after all, can you connect a story to the way a portrait is framed?  


This is not a tutorial. Hell, it isn’t even much of a rant. Just some thoughts. Use of it what you will, and ignore (with great prejudice and much glee) everything you deem to be complete and utter bollocks. There will probably be some of both.

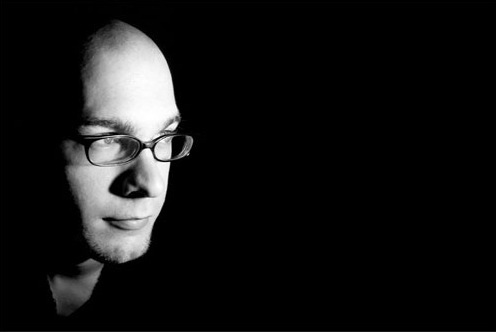
In this image (of myself. because I’m too lazy to dig through my backlog of umpteen million photos to find another one), the subject is dead centre in the image. The quality of the photo itself is unimpressive, and the lighting needs work, but that’s beside the point – we’re talking about framing here.

Centre-framing

Framed dead centre. Not very attractive. Nor is the framing.

In this image, the vast blackness on both sides of my ugly mug means that I’m surrounded by… something. But we can’t see it If I had a fear-struck look on my face, instead of looking smug, this composition may have helped to hint at something I was afraid of. perhaps something lurking in the shadows. But I’m looking vaguely content, so that doesn’t make any sense. In fact, the image has very little impact at all.

Looking into the frame

Cropped so I am looking 'into' the frame.

Fear and Loathing in East London

For my next book, I'll probably use something like this as my author photo. Because I've come a long way as a portrait photographer since my 'steeped in blackness' mysterious stranger days. (clicky for bigger)

So instead. it is recropped like this. Suddenly. I’m looking across a vast nothingness. Into… into what? I’m looking at something just outside the frame, lire image doesn’t hint at movement, nor does it show any particular emotion, so whatever is off frame isn’t engaging me.

Perhaps I’m watching television. Or I may just be at ease with myself. Due to the framing, the image has very little tension, and serves only to show off my face – great for the jacket-cover of that book I wrote, perhaps (Lo and behold, this is actually the photo I ended up using in my macro book.

This image is vaguely better than the one above. because it has some purpose. It draws the eyes the left, but simultaneously leaves you wondering what it is I’m looking at – And why it is so far away from me.

Looking “out” of the frame

Well will you look at that, miss moneypenny! This time, I'm on the right of the picture! It's pure unadulterated magic. MAGIC, I TELL YOU!

In this image, suddenly something else happens. I’m closer to the edge. Closer to action. Am I about to move towards the light? Am I dead, moving towards the light? At the very least, I appear more curious. And I’ve left a wasteland of darkness behind me. Or perhaps I’m just the first one to step out of the shadows?

This image has the sense of movement, somehow – a dynamic property, which wasn’t there in the previous image – even though the only difference is a net of black pixels.

So, er, what’s the point of all this, Haje?

Well, the main message, I suppose, is test it out, and keep the rule of thirds in the back of your mind.

Take an image, crop it in different ways. See how it impacts the photo, and see if it becomes more interesting. Think about what message you are trying to convey, and see if the image is actually supporting that message. If it is: Great! flit isn’t, perhaps a re-crop, or even a re-shoot would solve the problem.


Do you enjoy a smattering of random photography links? Well, squire, I welcome thee to join me on Twitter -

© Kamps Consulting Ltd. This article is licenced for use on Pixiq only. Please do not reproduce wholly or in part without a license. More info.

Low-light action photography

David's website is worth a peek!

Low-light photography is something that often confuses the metric bejesus out of photographers: It’s very tricky to get right, and even if you do everything 100% correctly, often-time you’ll find that your photos still don’t come out as you dreamed of. Now, multiply that with the trickyness of photographing action, and you’ve got yourself a true cluster-copulation of Whiskey Tango Foxtrot.

Everybody will sooner or later end up in a situation where you’re photographing moving things in the dark. To concert, event and dance photographers, it’s part and parcel of their chosen photography work.

I’ll be honest: I don’t consider myself a very good low-light photographer (with the exception, perhaps, of my concert photography portfolio, but in those circumstances you’ve got an entirely different set of challenges.

Today, though, I’ve got a wicked treat for yourselves: One of my colleagues and friends in Australia, David Wyatt, agreed to share some of his observations of low-light action photography with us. He’s a scholar, a gentleman, a legend, and a bloody great photographer… Take it away, David!  


Dance and stage photography are two areas of photography that often intertwine with each other. They can be wonderful to watch: They’re full of dramatic moments that can include moving silhouetted outlines of dancers or actors performing while being back-lit by a single strobe light – which is a great effect from the viewpoint of the audience, but which can make life for you, the photographer, incredibly frustrating!

The following notes are simply intended as a guide only to ways of coping with low light photography, particularly for photographers just starting out in or thinking about trying dance or stage photography – practice is the only effective way to develop experience and increase your photography skills, and there are thousands of great sources out there providing methods of increasing your photography knowledge, depending on the area of photography that you enjoy.

Equipment

My camera bag looks a bit like this: I use a Nikon D700 with a 70-200mm and a 17-55mm f2.8 Nikon lenses, and have recently upgraded from a Nikon D300. I also sometimes use an SB-800 flash unit for posed shots, and never use flash during dance or stage performances, unless I’ve previously received permission from the event or performance directors to do so.

I started taking photographs of dance and stage performances eighteen months ago, and love it. There’s nothing like capturing a shot of a dramatic moment on stage, or of a passionate glance between a couple dancing together, and knowing that the same moment captured within your camera will never occur ever again in precisely that same way.

The lighting challenge

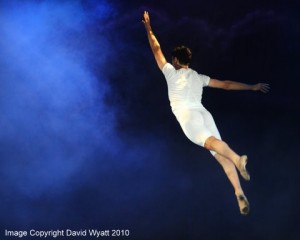
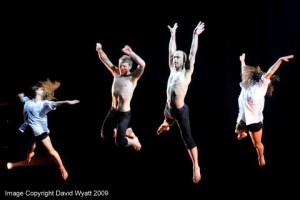
Up, up, and and away: The more dynamic the photos, the better they tend to be! © David Wyatt

Dance and stage performances can often have scenes or components which are entirely under-lit or which have fluctuating lighting levels, and sometimes fast movement at the same time, which together can make it very difficult to balance between a shutter speed that will be slow enough to let sufficient light into the camera to illuminate the image, while using a shutter speed that will be fast enough to freeze the movement. On the other hand, slower shutter speeds can also be used to amazing artistic effect with tripods or monopods through blurring the movement of dancers to give an impression of high speed in the photograph. (If you’re confused about exposure, check out How Exposure Works).

One of the main aspects of low-light dance photography in particular is that having faster glass will always makes a large difference in the kinds of shots that can be achieved. With an f3.5-5.6 lens, you can try to compromise in low-lit venues by lowering the shutter speed and opening the aperture as widely as possible using manual control settings on the camera, but chances are that those setting may still not be enough to freeze motion without using flash if the action is fast-moving, particularly if you may be wishing to capture the background as well as nearby action through using a smaller aperture for greater depth of focus (i.e., f5.6 – f11).

It's difficult to get too much energy into a dance shot - but you can try, if you want! © David Wyatt

Increasing the ISO levels can help with taking shots at a fast enough shutter speed to try to freeze the motion, though depending on the kind of camera you use, grain in the images at higher ISO levels can tend to become a problem, especially between ISO 1600 to 3200. While the f2.8 lenses more suited to low-light work are quite expensive, some of the f1.8 prime lenses are much more affordable and fantastic quality lenses for low-light performances, especially for photographers on a budget. The downside with prime lenses is that they require footwork to move around to frame the image properly, and without footwork or mobility, can require extensive post-shoot cropping for composition requirements, which is the compromise that offsets the price of the f2.8 lenses with zoom capabilities.

There will always be a dance or stage performance in low-light where you may not be able to capture the action effectively purely because of the low lighting that may be involved, or because of the distance placed between yourself and the dancers/performers. If that happens, it may simply be a matter of needing to upgrade your equipment if that’s an option, trying to use a slower shutter speed with a tripod or monopod (shooting at 1/40 and 1/60 shutter speeds with a monopod can still capture stationary non-moving images very well, when there may be a pause in the action), or checking if you can use flash at those events, which may sometimes also be an option.

Colour, motion, passion; what more could you want from a photo? © David Wyatt

There is also some excellent free software out there for image editing (including brightness and light levels adjustment) and for noise reduction in images, including GIMP, Picasa, and Neat Image. Neat Image is a nifty piece of software great for reducing noise/grain in images that may have been taken using a high ISO, though using noise reduction can substantially decrease the quality of images it has been applied to. Images with a large amount of noise reduction applied may still be fine for website display at small-medium size, though trying to print those same images may be a different story entirely due to the loss of detail through the noise reduction process. The new Lightroom 3 has some pretty awesome noise reduction algorithms built in, as well – so if you’re using LR, don’t forget to give that a shot, too!

What I’ve written here is a snippet of my own experience of low-light photography through dance and stage work, and I’m still continually learning as I go along. I base my abilities to a higher degree on the quality of the photographs that I’m yet to take at future performances, and to a lesser degree on my previous work. A bit like the acting adage that actors are only ever as good as their next performance.

Dance and stage photography in low-light environments are both some of the most difficult kinds of photography to capture effectively, although both forms also have some of the most beautiful and dramatic human moments that can be captured on film, which make the hard work infinitely worth it!

David's website is worth a peek!

About the author

David Wyatt is a dance and stage photographer based in Melbourne, Australia, with a wicked eye for a good photo. Check out his website over on Capturing Images.

He loves a bit of feedback, and is available for assignments – contact details are on his site, so knock yourself out!


Do you enjoy a smattering of random photography links? Well, squire, I welcome thee to join me on Twitter -

© Kamps Consulting Ltd. This article is licenced for use on Pixiq only. Please do not reproduce wholly or in part without a license. More info.

When RAW is not enough

4150358922_e5af95be9e

One of the first pieces advice I give to people who wonder where to start getting their photos to become better, is to shoot in RAW. There’s many obvious reasons for why this is a good idea.

With RAW, the final result can be sharper, you have better control over white balance, you get wider dynamic range, you can do HDR photography, and, well, it’s what all the cool kids done. Recently, however, I have moved away from shooting in RAW for several reasons. Or, to be precise, I have started shooting in RAW+JPG.

Here are some compelling arguments for why you should do the same… 


Becoming a better photographer

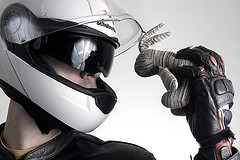
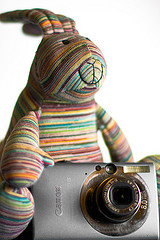
Holding a bunny to your face while wearing full Motorcycle protective gear is a great way to become a better photographer. Aw, c'mon, give me a break, what would YOU use to illustrate this article? (clicky for bigger)

RAW is great because it is lenient – you can over-expose a photo quite significantly, and still rescue the highlights, because you have significantly higher bit-depth (and more information) than you would do with JPGs.

This is a life-saver for press, event, and action photographers: The fact that you aren’t completely buggered even if you’ve screwed up the exposure a fraction is a godsent!

The problem is that I’ve recently talked to a lot of photographer of the ‘new garde’. People who have rarely – or never – shot on film, and are unaware of how often RAW is helping them out of a hole. There’s two ways of looking at this: Either, use the extra flexibility RAW gives you on a regular basis, and accept that we’re now in the digital age. Or shoot as if you’re still shooting on film, and use the extra flexibility as a safety buffer.

Bunny is sad because his compact camera doesn't take photos in RAW. (clicky for bigger)

I’m a strong believer in the latter: Ultimately, when you present your photos, you have to save them as 8-bit colour anyway, so you’re in fact re-compressing the image back into a lower bit depth. This isn’t a bad thing: the human eye can’t really cope with more than 8 bits anyway.

The problem is that it’s difficult to estimate how much of the photo is over-exposed when you’re relying on RAW to save you – and there will come a day where you are relying on it, and you’re off. There’s only so much recovery you can do of a photograph, and if you miscalculate, you don’t have a safety buffer anymore.

Personally, I’ve become a huge fan of trying to take perfect exposures out of the camera: Shoot as if the JPEG is your film. Get the white balance right. Get the exposure right. Sharpen the JPG in-camera. Set the saturation and contrast you like. In short; Make your JPEGs be as perfect straight out of the camera as possible. In addition to making you a much better and more conscious photographer, this has several benefits. To wit:

Better previews

Getting the white balance right on shots like this is challenging, but hellasatisfying. It's good to know you can fall back on RAW if you did make a hash of it after all (clicky for bigger)

RAW photos are unsharpened out of the camera. This is a blessing, because as we discussed in the article on how you can sharpen your photos, you should never sharpen your photos twice. Your JPGs are sharpened in-camera, which means that if you sharpen them on your computer, you’re not getting as high quality as you could. Not a good thing.

In situations where you're taking lots of photos (like when snapping gigs), it's a relief to have JPG preview - it saves you from opening hundreds (or even thousands) of RAW files to find out which ones turned out well.

The flopside of this, however, is that RAW photos can look flat and lack energy. The photos that really zing are the ones that are tack-sharp – and if you’re only looking at RAW photos, you may actually miss the photo that is sharpest, because it hasn’t been sharpened to its full potential.

When you shoot RAW+JPG and your JPEGs are perfectly exposed and whitebalanced, they are the ultimate previewing tool: Full resolution previews, beautifully sharp, which your computer can deal with very quickly. Even better, if you need to e-mail or upload previews of a shoot anywhere, it’s an order of magnitude faster to resize and compress JPGs than RAW files.

So, Shoot with JPG, keep them, and use them for previewing purposes. If you decide to edit any of ‘em, use the RAW files, but at least you’ll have a much better picture (har har) of the potential of your photos

Submitting photos to magazines

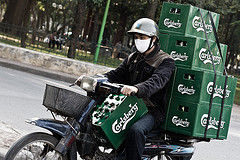
Enough with the useful captions already. Here's a picture of a guy in Vietnam with 10 (yes! Ten!) cases of beer on his motorbike. (clicky for bigger)

So you occasionally shoot paperazzi stuff? You do events? You shoot news? Honestly, you don’t want to piss off the picture editors: if you send them a photo they’ll have to do a lot of work on, you’ll need to have a damn fine explanation… And find yourself some other customers, because they won’t use you again.

They’re on extremely tight deadlines, and they prefer photos they can just drop into their page layouts without fiddling with them too much. Shoot perfect JPGs, and that’s usually good enough for magazine use.

Let them know that you have a RAW file if they need it, of course, but 99 times out of a hundred and twenty two, they won’t want it – they don’t need the hassle.

Workflow speed

My university professor stole a wise saying from someone else once: Work smarter, not harder. This saying really is eminently applicable here.

I don’t care how fast your computer is – RAW will slow you down in one way or another. If you organise your photos so you can preview the JPGs, you’re making your life a lot easier.

If the JPG looks out of focus, the RAW will be too – that’ll save you a few seconds opening the RAW file to check. Multiply that by 300 photos, and you’ve saved yourself 10 minutes. Presto!

There’s no reason not to

This model wants you to shoot RAW+JPG. Just look at how stern she looks. Would you dare not to? Thought so. Grab your camera right now and change your settings. (clicky for bigger)

Set your camera to RAW+JPG, and bring plenty of memory cards. They cost next to nothing these days, and if you do a shoot where you know you don’t need to keep the JPGs, you can always trash them after you’ve downloaded them – sort ‘em by size (the RAW files tend to be 3-4 times bigger than the JPGs) and delete half the smallest files. Or sort ‘em by type and delete all the JPGs. Whatever you prefer.

If you have enough memory cards (and you should. Really. If you don’t, head over to Amazon and be Amazed (groan) at how cheap they are), there really is no reason not to shoot in RAW+JPG.

Go on. Give it a shot. And let me know how much time you’re saving :-)


Do you enjoy a smattering of random photography links? Well, squire, I welcome thee to join me on Twitter -

© Kamps Consulting Ltd. This article is licenced for use on Pixiq only. Please do not reproduce wholly or in part without a license. More info.

Learning by example

Photos that Inspire is one of the few books I'm aware of that goes into detail about the individual photos, with how, why, where and when they were taken - perfect to start learning

Some people learn best when they start at the basics: This is a camera. Press this button to make it go ‘click’, and it takes a picture. Change the aperture to… etc. Me, I like to work the other way around – I learned a long time ago that photography – like computers, cars, etc – is interesting mostly for its results, rather than for its technology. Who cares if your camera can do 1/4,000 second or 1/12,000 second shutter times… Unless, of course, you need the faster shutter time to achieve something.  


Learning by example, then, is the act of starting at the other end of the learning process: Find a photograph you like, or come up with a crazy idea, and then start stepping backwards: What do I need to do to create the photograph I have seen / imagined / come up with.

What’s the point?

Boats on Ha Long Bay in Vietnam. Taken with a Canon Digital IXUS at ISO 200, f/8 and 1/30 second exposure, at widest possible zoom

Boats on Ha Long Bay in Vietnam. Taken with a Canon Digital IXUS at ISO 200, f/8 and 1/30 second exposure, at widest possible zoom

The interesting thing of learning by example is that there’s a pretty good chance you miss whole fields of photography. If ISO or lens length isn’t relevant to the shots you’re taking, you’ll never have to learn them… It’s kind of like mathematics: I could never wrap my head around calculus. Not because I don’t have the brain capacity (or, at least, I would like to think), but because I never saw the point. Just like I never saw the point of geometry, until someone managed to bring it to life by explaining how I could apply it to my life – suddenly, I had a need for a bit of knowledge, so I went out to acquire the necessary information and understanding, and was able to do the calculations I needed.

I’m a strong believer in doing the same thing with photography: If you don’t think you need something, well, you probably don’t. You’ll eventually find out that the techniques you’re using at the moment are limiting you – or making the things you’re trying to achieve more difficult – but that’ll be new motivation to learn something new again.

So, how do you do it?

My sister in Vietnam. Taken at ISO 100 with a 50mm f/1.4 prime lens stopped wide open, aperture mode. Shutter time was whatever the camera suggested. Slightly desaturated the RAW file to get a more timeless feel

My sister in Vietnam. Taken at ISO 100 with a 50mm f/1.4 prime lens stopped wide open, aperture mode. Shutter time was whatever the camera suggested. Slightly desaturated the RAW file to get a more timeless 'feel'

Well, it’s easy: Find a source of inspiration. Personally, I use all sorts of sources: Magazines are a great starting point (especially amateur photography magazines like Digital Camera Magazine or similar – also check out PhotoRadar). Flickr, of course, is a marvellous source as well. The problem with on-line, however, is the nature of computer screens. Call me old-fashioned, but I really prefer the high-resolution way of looking at photography: Prints, books, magazines, etc.

The other problem is that, even on Flickr, not that many photographers take you through their way of thinking, or their technique for getting the shot (I love the idea of the How I Took It group, but so far, only 22 photos have been posted, which seems like a huge shame). Luckily, you can often ask questions, and many are good enough to help you along, but that’s still not an ideal way of getting tucked in. (Of course, I’m also guilty of this, but if you find any photos in my photo stream which you’d like explained and deconstructed, I’d be more than happy to – leave a comment and I’ll dig out the info!)

Using books for inspiration

Photos that Inspire is one of the few books I'm aware of that goes into detail about the individual photos, with how, why, where and when they were taken - perfect to start learning

Photos that Inspire is one of the few books I'm aware of that goes into detail about the individual photos, with how, why, where and when they were taken - perfect to start learning

There are a lot of fantastic photography books out there, but many of them are by a single photographer – the problem with that is that they have only a limited number of styles, and most of them say nothing about how the photos were taken – you’re expected to enjoy them as art, rather than as part of a learning experience. As you get better, this is a sensible approach, but when you’re starting out, it can be mighty frustrating.

The best one I’ve found that does things a little differently is Photos that Inspire (Amazon US / Amazon UK) is in the same series as my macro book – the Photo Workshop series published by Wiley – and it’s a peach.

For one thing, it has a couple of my photos in there (which obviously makes it a much better book already) but the important bit is that it contains tons of photographs taken by professional photographers – who explain why and how the shots were taken. It’s like a small art gallery with a personal guide by each of the individual photographers – and a fantastic place to start learning, of course.

How do you learn?

So, that’s my take on it – How do you prefer to learn about photography? Where do you get your inspiration? There’s a comment box down there somewhere…


Do you enjoy a smattering of random photography links? Well, squire, I welcome thee to join me on Twitter -

© Kamps Consulting Ltd. This article is licenced for use on Pixiq only. Please do not reproduce wholly or in part without a license. More info.
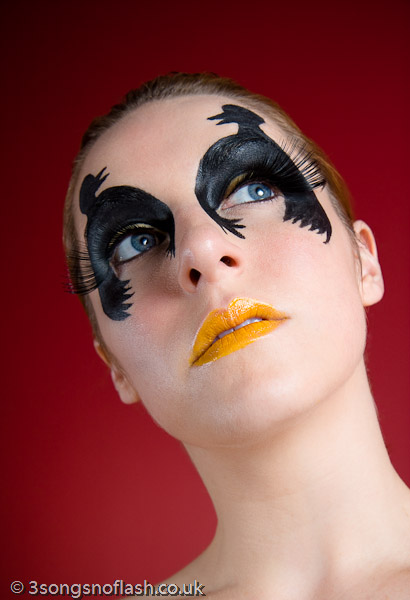
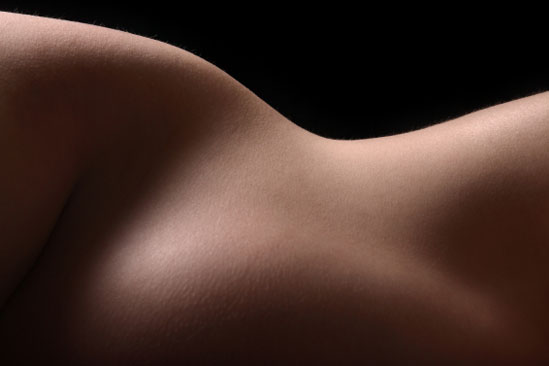
Nude self portraiture

pregnant-main

Taking photos of yourself has a certain under-tone of intimacy about it at the very least; but choosing to shed your clothes and do the same thing adds a whole new dimension to the experience.

One of my long-time readers, Brigitte, told me her approach to nude photography; She doesn’t share her photos with anyone, but decided to take them for her own sake. It made me think; I know that my blog is quite strongly in favour in sharing all your photos with the whole world, but perhaps that misses a little bit of the point; Who are we, in fact taking photos for? Anyway – that’s a topic for another post… Today, it’s Brigitte’s turn… 


Nude in front of (and behind) the lens

A few days ago I was reading articles on nude photography… and these took me down memory lane. When I was pregnant for the second time, I used to take a thorough look at myself everyday in the mirror and marvel at the way my body had changed. There is an immense softness in a pregnant woman’s curves which I find very appealing, and I knew from my first pregnancy that once the baby is born, it’s easy to forget the way you looked before.

This time, I very much wanted to be able to remember my whole life the way my body was right before I gave birth. Of course, I had lots of pictures taken by my family and friends, but it felt like cheating, by hiding some of the curves while emphasizing others. Most were not very becoming, either… these pictures were taken on the fly, showing me in whatever position I had deemed comfortable at the time, and I felt it was really unfair. To be totally honest, I’m pretty sure I’ve torn and thrown away the vast majority of these!

pregnant-main

Trusting others vs trusting yourself

I know lots of people can undress in front of a photographer they trust (Demi Moore, to name but one!), but I simply felt I could never do that, underwear or not, nine months pregnant or not. I did not trust anybody else’s look but mine on my body to take these pictures, not even my husband’s (OK, he’s a poor photographer anyway!), and I realized I would have to be both the photographer and the model.

pregnant-2I selected a plain white wall with a wooden door as the background for my pictures, no direct sunlight but no artificial light either, and set-up my Canon EOS 20D on a tripod. I made the necessary adjustments in terms of sensibility and focus, selected the B&W mode, and used the self-timer to take the pictures. Between each shot I practiced in front of a full length mirror… I wanted to be able to share these pictures with my children when they grow up, so I was determined to be as beautiful as possible (of course!), and if sensuality was permitted, I did not want these pictures to turn out erotic.

And that’s the best part. I know I may sound like a control freak, but I was the one who wanted these pictures, and I greatly appreciate the fact that I got to do them myself, without being subjected to anyone’s influence. In the end, all the decisions were mine, and if I had not liked the result, I could just have discarded all the pictures without any hesitations, regrets, or fear to offend the photographer.

Find out more!

Brigitte is a 34-year-old French lady who works as a translator and editor. You can find Brigitte’s blog on tequilas-secrets.com, with her photos in the, er, photos category. If you’re of the Twittering kind, she can be found on @Brigitte_Ba, as well.

The photos in this post are from iStockPhoto


Do you enjoy a smattering of random photography links? Well, squire, I welcome thee to join me on Twitter -

© Kamps Consulting Ltd. This article is licenced for use on Pixiq only. Please do not reproduce wholly or in part without a license. More info.

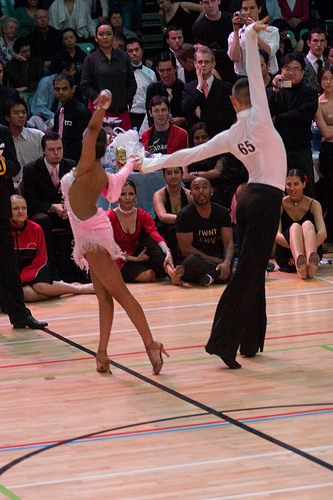
Photographing dancers

dance-photography

A couple of months ago, I had to eat my pride after my first foray into dance photography went terribly awry.

Since, I’ve spoken to Laurie, who is a friend, Ruby on Rails coder, dancer, and fellow photographer, who offered to write me an article explaining how to get dance photography done The Right Way™. His top tip: Learning about dancing makes you a better dance photographer!


Take it away Laurie…

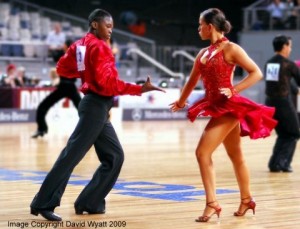
DancersBallroom dancing is the hardest photographic challenge I have personally come across. It seems everything is set up to make it hard, and nothing makes it easy. Everyone moves too fast, the lighting is horrible, and getting a spot to stand can be a challenge in itself. None the less, after years of working on it. I finally think I know enough to pass on some advice.

Photo on the right © Laurie Young – see it bigger on Laurie’s Flickr stream!

The first thing, as with any photographic trip is to know what you want to get. For me there are three different goals I can be thinking of. The first is to try and great stunning photos. The sort that i want to frame and maybe even sell as art. Secondly I want to document the dancing, including all the bits that don’t look so good, the mistakes and the moments in between the rehearsed lines. Surprisingly this is what most dancers are looking for when they ask to see my photos, as it helps them improve. Finally I want to capture the emotion of the day, the excitement and nerves before the competition, the release after coming off the floor, and the joy or disappointment that any competition brings. I’m not going to talk about this one today, as technically its similar to portraiture, and so off topic.

Like any demanding field of photography, the equipment you have really makes a difference. You are just not going to get really good photos with anything less than a semi-professional DSLR.

The biggest single leap I took was getting my hands on a camera with no shutter lag. If you are waiting between when you press the shutter and when it takes the photo, you have no chance of getting anything, dancing is ALL about timing, and so is dance photography. Hand in hand with this is a camera with fast autofocus. More than anything else you can spend your money on, no lag, and instant AF will improve your pictures.

Dancers

For the choice of lenses, I like to go for the extremes, either a telephoto, or a wide-angle. Standard lenses have little to no place in my kit bag. Having said that, I use the telephoto to pick out just one couple or dancer, and if the competition is in a small room, then this job is done best by a slightly longer than standard lens like 70mm.

Either way, the lighting is going to be low, so the fastest lens is going to pay dividends. Personally I use a Sigma HSM 70-200 f/2.8, and this seems to be the lens of choice among the other photographers. For wide angle I like about 20mm, which i use mainly for the Standard (ballroom) dances from right up close.

Photo on the right © Laurie Young – see it bigger on Laurie’s Flickr stream!

Flash is a good next addition to your kit. You are going to be taking a LOT of photos, so it needs to recharge really fast. In a dark room you are going to be dumping a lot of charge with each flash. I use a Metz Hotshoe Mounted gun, charged from a Quantum battery pack, and even then can easily go through 2-3 full charges of it in a day.

The last thing you need is memory cards. Lots. If your shooting an all day competition, you are probably looking at between 1000 and 5000 photos. At full quality thats a lot of GB, so stock up, or bring a laptop to download onto.

When I arrive at the competition the first thing I do is get a feel for the light levels. Competitions are held in lots of different venues, from community halls with lots of windows and ample natural light, to the Winter Gardens in Blackpool, a massive hall with quite dim lighting. If you are lucky there will be some spots of lights from down-lighters, or even follow spots, which can make for some great photos. Personally I prefer not needing to use flash, it is hard to avoid flash shadows, but its not always an option.

I tend to meter manually, taking some sample shots till I am happy with the ambient light, then setting the flash on auto, (use the most advanced form of auto your camera supports) which will generally do a nice fill in. Because the dancers are moving so fast, and because the background at competitions is typically horrible, a wide aperture and really fast shutter speed is the best. Autofocus should be on, but if your camera can’t focus fast enough, then pre-focus on a specific part of the floor, and only take photos when people dance on that spot.

Dancers in the DarkNext decide where to position yourself. My two favorite spots are on the balcony, looking down with a telephoto, or right on the edge of the floor, close enough to get hit by the girls dresses as they go past.

Photo on the left © Laurie Young – see it bigger on Laurie’s Flickr stream!

If you do this, be nice to the judges. They are competing for the same floor space, and often have to stand right in front of you to get their job done. It can often feel like part of the judge’s training is learning how to stand right in front of photographers, but I have been assured this is not true. Annoying as it is, its something you have to accept. If you are at the floor edge, then kneel down. Your camera should be at or below the dancers waist height. Otherwise you are going to foreshorten their legs, and no girl, and pretty much no dancing guy is going to be happy with that look. The lower the camera is the nicer the legs will look. Just don’t get so low you get accused of trying to take photos up the girls skirts!

Now its time to take photos. This is where your biggest problems are going to begin. At first it will feel like lots of random motion is going on, and you only ever see a good photo after you have missed the chance to capture it. To fix this, you need to learn more about dancing, and learn the individual couples routines. Here Latin and ballroom start to differ. Ballroom is all about motion, so still photos are always going to be difficult. Add that to the fact that each couple is effectively embracing each other for the whole dance, you will always get the back of one persons head.

Except in the “lines”, those moments when the dancers stay on the same part of the floor for a bar, and show how they can stretch, and create impressive shapes. Learn the routines. If you watch them for a lap or two of the floor you can start to see that they repeat the same steps each time. This lets you predict when such a line is about to happen.

In the Latin dances, there are lots of accents. Highlights in the music where the dances do something dynamic, powerful, or sudden. As you learn more about the music these become more predictable. In Cha Cha, its normally on count 1, in Rumba, its on 4. In Paso there are two specific highlights. Learn the music and you can tell when these accents are coming. If you have learnt the couples routines, you can know when they are about to go into a line, if not, assume they are going to do something that hits the accent. You will be surprised how often you are right.

You really have to listen to the music, and be as aware of it as the dancers are. Its the only way to get good photos of dancing.

Thank you!

Thank you, Laurie, for writing up your guide for us. If you liked Laurie’s writing, check out his website, and of course, give his Flickr stream some love, too.

Inspiration

As with so many other things in life, Flickr is great for inspiration for finding great dance photography. Plug in the name of the dance and search by most interesting, get a feel for what can be done!

Can’t be bothered searching yourself? Can’t blame you – here, let me help: Tango, Paso Doble, cha cha, Rumba, Salsa, Merengue

Other searches worth trying: Latin dance and dance, of course.


Do you enjoy a smattering of random photography links? Well, squire, I welcome thee to join me on Twitter -

© Kamps Consulting Ltd. This article is licenced for use on Pixiq only. Please do not reproduce wholly or in part without a license. More info.
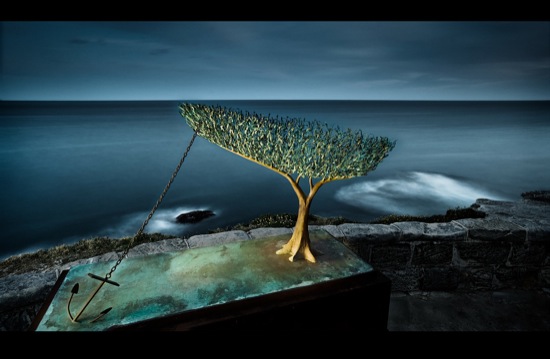
Painting with light

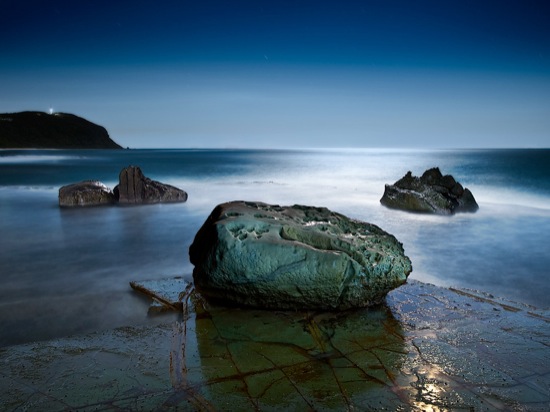
sculpture_by_sea

You’ve probably seen the effect of camera blur (moving your camera, giving a fuzzy, streaky effect), zoom blur (by zooming during an exposure, I have a modest example here), and motion blur (something moving on camera). But what do you reckon would happen if your scene isn’t moving, your camera is firmly locked down on a tripod, but your light-source moves?

Well, if you can imagine such a thing, you’ve just imagined the bright art of painting with light. I’ve spoken to my good friend Brent Pearson who is ‘a bit good’ at this light painting malarkey, in the same way that Pele is a bit handy with a Football, and Antonio Lucio Vivaldi knew a thing or two about chord progressions.  


“I have enjoyed landscape photography for almost 30 years”, Pearson told me in a recent interview. “However over the past few years my landscape photography has evolved and I’ve started doing more and more long-exposure photography.”

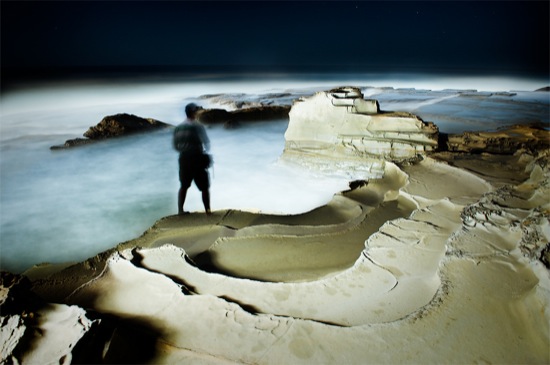
sculpture_by_sea

It was as part of this long-exposure work that I first ‘discovered’ Pearson – he has an amazing way of combining the zen-like peace of landscapes with the chaos of motion and light.

Getting into light painting

“I enjoyed capturing the movement in landscapes and the abstraction that long exposures introduced to my images allowing me to simplify my compositions.”, Pearson explains. Night-time landscape photography was the natural extension of that work

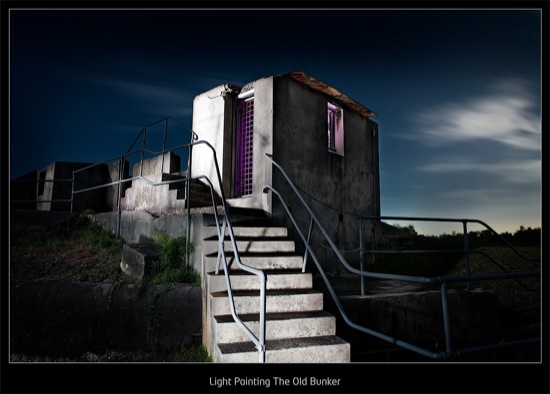
middle_head_bunker

Of course, landscapes are tricky enough when they’re done during the day – take away the sunlight, and you’re up against a whole new set of challenges. “Composing and focusing when you can’t see through the viewfinder is tricky”, Pearson laughs, but obviously there are issues beyond merely not being able to see what the hell you’re doing, like the challenge of calculating your exposure at night without the aid of a light meter, and managing noise of long exposures with a digital SLR.

“With a reasonable amount of experimentation and trial and error I started understanding the techniques that would give me consistent results at night and wanted to continue exploring and experimenting with night photography.”, Pearson explains “… And that is how I was introduced into the world of light painting.”

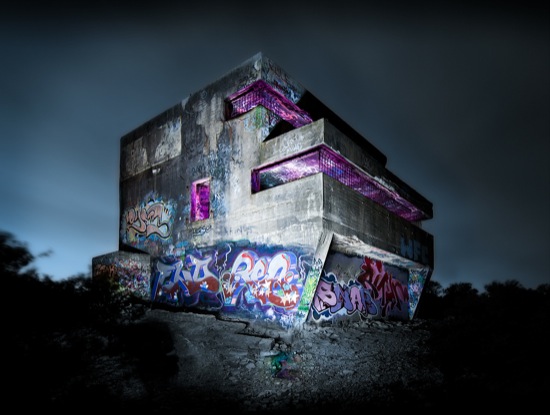
Light painting is a term that often associated with the creation of light trails in an image, however there is a totally different type of light painting that offers the landscape photographer unprecedented levels of creativity – the painting of landscape images using light sources that are not visible to the camera.

malabar_bunker

“By photographic standards, this is the Wild West!”, Pearson claims, “There are new frontiers to explore and new trails to blaze. There aren’t many photographers doing this type of photography… perhaps because of the technical challenges associated with photographing at night, or perhaps because there are not a lot of comprehensive guides or manuals to help photographers climb the learning curve without becoming frustrated. ”

The Benefits of Landscape Lightpainting

By having control over the light, light painting is like unleashing the control and creativity of studio photography into the outdoors. With the long exposures that are associated with night photography, you are not limited to lights being statically positioned; “free to wander around a scene with various light sources literally painting landscape features with light means you get a completely different level of creative control.”, Pearson says, and lists off some of the extra control you’re granted by taking the camera outside in the dead of night:

You get the chance to control the direction and intensity of light, the quality (by changing your light sources) of the light, and the focus and colour as well, by using light painting techniques, coloured gels, ‘barn doors’, etc

In post-production you also have incredible control to blend your light painted images together with the control of a lighting director using a light mixer.

forrester_rocks

Getting started with light painting

Probably the most important component of light painting is the light source(s) that you use.

“Over the past 12 months I have been trialling a variety of light sources from the humble house torch through to home-built high powered light sources that emit a very even high-quality light”, Pearson says. “My light painting kit now includes three light painting tools: My workhorse light which is a high powered fluorescent light, my camera flash unit, which is great for lighting interiors with colour, and my high-powered head torch LED that can light objects up to 80m away.”

Learn from the master

Pearson has been noticed, and is often approached by people who want to learn the tricks of the trade. “I’ve had numerous photographers ask me how they can learn how to light paint landscapes.”, Pearson says. Like any good teacher, he decided to seize the opportunity and run with it: “I have finally put together a comprehensive step-by-step guide to night photography and landscape light painting” – which is available on his Night Photography Guide website.

caught_in_act

“If you feel like your ready for the next photographic challenge”, Pearson concludes, “then I urge you to get out at night and start discovering a new photographic world!” – and I couldn’t agree with him more! Get over to Brent Pearson’s site and grab a copy of his eBook – it’s well worth the cash, I reckon!

If you’ve taken any light-painted landscapes (or any other style of photography for that matter), do post a comment with the URL in the comments below – I’d love to have a look!


Do you enjoy a smattering of random photography links? Well, squire, I welcome thee to join me on Twitter -

© Kamps Consulting Ltd. This article is licenced for use on Pixiq only. Please do not reproduce wholly or in part without a license. More info.
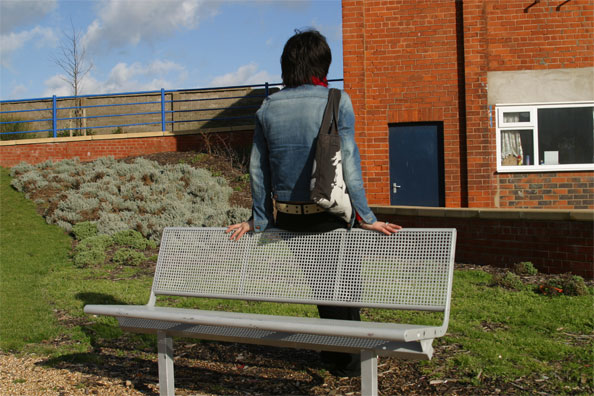
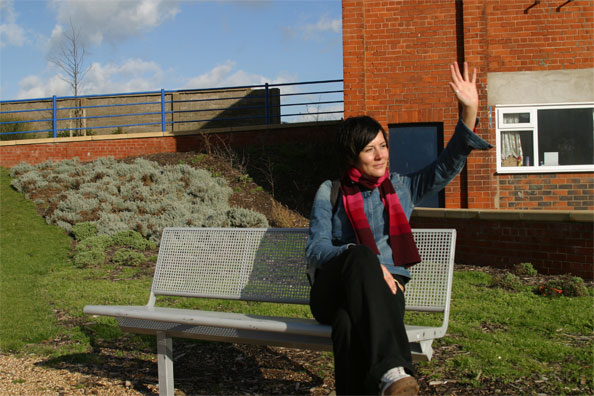
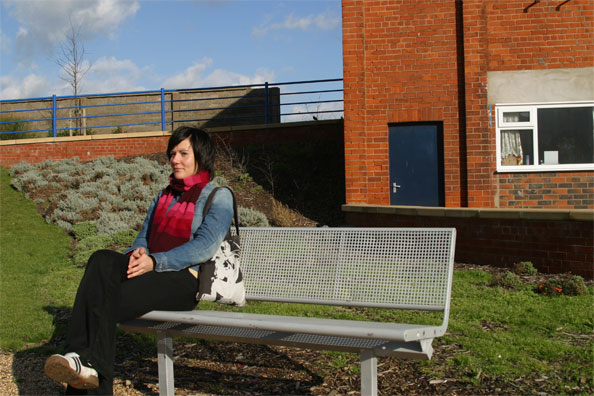
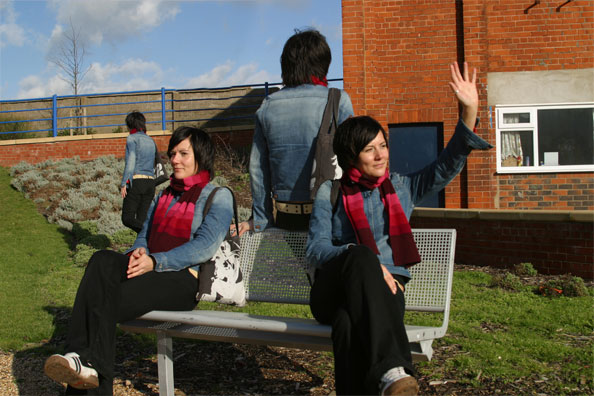
Digital Schizophrenia

schizo-progress-cutout.jpg

One of the first things I started doing when I started shooting digital images, was thinking of ways of doing digital double exposures – adding one part of an image to another – for a greater impact of my digital shots. It turned out to be relatively simple, but carrying high impact. All it takes is suitable photos, a copy of Photoshop (or the Gimp, which is sort-of nearly as good as Photoshop, but free), and a bucket full of time…

Have you made any cool images using this method? Post them somewhere on the internet – your blog, perhaps – and add a link to the comments, so we can admire the photos! 


Starting with a series of photographs taken with the camera on a tripod, to ensure that the angle doesn’t change:

schizo-progress-5.jpg

schizo-progress-4.jpg

schizo-progress-2.jpg

schizo-progress-1.jpg

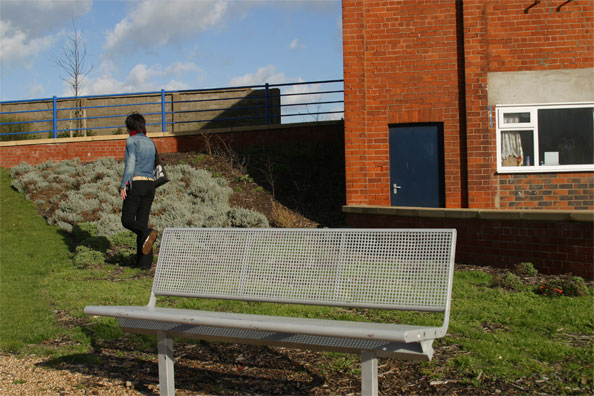
I loaded all of them into Photoshop, and copied them to the same document in different layers. When doing this type of editing, it makes sense to arrange the images in a way that allows you to work from top to bottom, or from left to right. So the first thing you need to do is arrange the layers in a way where they have a logical progression. In the case of the images above, I layered them in the order 4 – 5 – 2 – 1, with 1 on the bottom

The easiest way of doing these photos is by doing it in a way that the character doesn’t interact with itself, but on the other hand it is a lot more believable if they occupy the same field of view (i.e overlap) or interact in some way – getting them to hand things to each other, or similar, is an additional layer of messing with your readers’ brains.

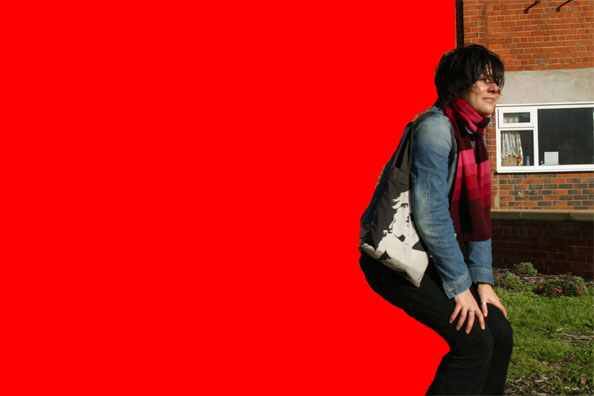
Now, in the top image, carefully cut out the area you don’t need. The trick is to cut off as little as possible. For the sake of example, I’ll show you what I would do if I were to add another photo all the way to the right of this montage:

schizo-progress-cutout.jpg

By leaving as much of the image intact as possible, chances of getting the cut-out wrong are limited. In this case, because the right side of the girl isn’t cut out at all, there are no mistakes to be made!

Hide this layer, and move on to the next one, and the next one, etc.

Finally, you’ll probably spend a bit of time carefully polishing your cut-outs. You may also need to darken some areas to ensure that the shadows look genuine – do you remember what we said about that in How to spot Photoshopped Images? Exactly.

Now, when you’ve put all the photos together, you get a result that looks like it could happen, if it hadn’t been for the fact that this lady doesn’t have any siblings, much less quaduplets…

schizo-finished.jpg

Couple of examples

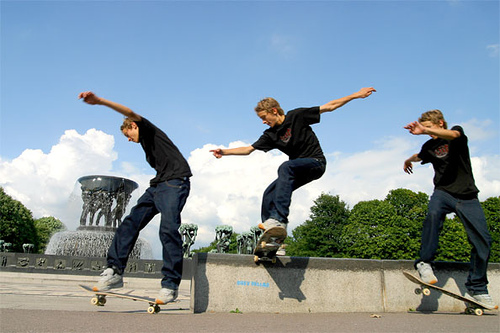
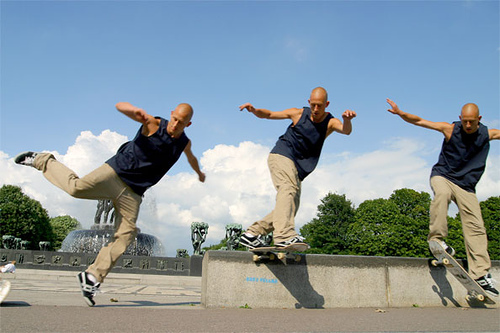
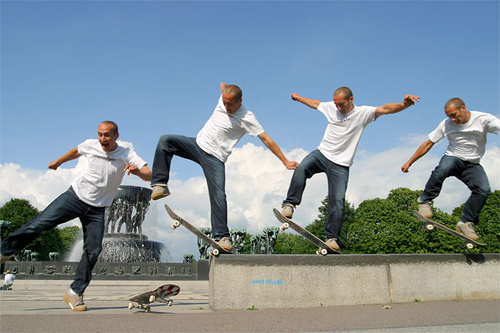
Do you like this stuff? Well, have a go at it yourself! And just to get you on your way, why don’t we add some more examples? The following three were taken free-hand, with quick series of five shots for each photo. In case you recognise the background: Yes, it’s taken in Vigerlandsparken, in Oslo, Norway. I think it was around 2003 or so.

Skatezophrenia
Photo: Skatezophrenia by Photocritic.org on Flickr

Skate-zo-phrenia-104.jpg
Photo: Skate-zo-phrenia 104 by Photocritic.org on Flickr

Skate-zo-phrenia
Photo: Skate-zo-phrenia by Photocritic.org on Flickr

So, what do you reckon? Can you do better? Of course you can! Get cracking, and post the results in the comments – I’m curious!

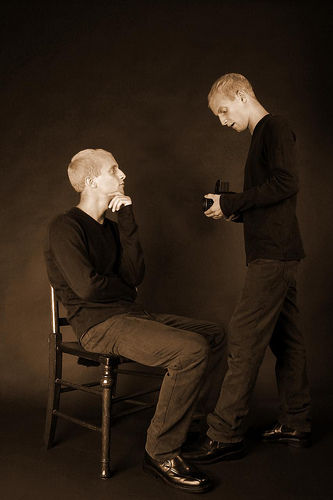
Couple of other examples

Self portrait with self
Photo: Self portrait with self by Photocritic.org on Flickr

Jonathan Squared
Photo: Jonathan Squared by Photocritic.org on Flickr

Finally, if you like these, you can get loads more inspiration on the Multiple Exposure group on Flickr!

This post was originally posted in 2006 (which is why the observant among you will notice a couple of old comments on this post – so no, you’re not going loopy:). I’ve updated it and added a few more photos, hence the re-publish.


Do you enjoy a smattering of random photography links? Well, squire, I welcome thee to join me on Twitter -

© Kamps Consulting Ltd. This article is licenced for use on Pixiq only. Please do not reproduce wholly or in part without a license. More info.
100 amazing iPhone photos

amazingiphone

Apple’s iPhone is a fantastic little gadget. Global positioning system meets touch-screen meets iPod / portable video player meets hyperportable computer, meets camera. For the purpose of this article, it’s only the latter that is interesting…

I was on the train the other day, and spotted the light hitting my book in a gorgeous way. Cursing that I didn’t have a proper camera with me, I decided to try and capture the moment with my iPhone. The results were actually really quite good, which piqued my interest; are there people out there taking works of arts with their iPhone?

It turns out the answer is a resounding ‘yes’ – and I wasted most of the evening and night collecting 100 fantastic examples of people taking gorgeous photos with their iPhones. Without further ado…

The Apple iPhone as a camera

Self portrait with iPhoneThe iPhone is many things. It’s the most flawed phone I’ve ever owned (which I wrote about here back when I was still editing T3.com), but it’s still heads and shoulders ahead of any other phone I’ve ever owned, too: It’s the first device that does everything I need to, the apps functionality is a stroke of genius, the built-in GPS and maps has saved my bacon so often I’ve lost count, and I’m a recovering Trism addict, too. It’s got the best screen on any phone I’ve ever used, and the whole touch-screen thing is fab.

Having said all that, the iPhone’s camera is pretty damn inferior compared to the current slew of camera phones out there. I had a couple of Sony Ericsson phones that had better battery life AND a far better camera (with – gasp – autofocus!) than Apple’s raprod.

And yet… it’s the first camera phone I’ve used where I’m taking photos all the damn time. It helps that the iPhone makes uploading photos to Flickr / Facebook or e-mailing them to friends very easy, and the fact that your photos are Geo-tagged for you is pretty nifty as well.

So yes, the iPhone is a rather fantastic machine overall, with a sub-par camera. That doesn’t stop people from making some damn fine artwork with it though…

(Top tip: the iPhone takes the photo when you release the on-screen shutter button, so you can find it, press and hold, frame, and then just release the button when you’re ready)

So – despite its shortcomings, it turns out there are some pretty awesome iPhone photgraphers out there. I’ve collected some of the best…

The best of the best

In my research, I found a few photographers in particular that are worth taking a special look at for their work with iPhone cameras: Sionfullana has more than 400 iphone photos in his stream, and his iPhone set is full of absolutely fantastic photos, including tons of great street photography around New York.

Update: I’ve done an interview with Sion Fullana about how he takes his amazing iPhone photos!

The other photographers that kept coming up time and time again are Steve Bluestein, whose abstract work is fantastic indeed. Finally, Bananajode, and carolthome both have really distinctive styles which is an inspiration in itself.

Between these four, they’ve got art with an iPhone camera covered – but there are so many others out there who dabble in iPhone photography – with fabulous results. Witness…

100 fantastic iPhone photographs

It took me a hell of a long time to collect all of these, but they’re all worth taking a look at – first off, 55 with thumbnails…


photo by bananajode


photo by pierre bédat


photo by breamarie


photo by imagohun


photo by Silence99


photo by Hieroglyphics…’


photo by pouwerkerk


photo by pressapposky


photo by clearstyle


photo by clearstyle


photo by Richard Sintchak


photo by 03w


photo by kcvsf8


photo by clearstyle


photo by toalston


photo by photo_aperture


photo by kayakvarberg


photo by tsurujun


photo by raney_day


photo by presuggan


photo by bananajode


photo by bananajode


photo by Jonas


photo by imago2007


photo by stevebluestein


photo by cruzan


photo by kt


photo by ascott


photo by stevebluestein


photo by chrishalford


photo by stephenhackett


photo by zach_manchester


photo by guest_family


photo by badastronomy


photo by pixelhound


photo by ath-har


photo by bananajode


photo by libratem


photo by stevebluestein


photo by guest_family


photo by mackro


photo by stevebluestein


photo by guest_family


photo by stevebluestein


photo by stevebluestein


photo by bananajode


photo by stevebluestein


photo by andyi


photo by libratem


photo by mattloveskicks


photo by psylense

Even more!

Still haven’t had enough? I don’t blame you to be honest, there’s a lot of awesome iPhone photography going here, so you may as well keep going! The next 50 or so haven’t got thumbnail images (partially out of laziness, and partially because these users have chosen not to share the ‘small’ versions of their images with the world) – but have a click, have a look, and enjoy!

photo by AdamBaronPhoto
photo by ilyysamanthaa
photo by shoken
photo by rayguntv
photo by uncommon
photo by carolthome
photo by version-3-point-1
photo by carolthome
photo by bitrot
photo by steviezj
photo by the-challenge
photo by studioh
photo by jswright
photo by carleton_hall
photo by big-e-mr-g
photo by jswright
photo by junku
photo by petermarik
photo by maitexu
photo by dogmatic
photo by sionfullana
photo by ronlemise
photo by alexthegirl
photo by x-cao
photo by x-cao
photo by antomic
photo by davidwatts1978
photo by journalrevolution
photo by hrtwrk
photo by littlepretty
photo by romeez
photo by gabo
photo by funcrodrigo
photo by yusheng
photo by sionfullana
photo by michaelnyc
photo by big-e-mr-g
photo by jswright
photo by sionfullana
photo by Otto K
photo by sionfullana
photo by skyblueskin
photo by marcel83
photo by Matthew Burlem
photo by carolthome
photo by sionfullana
photo by Tabangel7
photo by sionfullana

And finally, the photo which set me on this wild goose chase in the first place; the only iPhone photo I decided would be good enough to place in my main Flickr stream:

On the train
On the Train by yours truly

Join the fun

Want to get in on the fun? Check out the Taken with iPhone group – or check out the there’s currently more than 30,000 photos to be looked at, and they welcome you to add your own, too. Or you can check out ‘taken with iPhone‘ camera browser on Flickr.

… And if you find any amazing gems I’ve missed, do leave us a comment – I’ve been thoroughly amazed by peoples creativity so far, and I’d love to continue being flabberghasted! :)

How To: Concert Photography


Of all the types of photography ever invented, I would claim that live concert photography is up there among the most difficult ones. You have five thousand fans behind you, and there is a band in front of you. Nobody stands still. In fact, even the notion of standing still ruins the idea of a good music photo. The bouncers hate you, because you are in their way. The crowd is jealous of you. Crowdsurfers will kick you in the head. The band thinks you’re annoying. The lighting is never bright enough, and changes so frequently that you’re screwed even in the few moments that it is.

And nonetheless, concert photography is one of my all-time favourite pasttimes. It’s hard. It’s unrewarding. But it’s deeply gratifying on a personal lever. It’s about capturing the mood. Capturing the looks. Capturing something the audience is feeling.

Of course, it’s also something I know something about – I’ve done my share of concerts…

Tristania - Live in Manchester
Tristania – Live in Manchester by Photocritic.org on Flickr


So, how can you take photos at a concert successfully? First of all, remember the “standard” rules for most concerts:

  • No flash photography
  • First 3 songs only
  • What the security guys say is Gospel

The first two rules are a blessing and a curse rolled into one. No flash photography is a nightmare at many venues, but it is often better to take photos without. You don’t get the “feel” of the gig without the stage lighting. The “first 3 songs” rule is a bugger – most bands look the most energetic towards the end of their set. On the other hand, it means that you have a very clear time limit: You’ve got 10 minutes (or so) to get the photos you need. If you screw it up, well, you’re unlucky. But there is no saving film, you obviously have to make the best of the time you have.

Emanuel in concert 2
Using the available lighting is a challenge, but can be rewarding, especially if you manage to cotton on to the pattern of the lights. This is Emanuel in concert 2 by Photocritic.org, on Flickr. More Emmanuel photos here.

Equipment

Personally, I have done all all my concert photos with a Canon 60D, 10D or 20D. Don’t even bother trying with a compact camera – you’ll look like an idiot, and the photos will come out rubbish. (Granted, I have worked with a few photographers who have proved me wrong on this point, but why make your life more difficult than it has to be?).

My lenses of choice are a Sigma DX 70-200mm f/2.8 lens, which is great for getting in close, a Sigma 17-35mm f/2.8-4.0 lens which is great for overview shots, and a Canon 50mm f/1.4 fixed length lens. Notice a pattern? Damn right – go for brightness all the way. If you can’t afford zoom glass that is bright enough, then get a 50mm f/1.8 lens. it is normally the cheapest piece of glass you can find, and focussing is a bitch, but you need all the light you can get when doing this type of photography.

18 Visions in Concerts 3
Try to capture the artists in the moment where they are most “into” their song. Photo of Eighteen Visions on Flickr. More 18 visions.

How to get in the pit

The first problem you are faced with is that unless you have credentials, the bouncers are unlikely to let you into the venue with professional (i.e anything beyond a compact) camera equipment. So you need a photo pass.

They don’t hand these out to everyone and his dog, but there are a few ways you can get them. Personally, I was shooting for an agency, so they sorted out the photo pass for me, but you can call up your local rag and ask them if they would like concert X photographing. Offer to do it for free. When they say they want the photos, call the venue, and tell them that you are photographing it for the local rag. This isn’t going to work when Metallica comes to town (the local newspaper will send their own photographers, no doubt), but for smaller bands, it usually works: The small bands are thirsting for publicity, the newspaper wants photos, you want into the pit and to get some experience. Everybody wins.

The second avenue is to become an in-house photographer for a venue. This doesn’t work with all venues, and it means you need to get friendly with the managers of the venue. Expect to photograph crappy small local bands for a while, but once they see what you can do, and they start to get faith in you, you may do better.

Finally, you can just call the venue anyway. Tell them that you are a budding photographer, and would love to take some photos. “you have ‘no’, and can’t get a ‘yes’ unless you ask”, as my mother used to say.

Nightwish in Concert 8
Photo of Tarja, of Nightwish. More Nightwish

Tips to taking good photos

So, you are in the photographer’s pit in front of the crowd. Well done. Now, you need to actually take the blasted pictures.

First of all, select an ISO value on your camera that is as low as you can get away with. ISO 200 will give you far better photos than ISO 800, but if all your photos turn out blurry because of lack of light, then you would have been better off with ISO 800 after all.

Second, observe. Concert lighting move in patterns, and you need to try and snap the photo of once the lighting is exactly right.

Always shoot in fully manual. It’ll be too dark for your auto focus, and the rapidly changing lights mean that your light meter is worthless. You need to be good, but your instincts will save you. If you can’t “feel” how a photo is going to turn out before you look at your digital display at the back of the camera, perhaps you aren’t ready for concert photography quite yet. There’s no shame in that – just keep practicing.

Take a lot of photos. Personally, I throw away 99% of my concert photos. In fact, some times, I come home without any really good photos – it isn’t always your fault. The lighting can be particularly tricky, etc. And you can’t plan for any of it – you have to roll with the punches.

Change your vantage point. You can walk all the way back and forth in front of the stage. Do it. If you are in your face enough, chances are that the lead singer will show off for the camera a little – they may even look at your cam for a fraction of a second. That is your cue. Get the photo.

Finally, get as close as you can. I guess this is mostly a personal thing, but I prefer photos where I get really close. Action portraits, if you will: photos taken of an artist at work.

Inspiration

Check out Lithium Picnic’s concert photography galleries, or talented music photographer Andrew Kendall’s photo gallery.

We’ve also done a separate article on ‘more on live concert photography‘ and ‘concert photography at smaller venues‘, both of which might be of interest to you :)

Making money off your concert photos

Originally, we had a lot of information here on how you could monetize your concert photography, but it all became a bit wieldy. I would strongly recommend you have a look at our seperate writeup on event photography, and our making money off your photos article.

Join us on Twitter -

Photographic treasure-hunt

shootexp-1

Combine a good old-fashioned team-based treasure hunt with a photography competition, and you’ve got a recipe for success, right?

Well, that’s what I thought too, when I signed up to attend Shoot London, an event based out of the Tate gallery, organised by Shoot Experience, a company who organises these kind of events for public and corporate events.

Sadly, it turns out that I’ll probably give future Shoot Experience events a miss – to find out why, I spoke to another participant of the event… 

Anthony was one of the people participating in the Shoot London event on May 17th. He was also on my team, so writing this up as an interview might seem slightly presumptuous, but then, this is my blog, and I do as I damn well please, thankyouverymuch.

Anyway. The basic rules for Shoot London are simple: you’re given ten clues, about the area of London, you have six hours, you submit ten photos. It’s easy to see why it is sponsored: it promotes interest in the city, and organisers end up with lots of creative photos that they have rights to.

In the event, sixty teams entered, and the four of us (Catherine, Daniela, Anthony and yours truly) made up team Auslanders (which, for some reason, the organisers kept calling ‘ozlanders’, as if they could spot the one-fourth-austrialian-ness of the team from a mile away).

The rules

The rules did not allow any photoshopping, which I’m cool with: it’s a completely different challenge (much, in fact, like the dpchallenge.com concept of days gone by – a photography site which I’m very fond of indeed) if you can only use in-camera effects. We ended up using in-camera settings which made the photos extra sharp; fuzzy; extra vivid; and black and white, depending on what the situation needed.

The rules were not opposed to us having any help at all – there were no restrictions on googling for answers, and we did find it beneficial to phone a friend (thanks for manning the intergoogles for us, Josh!). My iPhone also came in handy, both for quick Google-advice and for navigational purposes.

The ban on PCs was a bit arbitrary though, as we ended up deleting some very good photographs. As Anthony says, “it was emotional to go through the pics on the camera and delete four out of five good ones in order to keep one that was to be submitted”. In retrospect, I should have brought my EeePC along, if only to copy the good photos off the camera.

To be honest, we were also a little bit grumpy about the one-camera-to-take-the-photos rule – between us, we brought 6 cameras, I think (I brought my freshly acquired Canon 450D and my IXUS 960i).

One camera to rule them all

“Some of the rules seem to be limitations of organisational process more than anything else.”, Anthony muses. “Don’t think that if you have four good photographers with their cameras, you have four times as many chances of taking a good shot: All the photos have to be not just on the same memory card, but taken on the same camera”.

Presumably, this rule exists so the images come out in the same order (you could solve the clues in any order, but had to fill in a little form so the organisers can match the right clue to the right photo), and clearly, if one camera records ‘DC_0284.JPG’ and another records ‘IMG1948.JPG’, it’s hard to tell which photo was taken first.

Having one camera is a downside if the other team members aren’t used to shooting with it – but it’s not a total waste: “Having four team members makes a lot of difference,” Anthony explains, “to help carry gear and props, solve clues, come up with ideas and spot good shots, and to pose for shots. The other three don’t actually need to all be good photographers, but a good photographic eye will help.”

Learning to see what others see

It’s quite interesting to see how the other teams solved the riddles, though, as Anthony explains: “You can sometimes see a shot and think ‘wow that’s original’ … and then see four variations on it following”.

At the end most of the photos taken were shown, projected on a big screen in an auditorium. “I was seriously impressed with some of the photos, and saw some wonderful shots”, Anthony recalls.

“There was one photo with three people with umbrellas jumping on the millennium bridge – it was an amazing photo.”

Haphazard judging

Nonetheless – and this is what sort of ruined the fun for me, sadly – it seems as if the judges were just a little bit too rushed in their, er, judging. “But in many cases the winning shot wasn’t – in my opinion – one of the good ones,” Anthony says. “Judges seemed to favour an obvious joke – equivalent of a zany holiday snap – over a technically interesting or well composed art shot”.

Far more annoyingly, in one case, the judges ended up giving out a prize to a shot that plainly didn’t solve the clue correctly (they took a photo near the Globe Theatre, which was about a mile away and on the wrong side of the river from St Paul’s Cathedral, which was the correct answer) – while the photo itself also didn’t really strike us as being particularly amazing.

Of course, I fully expect comments along the lines of ‘sore loser’, but it wasn’t the not winning which grated on me: Most of the time, our photo wasn’t as good as some of the other photos which were shown for a given clue, but it was better than the photo which won.

Good fun, but not photographically challenging enough

As Anthony summarised the experience; “there is no shortage of takers for this fun day out, but if you’re already a DSLR-owning, multiple-lens using, flickr-account-holding arty-shot-taking passionate amateur camera geek, this contest may not be what you’re looking for”.

… Which is a damn shame, because the idea really is incredibly good.


Our photos

As mentioned before, we had quite a few photos we were rather proud of – in the interest of completeness, here are our 10 entries – including the ones that were not-so-good. The only editing done on them is a resize from 12 megapixels down to 650 pixels across so they’ll fit on this blog better


Borough market, photo taken by Anthony, Sigma 17-35mm, vivid colours.


Imax cinema, photo taken by Haje, Sigma 17-35mm, vivid colours, the zoom effect was done by zooming while having a long (0.5 second) shutter time. The lights? Well, that’s just the way the underpass by the IMAX looks!


South bank book market, photo taken by Haje, Lensbaby 3G, in-camera black-and-white. I love the retro look the Lensbaby lends to this photo, especially with the top-hat and the old-fashioned looking clothing Daniela is wearing. Oh, and the Moleskine, of course.


Gabriel’s wharf, photo taken by Haje, Sigma 70-200. Not really happy with the way this one turned out, I think this was easily our weakest photo.


Blackfriar’s pub, photo taken by Haje, Lensbaby 3G. A less-than-inspired photo, sadly, but it was raining, and we were a bit scrapped for ideas in this one.


Blackfriar’s pub, photo taken by Haje, Sigma 17-35mm. Yes, we wore hats for all of this, and this is our ‘team portrait’, which simultaneously answered the ‘out of sight, out of mind’ clue


The tube (‘see no evil, hear no evil, speak no evil’), photo taken by Haje, Sigma 17-35. We only had one stop to take this one, and the tube shakes a lot when it goes, so I had to shoot it at a high ISO (flash photography is strictly forbidden on the London Underground). I’m not really happy with the way this one turned out either, sadly.


St. Pauls, photo taken by 10-second self-timer, Sigma 17-35. On this one, we decided to try and do an ‘abby road’, to avoid the rather samey photos we expected everyone else was getting. This is one of the occasions where I was really sad to see the out-takes getting deleted, because we did have some wicked cool alternative shots on this one.


‘The sweet smell of success’, photo taken by Haje, Sigma 70-200 f/2.8 lens. On this one, we just decided that we couldn’t figure out a good way to answer the clue, so we decided to get ironic/sarcastic about it. Catherine went and spoke to the guy, and he was more than happy to be photographed – especially after we gave him about £5 in change. With a bit of increased contrast, I feel this photo would really be quite good.


The Millennium Bridge, photo taken by Haje, Sigma 17-35mm. It’s really difficult to photograph the Millennium bridge well, possibly because it is such an iconic landmark by now – everyone is so familiar with it, that once 60 different teams have had their way with it, there is little left. We did spot this grid, however, and decided to do something interesting. Anthony pointed out that “this photo looks like film frames, with the main frame being taken up by Daniela”, and I can’t but agree – I think it was conceptually one of the coolest photos we did.

This post was co-written by Anthony Steele

Sharpening photos in the darkroom

img_2136

In the past, we’ve covered why it is important to sharpen your photos, and how you can use the Unsharp Mask tool in Photoshop to make sure your photos look their best.

I am a firm believer of understanding how things are done manually, however. If you are to take shortcuts, you have to know the long road to get there first. So… If you have a darkroom, how can you sharpen your images without letting the film go anywhere near a computer?

Here’s how… 


In the old days, limited film and lens quality kept the sharpness away from photography. When the negative techniques started evolving, and lenses and film became the bottlenecks, people started to experiment with ways to improve the image in various ways. Contrast became one of the first improvements, but this was comparatively easy to correct in the darkroom. Now sharpness was a different thing altogether.

The first cameras used horribly show shutter times; This increases the chance of camera and/or subject movement. Slight focussing problems also frequently occurred. Remember that a regular 24 x 36 mm negative is enlarged significantly, and even the tiniest blurriness becomes visual: Which is why some bright soul came up with a way to sharpen the final results.

How to…

If you want to have a go at using unsharp masking in the darkroom (heh – if you want to put yourself through stuff like that, let me tell you; I like you), here is a concise guide how it can be done. I have had a lot of surprises when using this technique – mostly positive surprises, but every now and then, things go very wrong. Even then, it looks interesting, if nothing else.
Right. Take the negative you want to have sharpened, and place it on a photographical-grade glass plate. Underneath the glass plate, put some unexposed film. Now, make a contact copy of the film, and develop the film from under the glass plate. That should leave you with a positive copy of your negative. This copy will be ever so slightly blurred (because of the glass plate), which is exactly what you want. Align the two film strips, and put them both in your enlarger.

Right – let’s have a look what has happened now. Theoretically – if the contact copy was 100% exact, you shouldn’t be able to see through your negative. Why? Well – what was light in your original negative should now be dark in your positive (effectively a slide), and all the gradations should be cancelling each other out. However, you don’t have (and didn’t want) an exact copy – you need the small differences. When turning on your enlarger, you will see a strange outline of your image.

This outline consists of the original highlights (which were black in your negative – cause it’s a negative, remember?), and the blur is introduced into the transitions in the shadows of the image. What this means? Well – your shadows will ‘take more space’ in the image, and eat into the blurred edges of your original negative.

So – what you’ll want to do is to just briefly flash this unsharp mask on your photographic paper, and then expose the paper normally, using only the negative.

You should be able to tell the difference between pictures that have / have not had this done to them.

So how long should you flash the enlarger? I wish I could tell you. I have spent endless days in darkrooms, and eventually it becomes second nature. You can tell approximately how much exposure a particular unsharped image needs – just keep practising, and bracket all your tries (yes – half step bracket your unsharp masked image, and then see what works best. Take notes to find out exactly how you can make it all come toghether perfectly.)

Good luck!

Why sharpen your images?

This week, I received a rather good question from one of my old friends, Cindy. She was wondering “how come that whenever I’m taking digital images, I have to sharpen them afterwards?” Good question, and of course, it’s already one step ahead of the curve, in that the question presupposes that yes, you DO have to sharpen your images. Which is correct… But why?

Back in the days of film, things were simple: If you wanted your photos, you got prints made. These prints were predictable: They’ll be on paper, have a certain dynamic range, etc. Then digital photography came along and turned everything on its head, because suddenly there are so many more things you can do with your photos…

You can project them on a wall (in a series of different resolutions, depending on the projector), you can upload them to a website, you can have prints made, or you can print them in magazines in newspapers. This is where part of the problem comes from…

Mathematically, (which is, of course, how computers think), it is far easier to sharpen an image than to un-sharpen it – It’s important to remember, for example, that un-sharpening an image is not the same as merely blurring it: The quality of the resulting fuzziness is completely different.

Camera manufacturers know this, and this is where one of the biggest differences between the way images are processed inside an SLR and a digital compact are different:

Digital SLR versus compact cameras

The manufacturers assume (correctly, most of the time), that people shooting with compact cameras don’t plan to do much to their photos after they are downloaded onto their computer. So, how do you make the photos look as good as possible? By sharpening them in-camera, so they look gorgeous right away. You take one look at ‘em, are happy, and upload them to Flickr right away.

All good and well, but people photographing with an SLR camera are different. For one thing, they’ve paid a lot of extra money for the flexibility and choice that is inherent in a SLR: You can choose lenses, shutter times, ISO values, and all that wonderfulness. It is therefore safe to assume that an SLR user wants more control over the final image, and for this reason, photos coming out of a digital SLR are generally sharpened less – in some cases, you will even see that photos coming out of a digital compact appear sharper (and therefore better) than that from an SLR.

Quirks of sharpening

As already has been mentioned, it’s easier to sharpen than to de-sharpen an image. There is a second quirk too, however: It’s never a good idea to re-sharpen an image (i.e. sharpen a photo that has already been sharpened). This is the crux of why you can ultimately get better photos out of a SLR: you evaluate the photograph, and experiment with the amount of sharpening you do. Then, once the preview looks good, you run the sharpening on the photograph, and then never sharpen it again.

Photos from most digital compacts have, of course, already been sharpened once (inside the camera), so if you try and re-sharpen them to get more clarity out of them, you’ll never get the same level of woah-factor, because you’ll start getting sharpening artifacts (thin white lines around the areas that have been sharpened): What, in fact, happens is that the software isn’t sharpening the image itself, it’ll start sharpening the parts of the image which has already been sharpened. Sometimes this can lead to interesting effects, but often you just lose any subtlety to an image.

It’s also worth noting that sharpening often amplifies the downside of JPG image compression: If your photograph has been compressed too much (such as when you shoot on ‘medium’ quality on your camera, rather than ‘superfine’, or whatever the highest quality setting is), you might find that suddenly you’ll get a lot of ugly banding and compression artifacts showing up that were practically invisible before.

So, in-camera sharpening is bad?

Hmm. Not necessarily: I never really do all that much editing on casual holiday snaps, for example, so I leave my Canon IXUS compact camera set to ‘high sharpening’. It means I can upload my photos straight to Facebook, and they’ll look pretty decent.

When it comes to artistic control, however: Yes, in-camera sharpening is bad. There are two ways around this: Turn the sharpening down as much as you can in your camera (your photos will look a lot worse when you look at them the first time, but when you sharpen them on your computer, they’ll really zing), or shoot in RAW format (which, if you want full creative control, you should be doing anyway, but that’s for a different article).

So, how do I sharpen my images?

Hah, that’s a completely different article altogether. Luckily, I’ve already written that one – head over to Sharpen those photos: Unsharp Mask for more info than you ever wanted about this topic!

Nude photography 101

nude-thumb.jpg

Portraiture is one of the most exhilarating forms of photography. It’s rewarding, exciting, challenging, and a lot of fun. But people have a way of hiding from the camera: Clothes. Nude photography is essentially portraiture sans clothing, which is what makes it such a fun topic to explore and develop as a photographer. Personally, I’m completely convinced that a photographer who starts developing their nudes also becomes a better portrait photographer.

One of the things people frequently e-mail me about is how to get started in nude photography – some of you want to make a living out of it, many just want to have a go and experiment, but don’t know how to begin.

Of course, Photocritic already has a series of articles on the topic already, including an introduction, and an interview with acclaimed nude photographer photographer Renoux.

Well, today you’re all in for a phenomenal treat, as my good friend Tammy guest-writes an article on taking the first steps into nude photography, by inviting your girlfriend to model for you.

Needless to say, depending on what you do for a living, this article may not be ‘safe for work’.

Take it away Tammy…

nude-1.jpgLet’s start with the basics: You already know that your girlfriend is gorgeous. While you may not be a digital pro, you’re still pretty handy with a camera, and you’d love to be able to capture some of your girlfriend’s natural beauty – if you’ve never tried before, here are a few tips to get you on your right way!

Ask permission.

Much like that nervous first date, the prospect of nude photography can be a little scary and intimidating, both for the photographer and the model. Though most women enjoy feeling beautiful, they also realise there is only room for so many supermodels in the world, and many women are self-conscious about how they look, particularly in the nude. There is great security in clothing and taking it all off, even for a camera, can be like having an audience when you’re at your most vulnerable.

If you are interested in taking nude photographs of your girlfriend (or girl who is a friend. Or boyfriend, for that matter), make sure you sit down and really talk to her about this ahead of time. If she doesn’t appear convinced, perhaps it’s worth reminding her how beautiful you think she is and that you’d love for her to be able to see for herself and let you try some nude candid shots. She might not leap on the opportunity, but give her some space to mull about it.

nude-2.jpgSometimes the best things come to those who can wait patiently. Chances are good that if she didn’t have sex with you the first night, she might will not be ready to jump into nude photography the first time the two of you talk about it either.

Less is more.

Trust is an important aspect of every relationship, and there is definitely a deep kind of trust that needs to be present before a woman feels open to this sort of photography. Do not pressure her to do anything that she doesn’t feel comfortable with. In fact, do everything you can to make sure that she feels comfortable. Involve her ideas, discuss her fears and concerns, and find out what she might like to try.

Nude : Anonymous
Nude : Anonymous by Photocritic.org on Flickr

It might help to thumb through some photographs or magazines for ideas and possible poses. See what she likes. If she’s nervous about exposing a body part like her nipples, illustrate different ways that she can pose nude without having to show whatever part she’s shy about.

Of course, there’s myriad ways to get around the whole nudity thing – even if a model is naked, they don’t have to look it in the photographs. Come to think of it, even if they do look naked, you don’t have to show off all (or, indeed, any) of the ‘naughty bits’:

You can ask her to cup her hands around her breasts so that she feels less exposed. Or the first time she poses, let her warm up to the idea in a sexy lingerie outfit or a skimpy swimsuit in the bathtub. If she’s worried about her frontal view, she can pose on her stomach. Try shots that focus on the small of her back, her bottom, and her neck (they’re all vastly sexy bits of the body, if you photograph them right!).

If she’s worried about showing her face, allow her to hide it – get creative, and it doesn’t have to be of detriment to the final result. Try profile shots, silhouette shots in a dimly lim room, or experiment with black and white photographs. Often, you’ll find that subtlety is hot, and truly sexy photos are often the ones that hide more than they show, anyway.

If she’s concerned about anything, big or small, make sure to take her concerns seriously – I know we’re harping on about this point, but that’s only because it’s important: Listening and paying attention to detail are two of the greatest things you can do to help her relax and feel completely comfortable with the idea of being in front of the camera

nude-3.jpgGet Close. Closer. Nope, still not close enough.

The main focus of your photographs should be your girlfriend. Don’t be afraid to experiment with close up shots and interesting angles. If your girlfriend has a particular feature that you find very erotic or sensual, try to highlight that feature in the photo.

This is your chance to experiment and discover new sides both of her and what you think of her – and if the photos turn out as well as you hope, then chances are that she’ll appreciate your, er, appreciation as well!

Don’t act like an idiot.

After you find something she’s decided she’s willing to try, make sure to mention how beautiful you think she will look. Especially for a woman who feels shy or self-conscious, reassurance is a must. If she’s never posed nude before she may feel like she doesn’t know what she’s doing.

It’s important for you, as the photographer, to be prepared to offer assurance and encouragement, but most of all, instruction: you see how the photos are turning out, so you have to offer direction. Show her that you know what you’re doing, and even if you don’t, by all means at least act like a professional :)

nude-5.jpgRemember that she’s your girlfriend, not a porn star, and not a stripper (unless, of course, your girlfriend is a stripper or a pornstar, but in that case you’ll probably not really need this write-up).

If you are respectful and loving, chances are that she will relax and get more into this. Make it about her and about how beautiful you think she is, and she’ll return the appreciation.

Talk about how the photos will be used

A final word of warning: Taking the photos will be a learning experience for both of you, and you may end up with some mighty fine photographs. Nonetheless, take care to talk about how the resulting photographs will be used, and who will see them: Nude photographs might not be something that your girlfriend wants the entire world to see. Before you rush right out and upload them all onto your Facebook or MySpace pages, make sure you defer the control of the photos back to her. The photos are of her, so she should be the one to decide what you can and cannot do with them. Don’t be surprised if this is a private activity that she wants kept between just the two of you.

nude-6.jpgThat means that if she wants the memory card formatted, or requests that you delete certain images that she doesn’t like it’d be rather rude not to.

Once she trusts that you’re really not going to do anything with the photos that she isn’t okay with, the chances are good that the next time you experiment with a camera she’ll be more relaxed and more willing to try different things.

Have fun!

If you’re being tense and worried about the experiment, it isn’t going to work. if you have to, take the memory card out of your camera, and just shoot ‘blanks’ for the fun of it. Get used to seeing nude skin through the viewfinder, and make sure your girl is comfortable with the sound of the shutter, the lights of your flashes, and with taking instructions throughout the shoot.

Basic rule: If you’re not both having fun, someone’s doing something wrong.

Good luck!

Lens Flare - and how to avoid it

lenshood.jpg

I get a lot of people sending me images with ‘mysterious’ problems, and I figured it was only fair if I run a series of articles about how you can alleviate these problems. The most frequent problem is actually a lens-flare related problem, and there seems to be some confusion as to what lens flare actually is.

I suppose the first thing we should discuss is just what lens flare actually is. Most commonly seen in photographs, lens flare can appear as bright circles, smears of light or glimmering lines.

On some occasions, it can even appear as a thin film over the entire picture that makes the image itself lighter.

lensflare-2.jpg

Why does this phenomenon occur? Lens flare is normally seen because the photographer took the picture into the general direction of the sun. The basic idea is this – some sunlight gets into the camera lens at just the right angle that it bounces around the interior of the camera until some of it ends up on the film.

If that’s the case, then how can you test your camera to see how it deals with the lens flare issue? First and foremost, there is the obvious way of aiming it right at the sun and taking a picture. This is the most common way to get your lens to produce lens flare, but not the only way. In fact, some lenses have no problem taking photos towards the sun, but fail miserably in other tests.

lensflare-1.jpgA second way to test for lens flare is what is known as the ‘window test’. Aim the camera someplace indoors, but have a bright window just out of the view of the lens. If your image, upon developing ended up with the tell tale signs of lens flare, you know your camera can’t handle that sort of situation so well.
Another way that you can test your lens is the ‘bird in a tree’ approach. For this, aim your camera at a bird (or something of similar size and detail) against a bright sunny sky, but without aiming directly at the sun. Check for contrast loss at the edges of the bird or object. Generally, what you will see is the light ‘swallows’ up the outer edges of the bird. The more of the bird that is ‘swallowed’ up, the more lens flare is occurring in this case.

These aren’t the only ways to come up with lens flare. In fact, you don’t even need to have lens flare show up in your original photo to have it appear later. But why is this? Well, Photoshop has come up with its own ‘lens flare effect’ that you can apply to your images long after you’ve originally taken them. It offers a wide range of options to choose between to get you the look you are after.

lensflare-3.jpgOkay, so I thought we were trying to avoid lens flare. Why would Photoshop come up with something people try to avoid? For the simple fact that lens flare shouldn’t always be avoided. In fact, it can a little something extra to your images when used in the right circumstances.

Thing is, well, there are very rarely ‘right circumstances’ for lens flare: There’s an excellent reason for why photographers have been trying to avoid them for dozens of years, and it’s a bit daft to try and use software to put ‘em back in…

Is there an easy way to avoid lens flare?

Why yes, there’s a very easy way: Keep your lens-cap on your camera when you’re taking photos!

Okay, so maybe that’s not the most convenient piece of advice. It does have a kernel of truth, though: If you can stop direct light (from flashes, reflections, or sunlight) hitting the front element of your lens, the lens flare effect will be reduced significantly, or even eliminated altogether!

lenshood.jpgTo keep the light out of your lens, you can block it out with your hand (not particularly convenient, as you’ll need both hands to operate your camera most of the time), you can get a friend to block out the light with a reflector, or just by standing in the sun so the front of your camera is in the shade.

Alternatively, you can use a lens hood (it’s one of those attachments that go onto the front of your lens – on the picture above, it is the flowery-shaped attachment), which will go a long way to blocking out stray light. You can also get straight lens hoods (without the flower-shape), or you can even make your own.

Guest article by Amanda Stachowski (thank you, Amanda!). Photos are all CC photos from Flickr, by Ian BC North, Yuan2003, ratkinson and K Sawyer.


Do you enjoy a smattering of random photography links? Well, squire, I welcome thee to join me on Twitter -

© Kamps Consulting Ltd. This article is licenced for use on Pixiq only. Please do not reproduce wholly or in part without a license. More info.